Reusable Components are user actions that can be reused across various test cases, saving time on repetitive tasks. These components support input and output parameters and can also be merged with other reusable components.
For instance, in a shopping e-commerce site, you can create four reusable components: one for logging in, another for product search, a third for purchasing, and the last for logging out. These components can be utilized individually across various test cases.
Steps to work with Reusable Components
- On the left panel click Automate. Navigate to the Tests tab.
- Click on the Create Reusable component icon and select the Automated Reusable Component.
- A new page opens, where you need to enter the details of the name of the reusable component, set the priority level, choose an assignee, add a description, and click on Create.
- Your reusable component is ready. Now, click on the Record button to add steps to it.
- The recorder is available for web applications, different ERPs, mobile, and desktop applications. You need to select the recorder, enter your test URL, and click the Start Recording button.
- The recorder window opens with your URL in a browser window. Enter the login credentials and sign in. Once the steps are recorded, click on the Save and Close button at the top of the recorder.
- The steps are saved in the test case. You can now call this reusable component in other test cases.
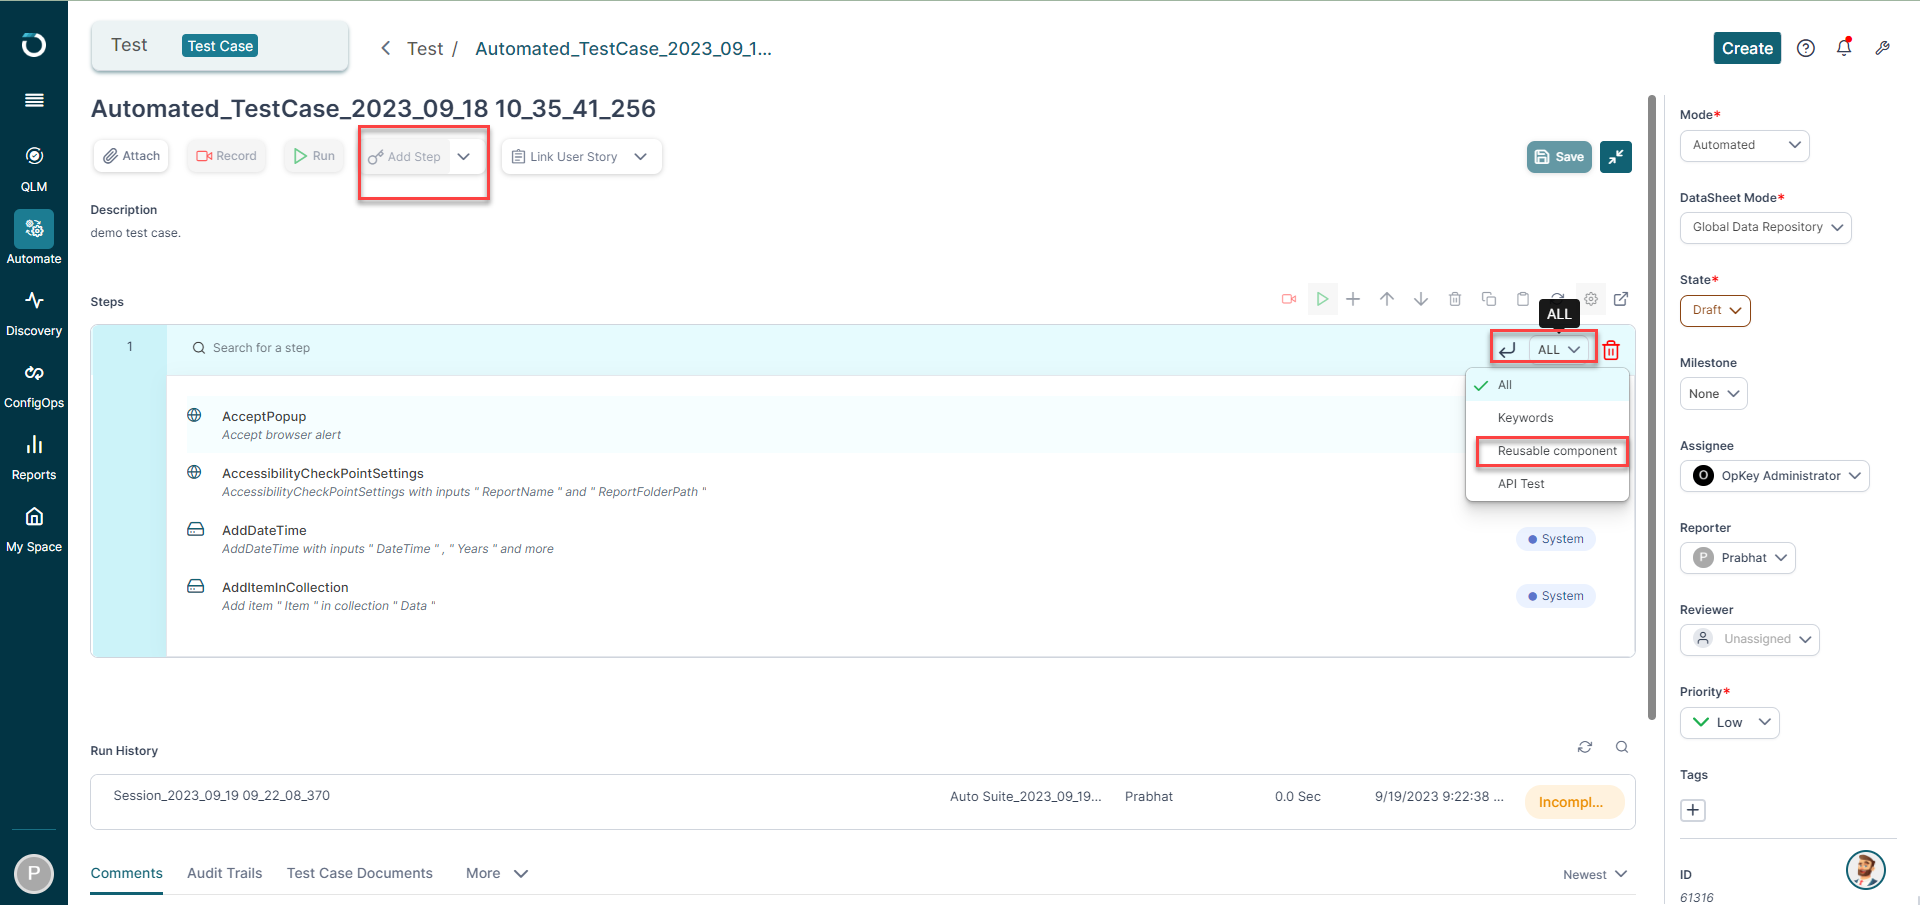
Steps to Call the Reusable Component in a Test Case
-
To call the reusable component in a test case, open the test case and add a step where you want to call the reusable component by clicking the Add Step button at the top. Now, in the dropdown at the right of the test step, select reusable component.
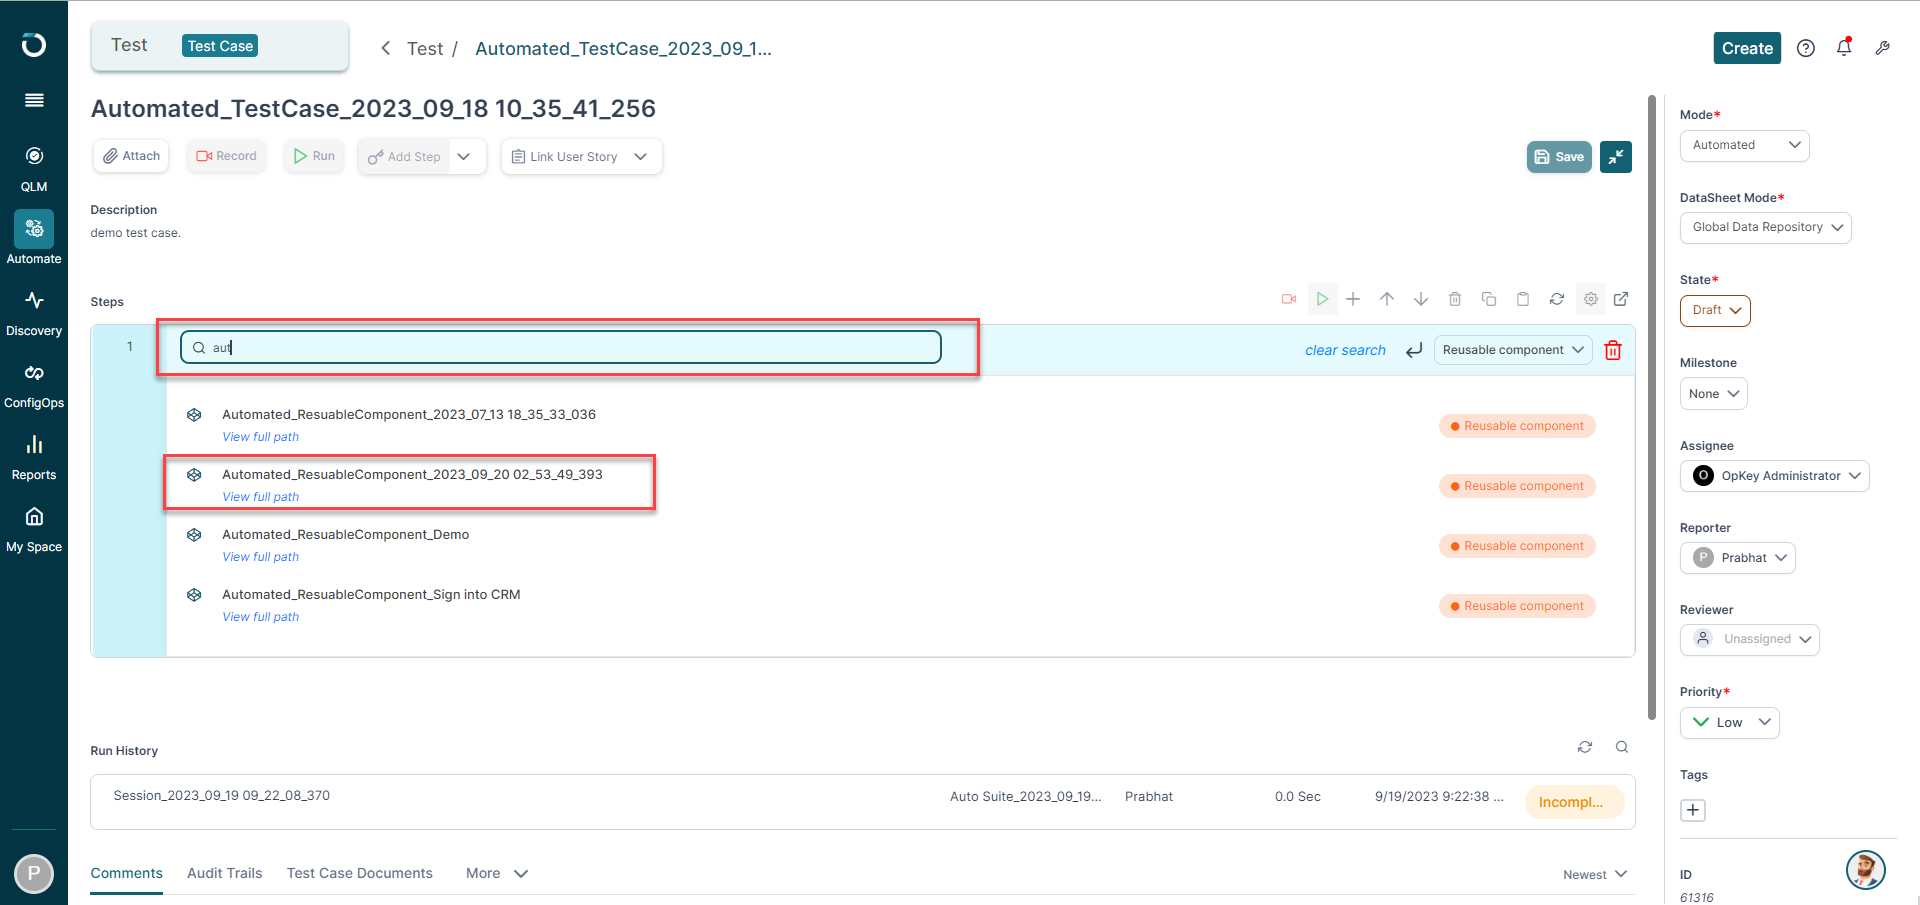
-
Search the reusable component you want to call by its name in the search bar on the step. Select the reusable component from the search result.
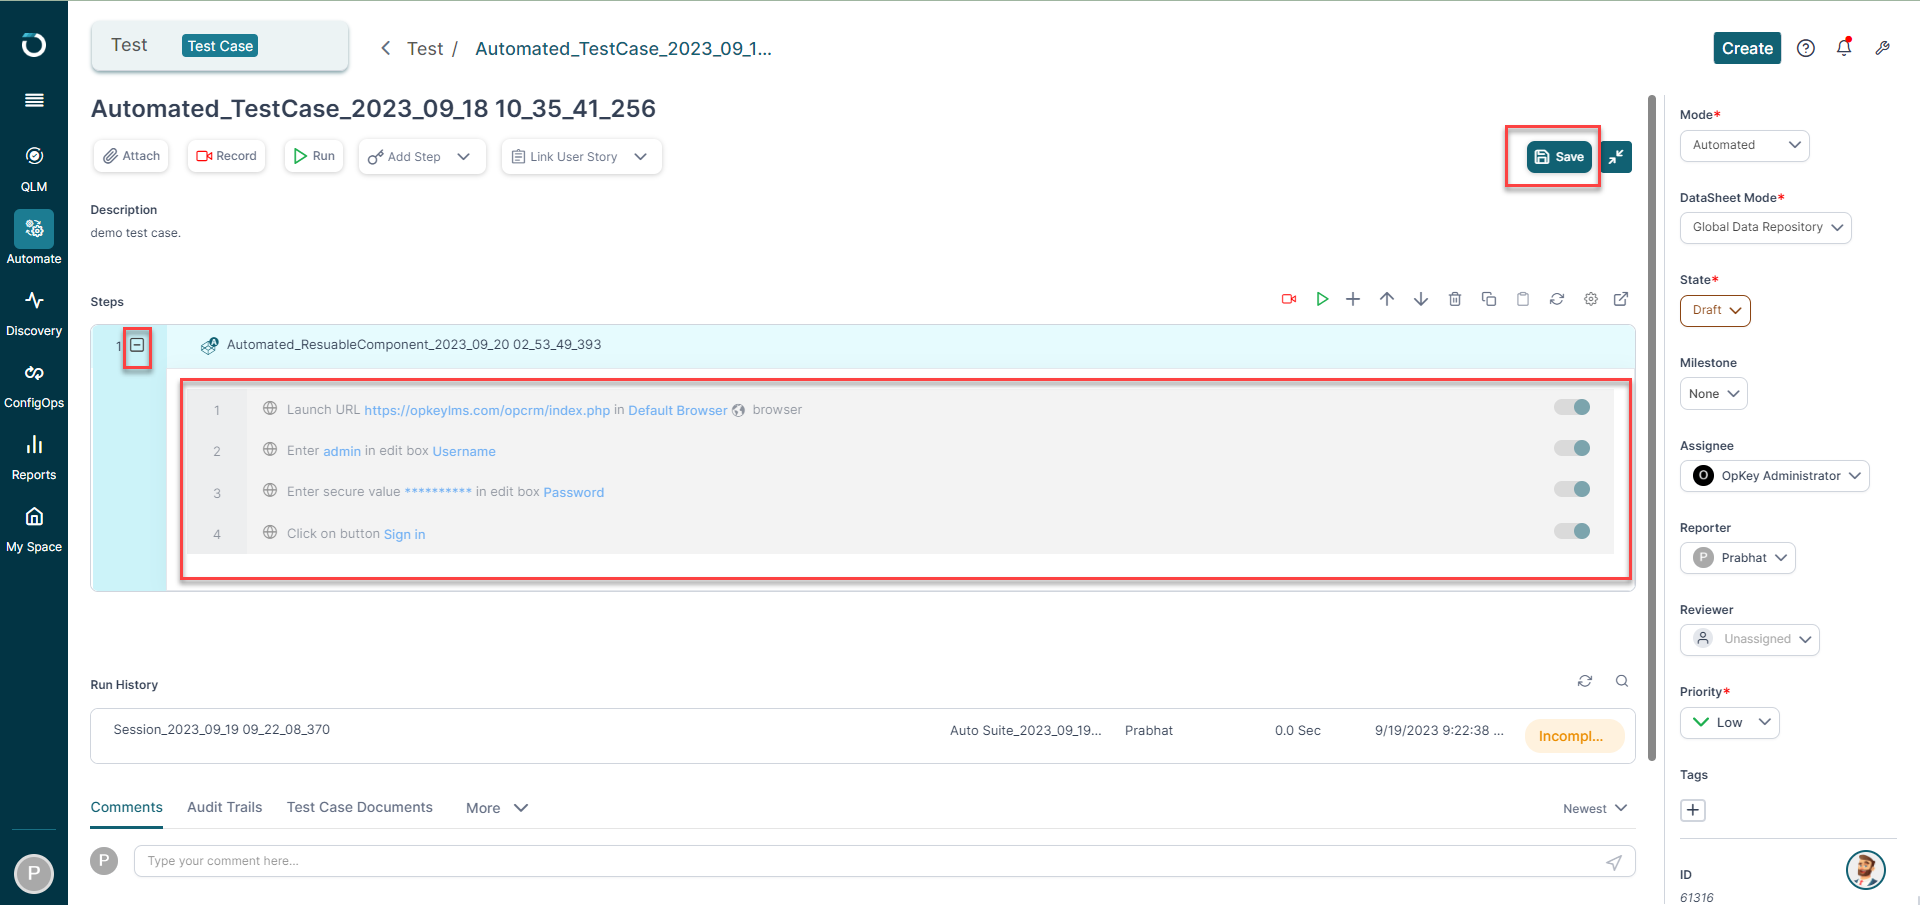
-
Your test component is added to your new test case. You can click the expand icon to see the steps in the test component. Save the test case by clicking the Save button at the top-right corner to finish the process.
You've reached the end of this article and are now well-prepared to create and execute Reusable Components.
Ready to dive deeper? Check out the next article: Creating Reusable Components with Keywords
Explore, experiment, and achieve your testing goals on pCloudy!