
Katalon Studio
Overview
Katalon Studio enables you to perform automated Mobile and Web Testing by creating codeless automation scripts and with a powerful record and playback feature. Integrating Katalon Studio with Pcloudy will help you run your existing scripts on 5000+ browsers and device combination.
Prerequisites
- Pcloudy Account and the Pcloudy capabilities.
- Mobile Application must be uploaded to the section on Pcloudy portal.
- Katalon Studio configured on the user machine.
Running Katalon Tests on Pcloudy Device cloud
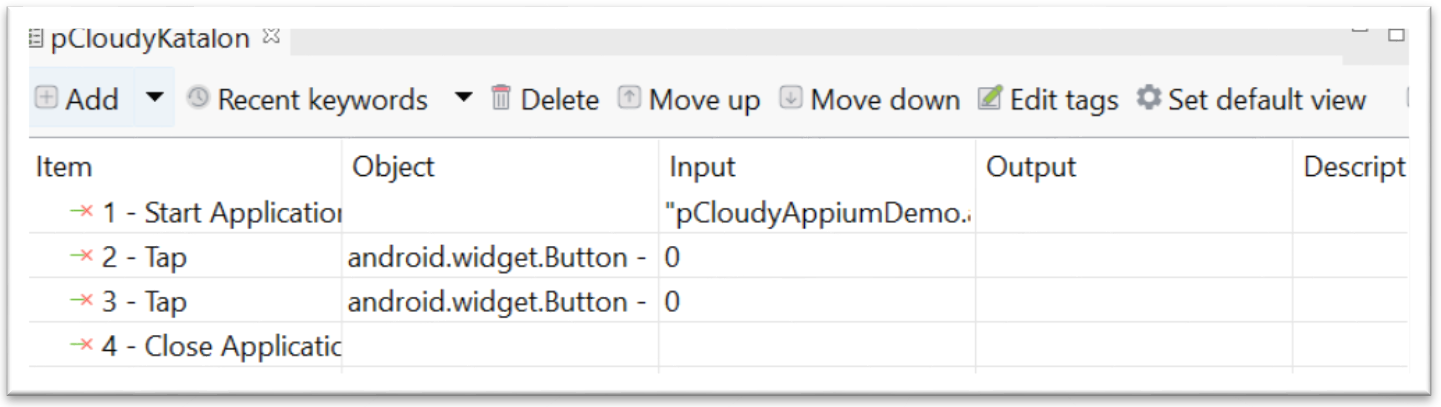
- Open an existing project on Katalon which you want to Execute.
For Example: Here we are using a sample test case as mentioned below using Mobile keywords, where we Launch an application (Android) and click on two elements and close the application. Note: Provide the application name for the Input of Start Application Keyword.
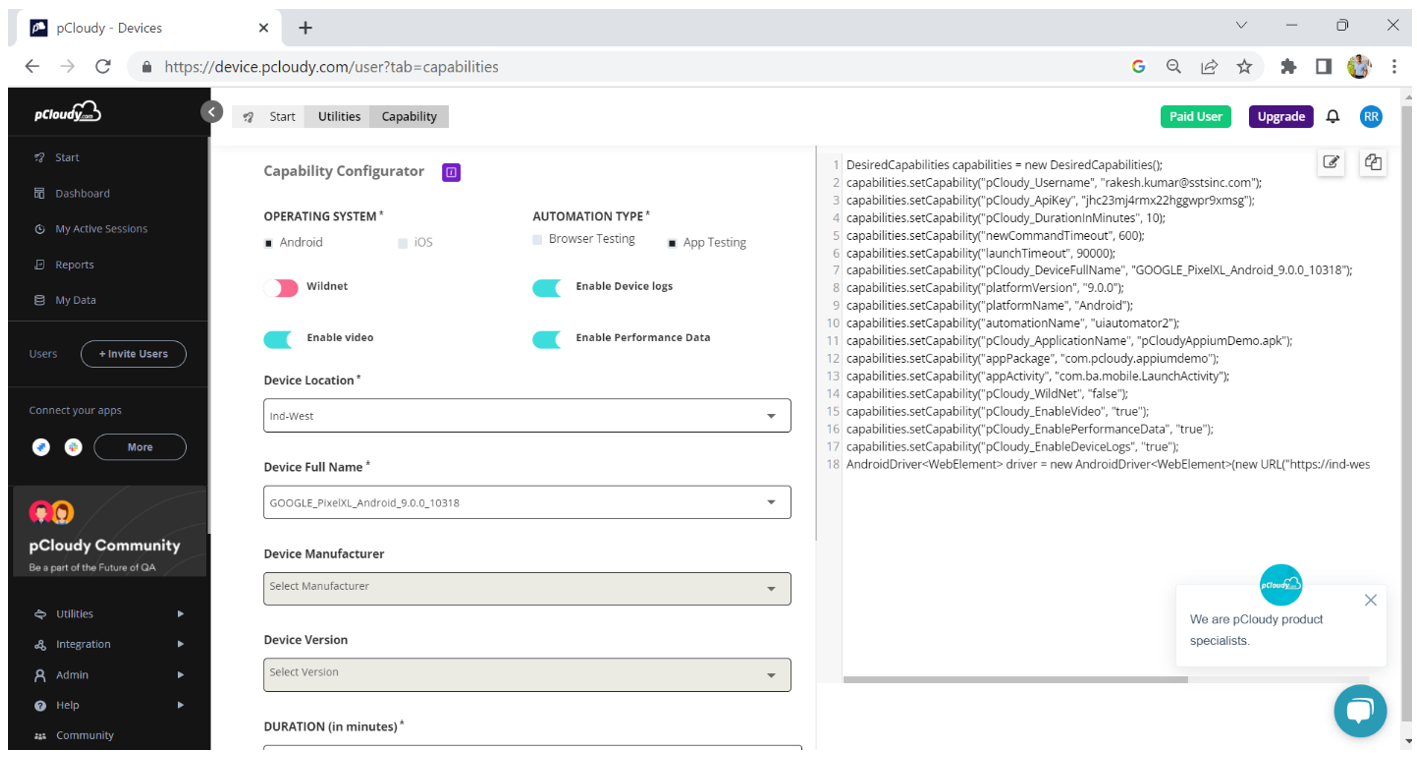
- To generate the capabilities, you can use the Capability Configurator from the Pcloudy portal as mentioned below.
Note:
- The URL for the device cloud is included with the capabilities.
- Make sure the selected device is available on device cloud before running.
- You can also get the API key from the Pcloudy portal as mentioned below.

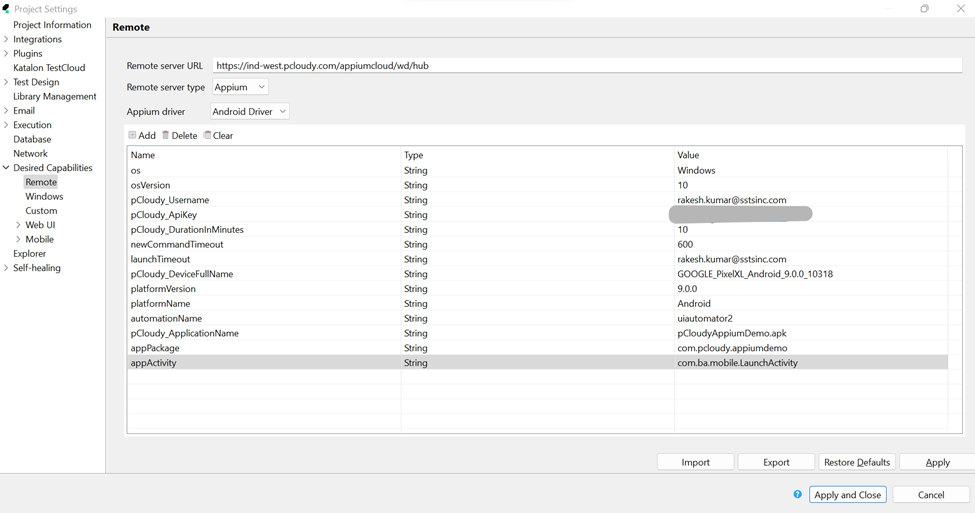
- To add the capabilities on Katalon remote server, Click on the Project Settings Desired Capabilities Remote
Remote Settings
| Setting | Value |
|---|---|
| Remote Server URL | https://device.pcloudy.com/appiumcloud/wd/hub |
| Remote Server Type | Appium |
| Appium Driver | Android Driver |
Desired Capabilities
| Name | Type | Value |
|---|---|---|
pCloudy_Username | String | abc@sstsd.com |
pCloudy_ApiKey | String | ............................................. |
pCloudy_DurationInMinutes | Number | 10.0 |
newCommandTimeout | String | 600 |
launchTimeout | String | 90000 |
pCloudy_DeviceFullName | String | SAMSUNG_GalaxyS10Plus_Android_12.0.0 |
platformVersion | String | 12.0.0 |
platformName | String | Android |
automationName | String | uiautomator2 |
pCloudy_ApplicationName | String | pCloudy_Appium_Demo.apk |
appPackage | String | com.pcloudy.appiumdemo |
appActivity | String | com.ba.mobile.LaunchActivity |
- Now choose Remote from the Run options
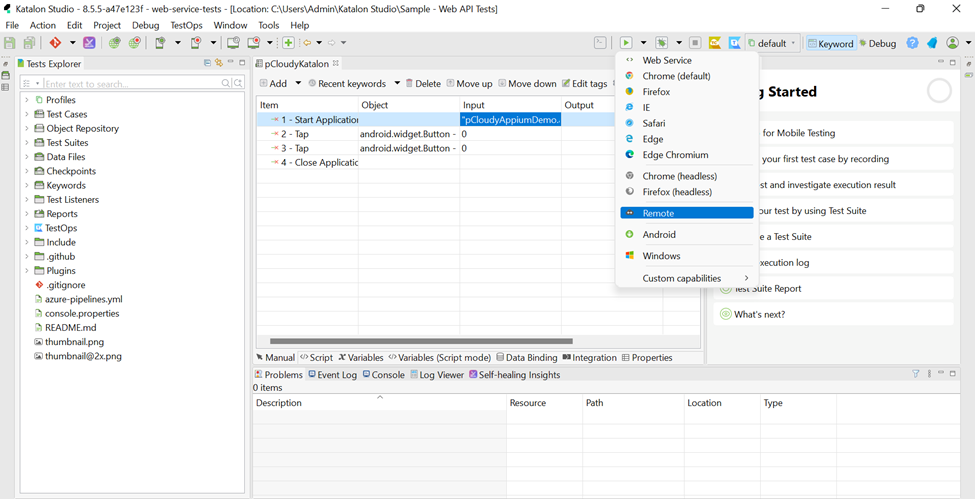
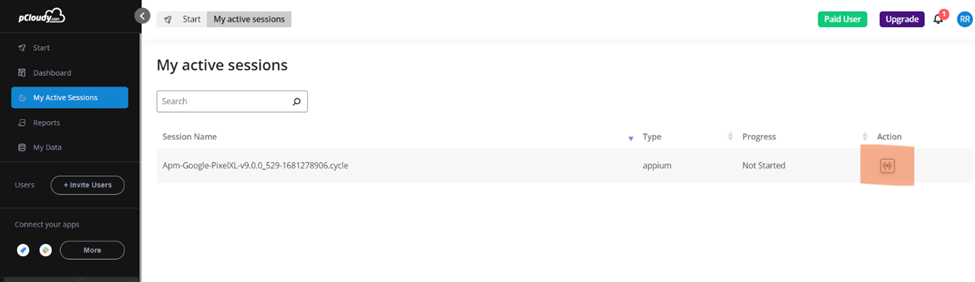
- Now the mentioned device from the capabilities will be acquired on Pcloudy and the scripts will be executed. You will be able to view the live session under My Active Sessions on Pcloudy portal.
Using Katalons Record Mobile Feature on Pcloudy Devices
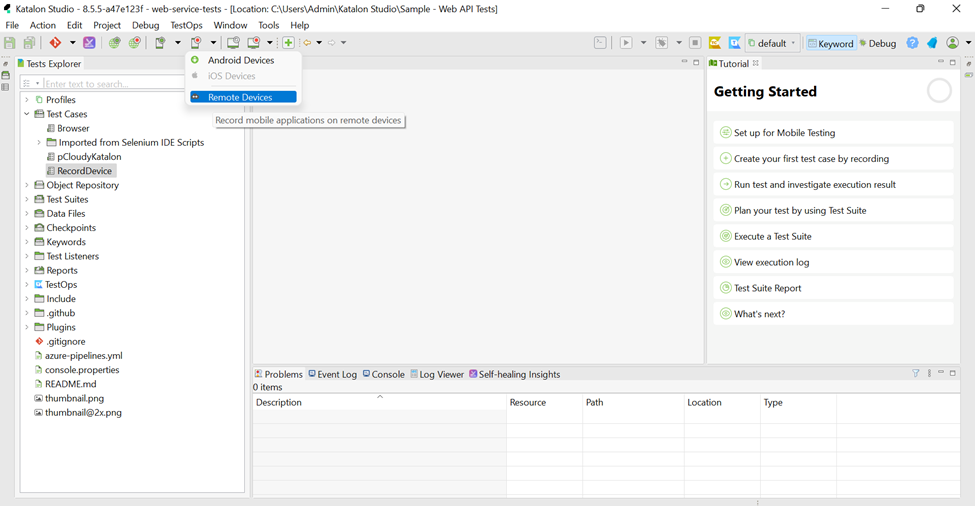
- Choose Remote Devices from the Record Mobile
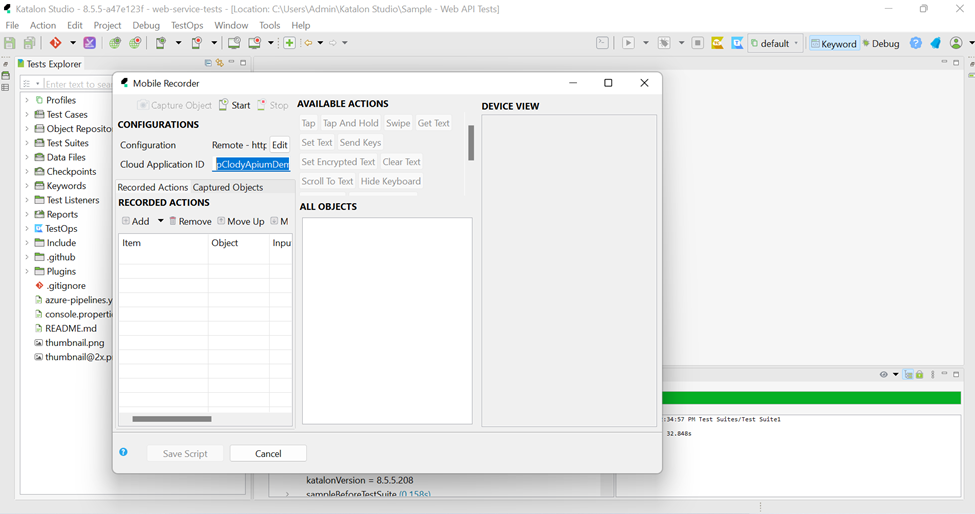
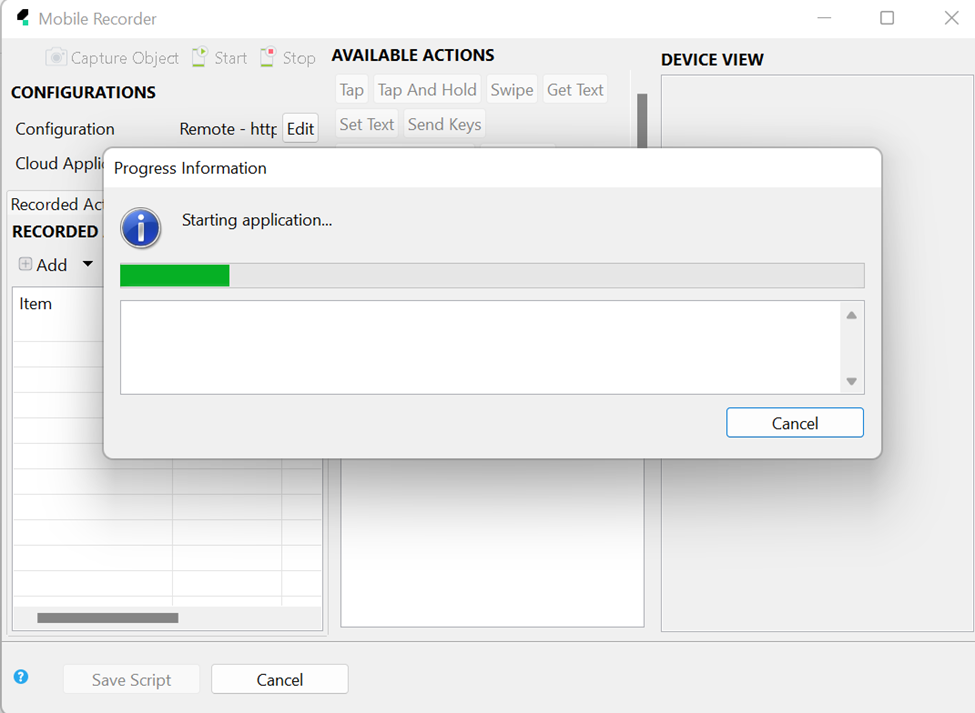
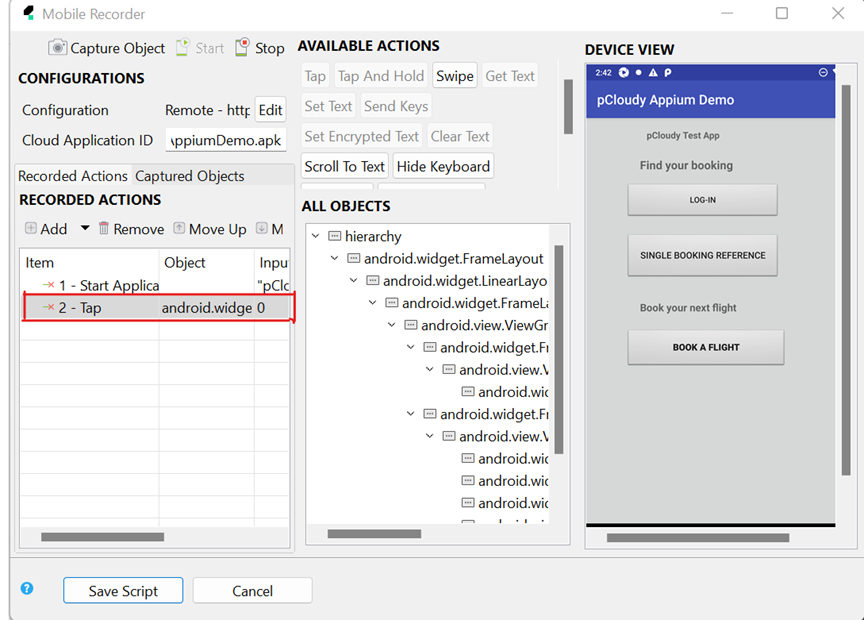
- Provide the Application name for the Cloud Application ID and click on Start.
- Now you can record the steps on the application via Pcloudy device and create the steps for the test and all the objects will be stored inside Object Repository on Katalon.
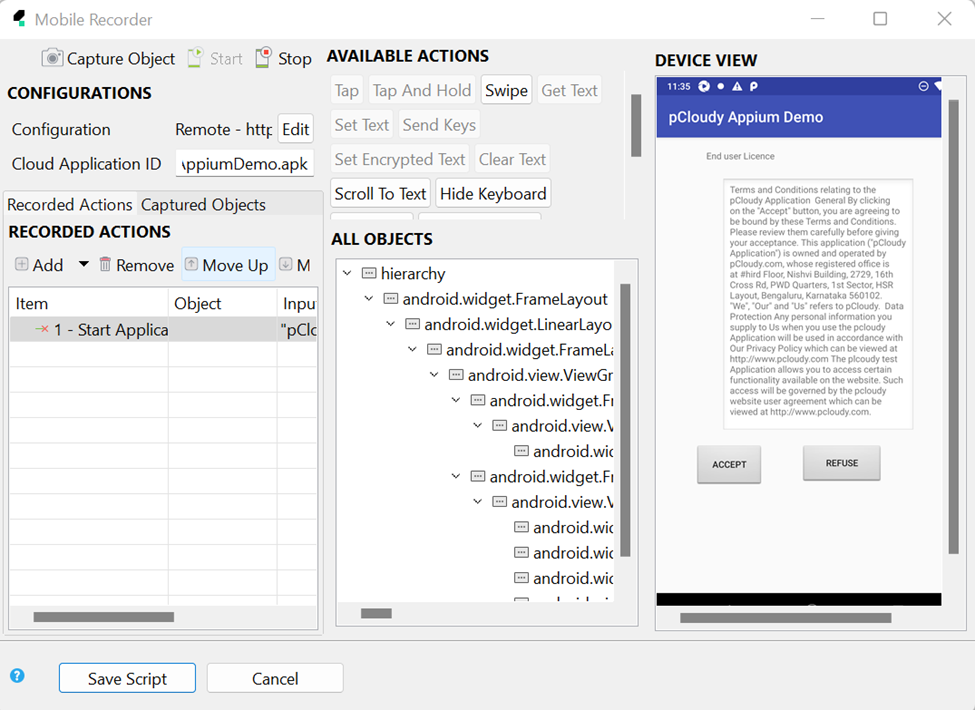
Here we are choosing the Accept icon from the application and performing a Tap action on it.

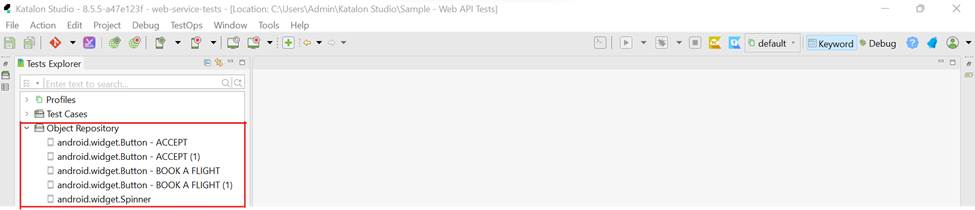
 As Mentioned, the recorded objects will be stored into Object Repository as shown below on Katalon.
Running Katalon Tests on Pcloudy Browser Cloud
- Open an existing project on Katalon which you want to Execute.
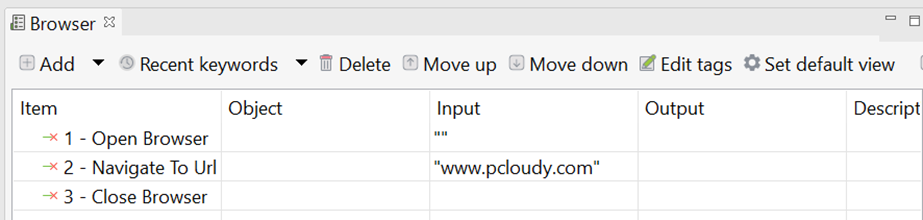
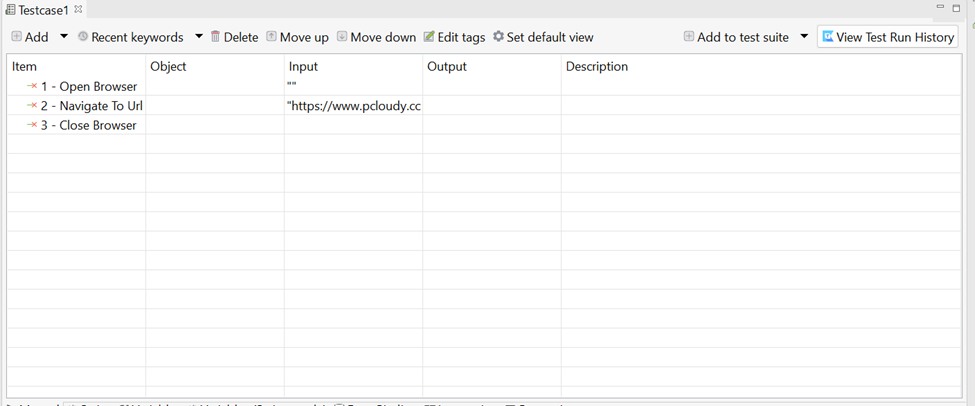
For Example: Here we are using a sample test case as mentioned below with Web UI Keywords, where we open a browser and navigate to an URL and close the browser.
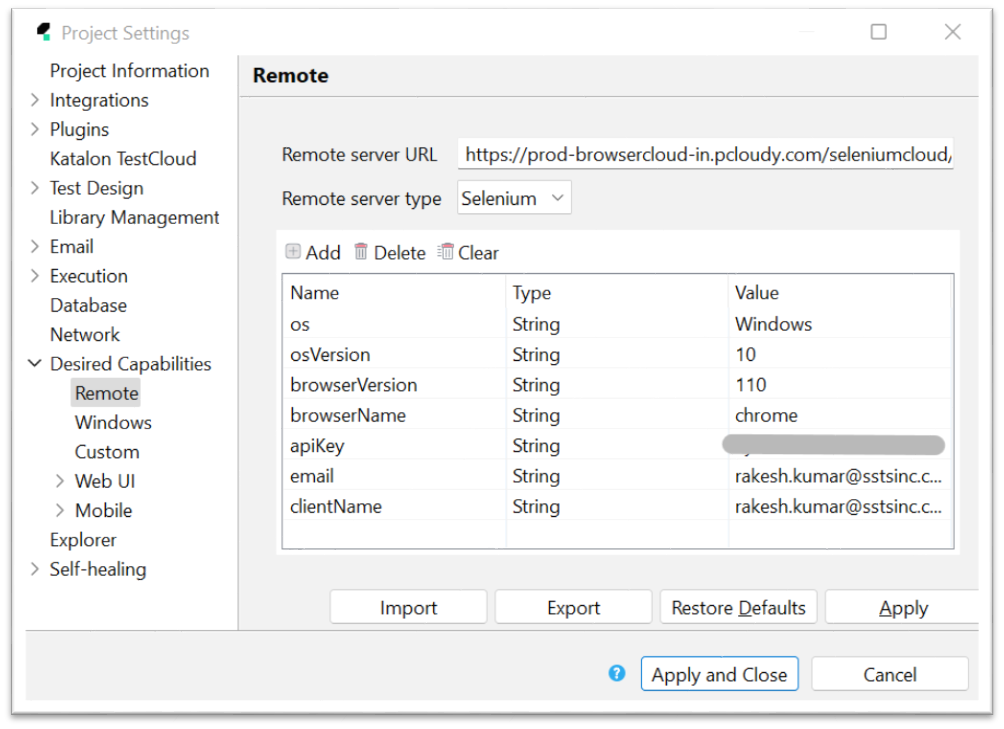
- To add the capabilities for Browser Cloud on Katalon remote server, click on Project → Settings → Desired Capabilities → Remote.
For example, if you want to connect to the Chrome browser on Windows with the following specifications, the capabilities will be as shown below:
os=WindowsosVersion=10browserVersion=110browserName=chromeclientName=Pcloudy login IDemail=Pcloudy login IDapiKey(You can get the Browser Cloud URL and API Key from the Profile Section on the Pcloudy portal.)

Note:
-
The URL for the browser cloud is
"". -
Make sure the selected browser is available on Browser Cloud before running.
-
The URL for the browser cloud is "".
-
Make sure the selected device is available on browser cloud before running.
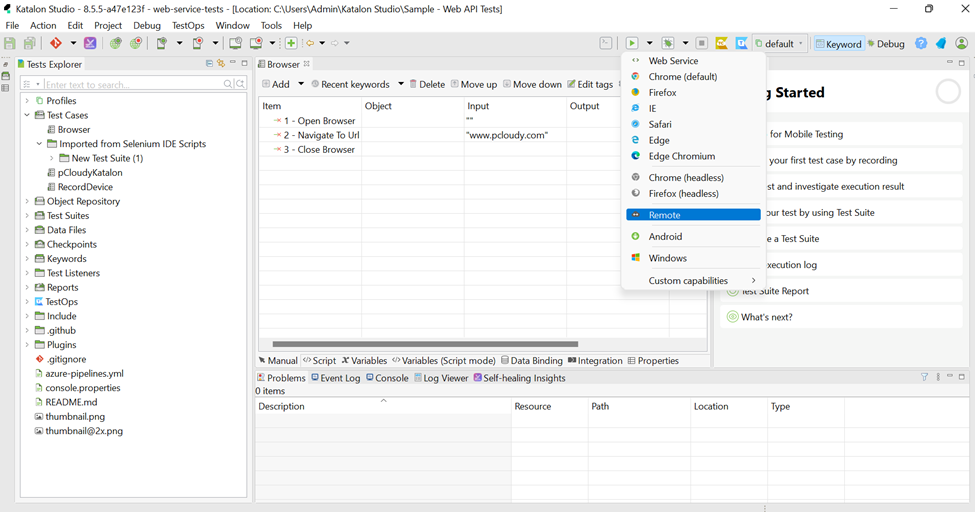
- Now choose Remote from the Run options
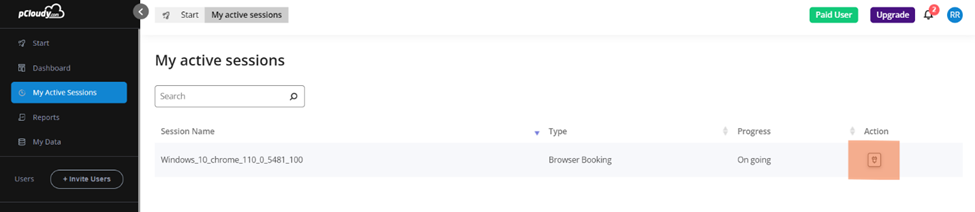
- Now the mentioned device from the capabilities will be acquired on Pcloudy and the scripts will be executed. You will be able to view the live session under My Active Sessions on Pcloudy portal.
Running parallel tests using Katalon on Pcloudy Browser Cloud
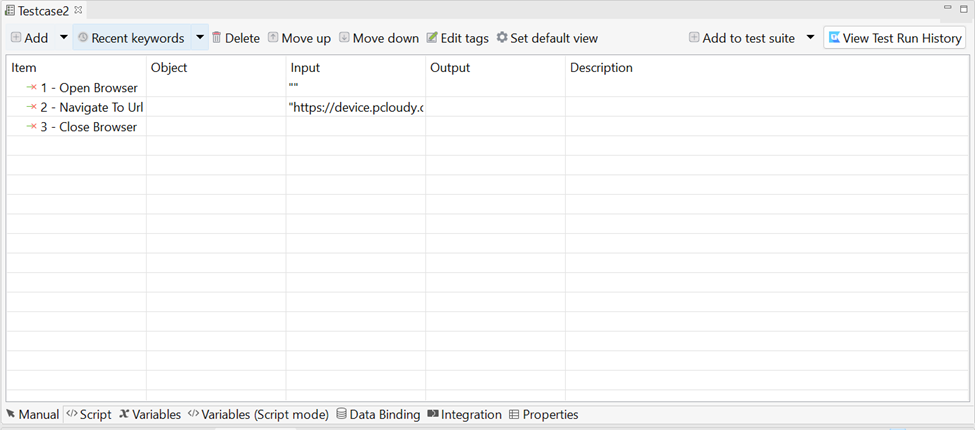
- Create multiple Test Cases(Example: Testcase1 and Testcase2) as mentioned below on Katalon.
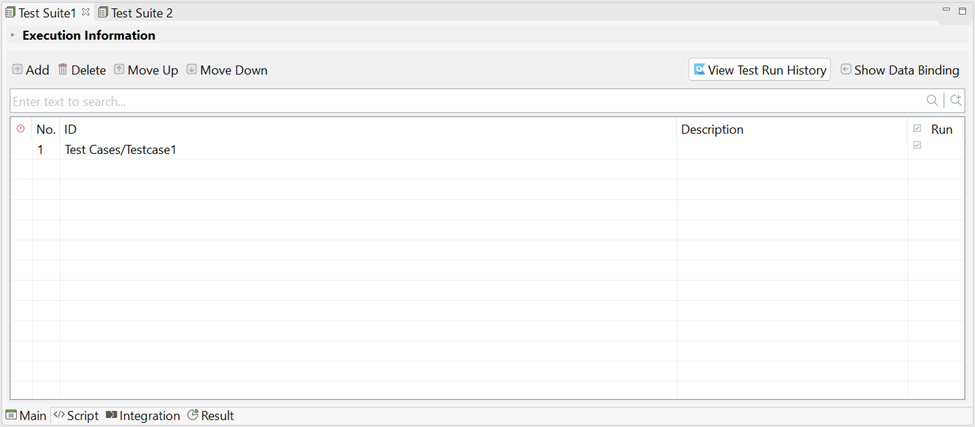
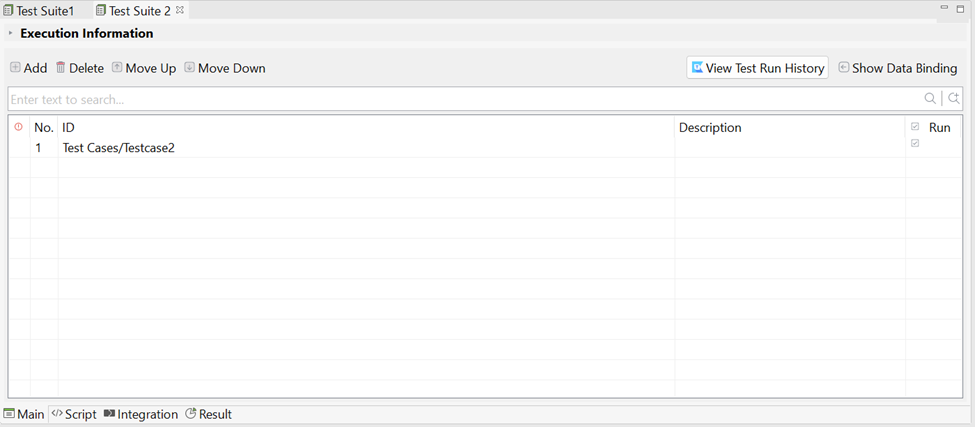
- Create two different Test Suites (Example: Test Suite 1 and Test Suite 2) and add the Test Cases to each Test Suites as mentioned below.
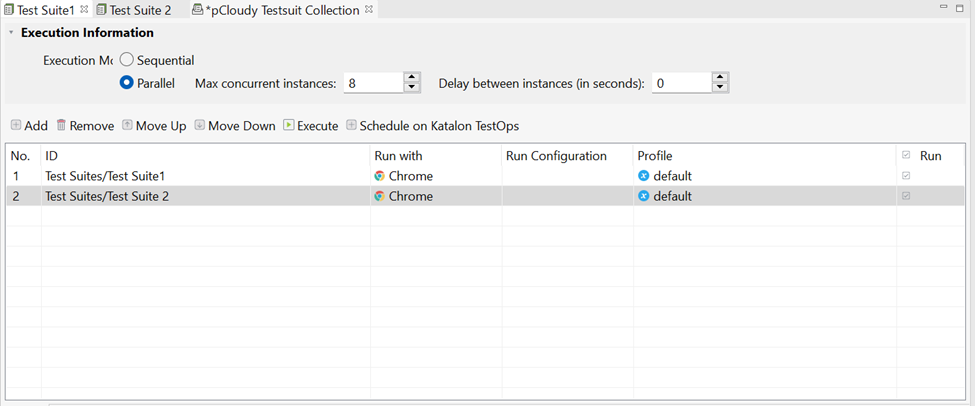
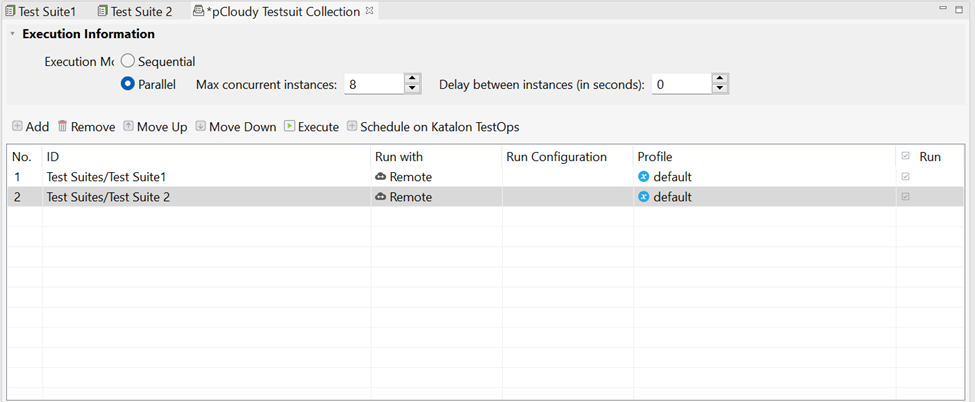
- Now create a Test Suite Collection (Example: Pcloudy Testsuite Collection) and add the Test Suite 1 and 2 to the Test Suite Collection as mentioned below.
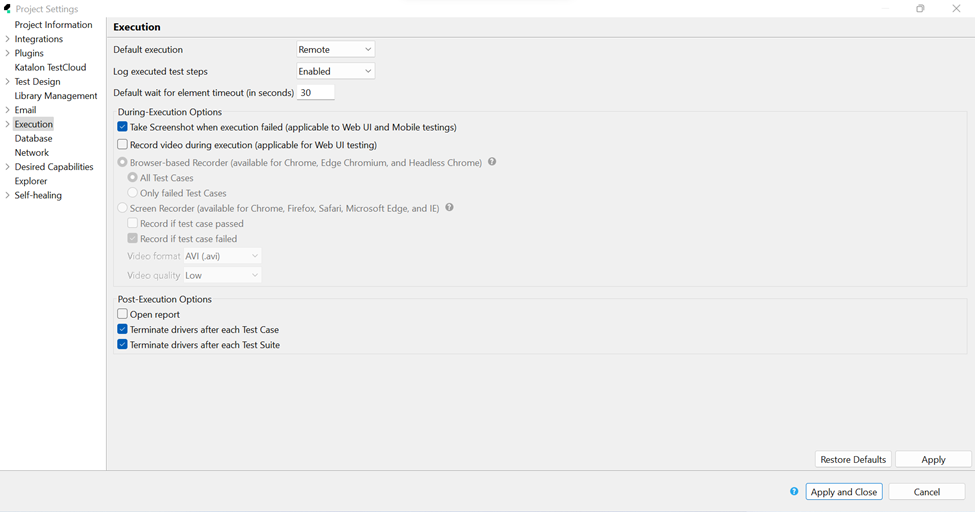
- Now Open Execution from Project Settings and select Remote from Default execution and Check the Post Execution Options as mentioned below.
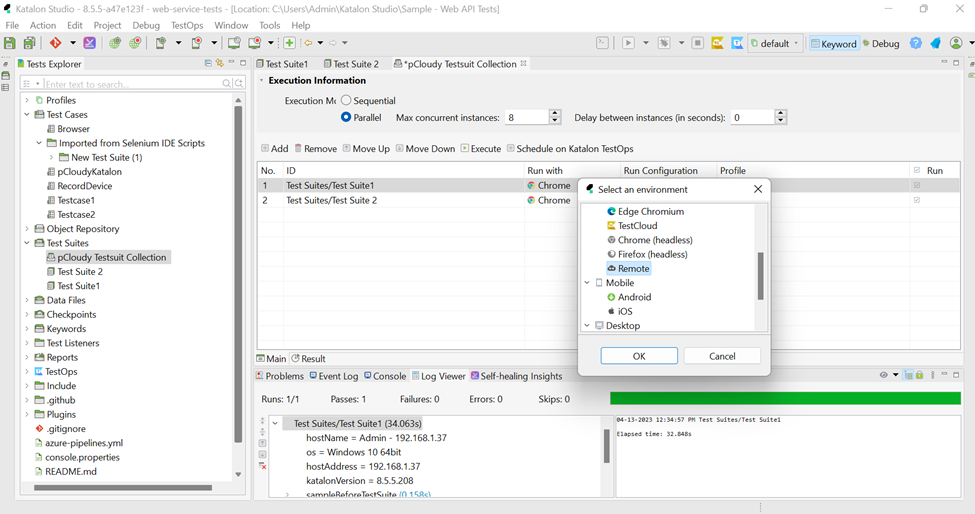
- Now select the Run Environment to Remote and select Parallel from the Execution Mode and Click on Execute.
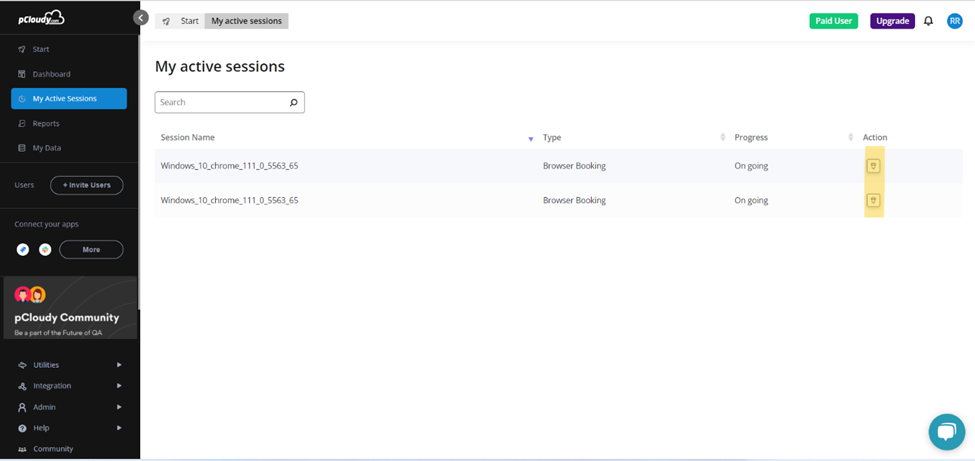
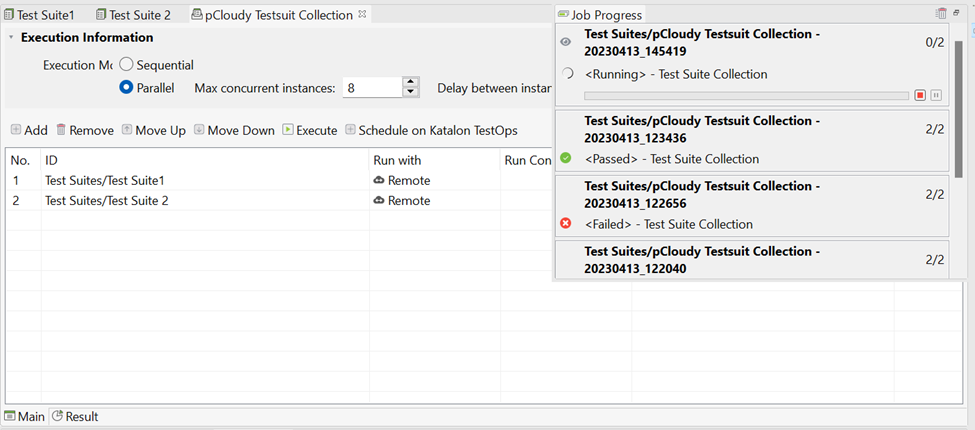 Now the mentioned browser from the capabilities will be acquired on Pcloudy and the scripts will be executed. You will be able to view the live session under My Active Sessions on Pcloudy portal.
Did this page help you?