Anshuman Chatterjee | Posted on | 2 min Read

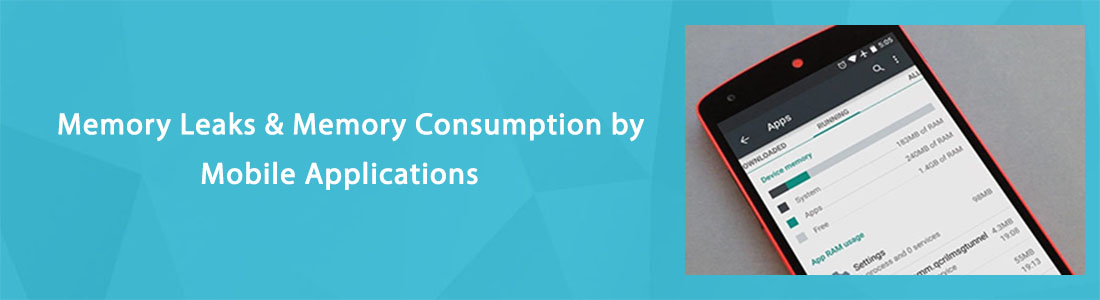
Uncover Memory Leaks by Mobile Apps


Mobile apps can often crash for many reasons. Nothing is as excruciating as memory leaks. It starts with your app crashing often, or becoming slow or maybe making your entire phone slow down, taking longer time to load activities. Memory leaks are notoriously hard to detect, and thus can easily surprise you. Have we ever thought why most of the users uninstall the application after some use?

Which is why it is critical for Developers to understand the memory consumption by any mobile application. How do you detect memory leaks during Mobile Application Testing? And if so, how can you prevent them from hogging mobile resource consumption?

A little knack for Mobile Application Testing always comes handy.


mobile application testing
Figure 1: Image Credit- GadgetHacks


Want to test your Mobile App?

Join pCloudy Platform!

Memory is critical to device


Memory is one of the key resources of the mobile device.And memory leaks in Android is an important thing to be kept in mind. Java is a garbage collecting language, which removes the need for developers to dig deep to manage allocated memory. This reduces the chances of any segmentation fault crashing an app or any unfreed memory allocation from eating up space of the heap area, thus creating a safer code.


However, a garbage collector is never an insurance against memory leaks. There are other ways by which memory can be leaked within Java. This means that your android mobile application is still pretty prone to wasting unnecessary memory allocation and crashing with out-of-memory (OOM) errors.


Toptal
Figure 1: Image Credit- Toptal


Why are Memory Leaks Bad?


Cause: Memory leaks occur when some variable of the application still has references to some objects that are unnecessary, no longer in use or used to be with the app anymore, is bloating the allocated memory heap and the Garbage Collector is not being able to release that memory.

Effect: Android devices mostly run on phones with limited memory, so as a result of too many leaks, the app runs out of available memory. This triggers more frequent Garbage Collector events which paralyze the device (Stop-the-world GC events) by almost stopping the rendering of UI and processing of events. This leads to an Out of Memory Exception and translates to the user as the app being unresponsive.


Android App Testing


Testing for Memory Leaks


Memory Leaks are caused by the failure to not be able to de-allocate memory that is no longer in use, which is why they cannot be identified during black box testing. The best phase to find the memory leaks is when developers are developing the application, at a code level.

It’s best to check for memory leaks during unit testing. However, testers can follow these tips:


Release Unused Memory: Memory leaks can be present because of the bad design of the application and thus might consume lot of memory when the application is in use


Test on Multiple devices:The memory consumption by the application should be monitored while doing the system & functional testing. One shouldn’t rely on a single device testing as there are plethora of devices in the market.


Detecting Memory Leaks

There are quite a few techniques and tools devised by developers to pin point memory leaks. Android’s very own Android Studio has a powerful tool to monitor not only memory usage but also for network, GPU and CPU usage as well, called the Android Monitor.

Memory Monitor in this helps track memory usage, find de-allocated objects, identify memory leaks and helps get an overall sense of how your app allocates and frees memory. It’s done in three steps:

1. During and use and debugging of app, track the memory monitor. If the memory usage graph rises for your app and doesn’t fall even if put in background, it’s a memory leak.

2. Using the Allocation tracker, you can check the percentage of memory allocated to different types of variables in your app. This gives you a sense of how much memory is consumed by which object.

3. Create a Java Heap Option to create a heap dump that keeps a snapshot of the memory at any given point of time, thus providing the data consumption data.

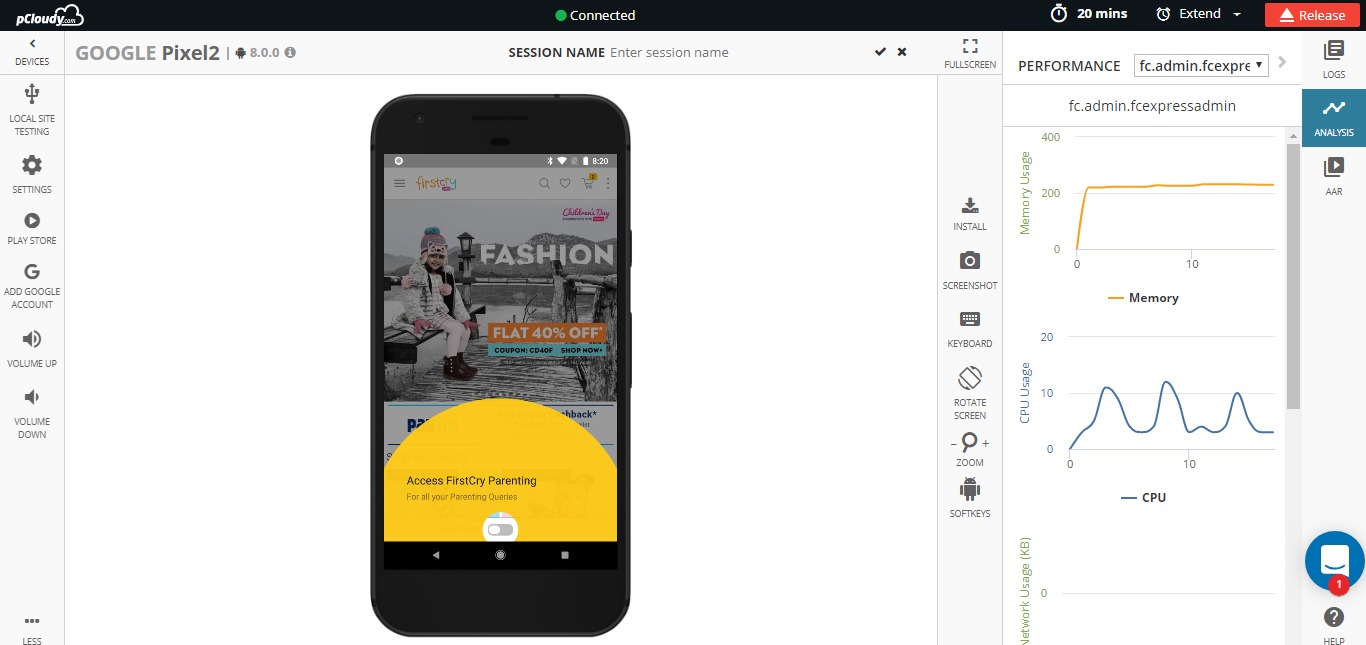
Despite Android’s monitor to detect memory leaks, there are a few platforms from developers that help extract memory consumption data without so many steps for faster testing cycles.

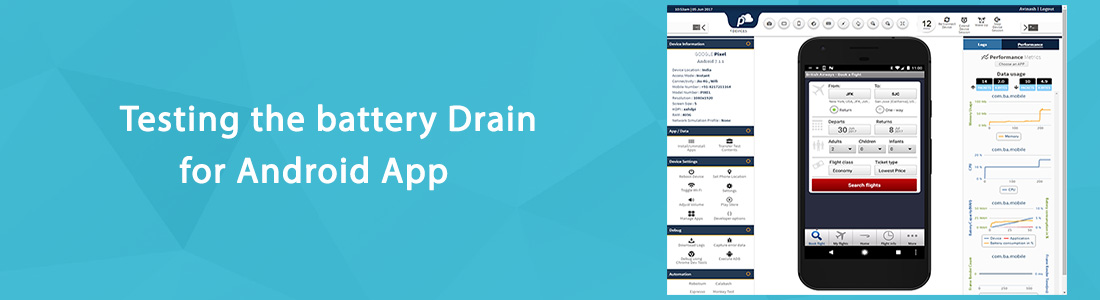
pCloudy’s very own platform for example, generates the statistics for Memory consumption while doing the normal functional Mobile Application Testing on real mobile devices.It also generates other vital data such as CPU consumption, battery consumption & data consumption for testers and developers who reiterate several test cycles across multiple physical devices.


mobile application testing
Figure 1: Image Credit- Android Developers Studio

Want to test your Mobile App?

Join pCloudy Platform!

Android App Testing


If you are anything like me, you’d agree that the armor of present day mobile phone technology has a few chinks on it. Nothing is worse than applications draining the battery resources of your mobile device faster than you can fill it back up. The sunnier side of course, is that you can create teachable moments for your kids better by hiding their phone chargers and watch the colors drain from their faces.

Studies show that battery life is a top priority for smartphone buyers. In fact, just recently, an IDC survey showed that 56% of Android buyers, 49% of iPhone buyers and 53% of Windows Phone buyers said that battery life was a key reason when they bought their particular device.

It is rare to find mobile app testing tools that assure proper usage of resource by the mobile app as, included in the overall test plan and strategy.

It’s rather a tedious and long process for conventional mobile app testing methods and as such, Let us talk about how resource consumption as an app takes top priority, because nothing stops a user to uninstall their resource draining apps from their phone. Also we’ll talk about how developers and testers efficiently test mobile apps for Android applications.


Android App Testing

Figure 1: IDC Survey


Why battery testing is important:


Thousands of new mobile apps are being launched every day. And these apps have gone beyond just utilities, games and shopping apps, nowadays, apps need to be integrated into self-driving cars, digital assistants, wearable devices etc. Billions of users need to install apps that are not only compatible with their varying devices, but also provide quality experience of the app so that it doesn’t prompt the user to uninstall it and move to an alternate app.

When you get worried about potential battery abuse, its fair economics to identify the markers that can cause increased consumption of energy by the mobile application. Critical are the functionality, usability, performance and security to make sure that the app does what it was meant to do, seamlessly. The growing need for perfect enterprise and consumer apps and the continuous need to upgrade the application to match it with what the consumer exactly wants is a job that creates high pressure for developers and testers alike, who are responsible to delivering them.

We would get deep into the best practices and tactics that should be kept in mind while testing for battery drain in your mobile app in a later blog post. For now, let us look at how developers can test for battery consumption during Android App Testing.


How to test battery consumption for mobile apps:


So far there hasn’t come a good automation method to test app battery drain. So testing Real Mobile Devices meets many requirements for efficiency in the process. Let us check out a few parameters to test battery drainage due to mobile apps.


  • Battery test flow

    This will vary based on the functionalities of the applications. But overall the below approach or points should be considered while testing for battery consumption.

    • Check the status of the battery before the test begins
    • Enable the location services for the application if app supports
    • Start the data sync of the application if app supports
    • Start the streaming service of the application if app supports
    • Check if the application send/receive the data when in the background
    • Check if the application send analytics to its server
    • Observe the battery consumption while doing above supported features by your application.

This will give us an idea as what is the battery consumption by the application.


  • Testing as end user

It is very critical to test the environment needs of the app from a real user perspective. Environments like device types, operating system, background popular apps installed and running, network conditions (WiFi, 2G, 3G, 4G, Roaming) as well as diverse set of devices with different battery states, brings DevOps teams as close as they can come to end users.


  • Android App Testing across varying devices

Android is guilty of OS fragmentation due to its open approach to OEM vendors. Different devices have varying battery capacity and each loses its battery chemistry over time, negatively impacting performance and battery hours. This is why we must check the battery consumption for the mobile app on variety of mobile devices. The best practice is to use multiple devices from device labs/ device clouds.


Different tools available in the market.


Android’s built in Battery App

Your Android Mobile Phone has a ubiquitous battery testing resource, as it comes preinstalled on all Android mobile devices. Android’s native battery analyzer, for example, (Settings> Device> Battery) is built into Android’s OS and helps analyze each app and let you know which are the ones draining the most fuel.


Commercial Battery Saving Apps

There are a few commercial Android Battery Analyzers which are available for free in the market, like:


GSam Battery Monitor can reset testing cycles as you go, which means there is no need for draining and recharging the battery like in android’s native battery app, and monitor app power usage without having to wait to get an information reset.


Clean Master on another hand, lets you know through its notification feature as and when an app is causing the phone’s battery/CPU to drain, which gives instant information on any CPU overuse.

Android App testing


pCloudy platform for Testing Battery Drain

pCloudy platform allows comprehensive features for Android App Testing. Moreover, Using pCloudy’s platform, one can monitor the battery consumption by the application. additionally, the user can also monitor memory, CPU and data consumption by the application.

The user can do the complete functional app testing on the application by touching all the critical/non-critical paths in the application. The pCloudy platform provides the necessary data for the work flow.


Performance Metrics


Conclusion

Google has said that this year their focus is on the ‘vitals’ of mobile phones, battery being one of the critical four. It’s always best to use varying angles of attack to test your app’s battery usage. And the only way to do that right now is to cover as many mobile device variants in the market and test against them.


To check battery consumption during Android App Testing Click Here.


Get 180 Device Testing Minutes Free


pCloudy 4.3


  • User can directly send input to the pCloudy Android devices by using their system keyboard.
  • CPU and Memory graphs on iOS.
  • New Improved Automator Page.
  • Automator now works on devices for all region
  • Live view for the Automation run for devices from all region
  • Bug Fix: Remaining Credits now revert back after an Appium session finishes earlier than booking expiration time.

Click Here to check our Previous Release.

Testing Mobile Apps


If you are someone using a smartphone to get through most of your day, then I’m sure would you’ve experienced it – You are in an elevator using your smartphone trying to find a restaurant for dinner but the app you are using unexpectedly crashes, or you are in a crowded subway using your smartphone to upload a video to some social media portal but the app you are using takes too long to respond, or you are just waiting for a friend in the basement of a parking lot and in the meanwhile you decide to shop for some new shoes but the e-commerce app you are using does not respond the way it should. Isn’t it frustrating when the apps you are using does not work when you require it the most? In these situations, the first thing you do is simply uninstall it, or in the worst case write a bad review.

Strangely, though most of the apps are functional and performance tested, they are still found to be defective by the users. It could be possible that not all scenarios are covered during testing. So, where is the gap? Deeper investigations have revealed that mobile apps behave differently in different network environments. In the above scenarios particularly, it seems like there is more evidence indicating that these issues are caused due to irregular mobile networks in locations such as the Elevator, or the crowded Subway, or the basement of a parking lot.


Why do apps behave differently in different network environments?

The network has a huge impact on the behaviour of your apps. Most of the apps that we use today are functioning by constantly communicating and fetching information from some servers or users that are miles away. The communication that happens is on wireless networks that are unfortunately not always reliable or consistent. Though most MNOs have established wider and better networks, it is practically difficult to achieve absolute seamless connectivity with excellent signal stability using existing wireless technologies. This is because, inherently, wireless networks have several inconsistencies like the lack of bandwidth in some places, the drop in packets caused by handovers and routing while moving, and more interference from other networks. Additionally, the networks through which data is transferred wirelessly also vary based on the technology used like GPRS, UMTS, HSDPA, LTE etc.


Why should apps be tested in different network environments?

The unpredictability of wireless networks has a huge impact on the functionality, performance and user-experience of an app. This is why we often see certain functional defects, performance defects, and sometimes crashes only when the app is running on a certain network or in some specific locations. Besides, mobile apps are expected to function on everything from an excellent Wifi connection, to a snail-paced 2.5G connection. Hence mobile apps have to undergo a wide range of tests on different networks with a variety of conditions before they are released to the users.


Are you testing your apps on different network conditions?

Traditionally, mobile apps are tested using the best networks in perfect conditions. But in real environments when the apps are being used anything can go wrong – the network bandwidth might not be enough, the latency might be high, data losses might occur, or there might be interference from other networks. App development companies have now realised the impact a network can have on their apps and are slowly filling up the gaps in mobile app testing. They are now focused on ensuring the app’s functional stability and relentless performance despite network inconsistencies. But testing mobile apps on different varieties of networks with a range of uncommon conditions is overwhelming and challenging. Moreover, these apps have to be tested on numerous mobile devices. It’s a tedious but crucial task. Additionally, tools that support such testing are scarce.


How can you test your apps in different network environments?

  1. Testing Mobile Apps using live networks – Live networks can be used for testing mobile apps. The apps can be installed on real devices and can be tested on various networks like GPRS, UMTS, LTE, CDMA, etc. But the procedure of using real networks for app testing is slow, cumbersome, and mostly provides inaccurate results. Testers need to travel to different locations or wait for the network conditions to occur for conducting the tests. Furthermore, when the developers try to reproduce the bugs in order to fix it, the exact network conditions are hard to be replicated; eventually, most of the bugs will be closed as “Cannot Reproduce” while the bug still remains.
  2. Simulated networks – Network related tests for mobile apps need not be such a hassle if the testers are given full control of the network being used. Using a simulated lab network, testers can easily test their mobile apps by simply selecting and applying the type of network profile to be used. They can also create and customize different network profiles by simply changing parameters like Uplink Bandwidth, Downlink Bandwidth, Latency, Loss Percentage, Packets Corruption, etc. This setup helps testers to replicate a myriad of network conditions for testing mobile apps.
    On a larger view, when a mobile device cloud like pCloudy is being used you can test your mobile apps on varieties of networks, on hundreds of real mobile devices in parallel, through manual tests or automation runs. It is one platform that takes care of your entire app testing needs by helping app developers to easily test and experience the app functionality and performance on different networks and different mobile devices.

Introduction to iOS TestFlight

TestFlight is an online service used to distribute and test beta iOS applications. Developers can use Test Flight to evade the Apple’s bitter binding procedure for testing new versions of their apps. It provides over-the-air installation, testing, tracking and managing of Beta apps. In simple words, TestFlight acts as a link between the developer, the tester, and the Apple Developer Center.

How is it useful?

  • Distribution of the app over-the- air to Testers
  • Tracking and managing testing using TestFlight’s dashboard
  • Receiving feedback from testers to improve the app
  • To obtain reports about the device models, OS version used while testing the App
  • Automatically records any crashes the testers encounter and sends it to the Developer

This tutorial will walk you through integrating TestFlight into your own apps.

What do you need to start?

You have to have your certificates, app ID, and provisioning profiles in place before distributing your apps using Test Flight. Here’s the list of items you need:

  • A Developer ID to login to your developer account.
  • A Certificate for Distribution to export builds and distribute apps
  • An App ID
  • A Device UDID
  • Ad Hoc Provisioning Profile to distribute your app on testers devices
  • Sign your app with a valid ad hoc provisioning profile

These items will help you obtain an .ipa file that can be distributed for testing in iOS devices with UDIDs mentioned in the provisioning profile of the app.

Uploading your app for Beta Testing

Open up your project in Xcode, make sure you have a correct Bundle Identifier and that you’ve chosen the correct Distribution Certificate:

Choose Product\Archive from the top toolbar:

Once Xcode finishes archiving your project, click the shiny blue Submit to App Store… button:

Choose your development team

Hit Submit

Wait for your build to upload. Once done you will receive a “Submission Successful message”

Inviting Testers

Choose the Right Testing Platform

 
As a mobile app maker, how sure are you about the success of your app? A small failure to recognize bugs can cost you thousands of dollars! A small mistake can turn you into a big failure among the users. Now, the question is, how to choose the best platform for testing.

Every mobile application is created differently from the other and the right platform to test can be the most important reason for your app’s success.

Right Testing Platform for Your App


Choosing the right platform among the various competing ones require a set of clear evaluation.

  • The nature of the targeted audience for your app. This will define the device matrix you should be targeting for your App Testing. Does that platform provide right device matrix for your testing needs?
  • Cloud based vs in-house setup – Does you testing process allow Apps to be allowed on outside cloud? Does your App have functionalities which work with in a secured network?
  • Type of Testing required for your App – Whether your current testing is manual or automated? Does your App require non-functional Testing?
  • Reliability and Scalability of the platform- Can it scale with your needs? Can the platform integrate with your existing tools and frameworks?
  • Return on Investment


Criterion

Description

Device Fragmentation

Can the platform handle you need of devices?

Availability

How critical for you instant availability of devices. Is you testing planned?

Automation

How much of testing is done using Automated scripts? Does the platform support the Automation tool that you are using or planning to use.

Type of Testing

What all functional features that you need to test? Does your App require non-functional Testing?

Extensibility ( integration with in-house frameworks)

Can the platform integrate with your in-house frameworks ( Automation, Test Management , Bug Management etc..)

DevOps

Can the platform support DevOps? Can it integrate with your build systems/dev IDEs or continuous integration systems.

Security

Can you upload your app on an external cloud? Does you App require interaction with your internal server?
Usage level and Cost

What is the usage pattern of your test and developing team and what is your budget?


Market Share: Andriod VS iOS


pCloudy provides the necessary tools for convenient, effective and immediate mobile app testing. Our device is based on cloud and it enables continuous development and testing on real devices. Our unique debugging feature recognizes potential errors that will significantly reduce costs and time. Our platform provides single-click access to end numbers of real Android and Ios devices.

To experience the best with your app, we have developed three different types of cloud environments for you.

Public Cloud

With pCloudy’s publicly accessed cloud, you can perform tests directly from your browser. You won’t get confused to choose between manual or automated because both are available in our public cloud environment. We allow our users to test on a comprehensive list of real IOS and Android devices. You can also test your app over various network conditions like 2G, 3G, 4G or Wi-Fi. You can either configure your own browser or choose from our wide range of pre-installed browsers.

Private Cloud

This option is similar to our public cloud environment, except it comes with additional benefits of personalized security and dedicated access. Here, we would provide you a host of devices in our enterprise grade data center and you can choose your own device. If you have a geographically distributed team, then they will have secured devices over a browser. We make sure that your data is safe on our platform, as we allow only authorized team members to access.

On-premise cloud

In this option, we provide you with the necessary hardware and give you the freedom to set up your own secure device lab. You will have complete control of your own on-premise lab.

In addition to have exactly the same features of our public cloud, on-premise model contains supplementary benefits. On-premise cloud gives you the freedom of plug-in with your existing set of devices and provides you access to a geographically distributed team. Manual and automated- both the testing techniques can be used and with a simple plug-in, you can access it from any rack. Also, there is no limit for the number of devices which can be linked!

At the end of the day, the developer has to choose the best platform for his app. But choosing the right one saves so much of hassles.


pCloudy – On Boarding Document


Thank you very much for opting pCloudy.

We appreciate your business and welcome you to our long list of satisfied and much valued customers. Our success comes from the continuous faith in the excellence of our products and services, something we are committed to and would never sacrifice.


Our customer service, especially in the after sales phase, guarantees the satisfaction of our clients. In line with this strategy, we ask you to share with us your feedback at any time, be it positive or negative. There is always room for improvement, so if we can serve you better in anyway, please do inform us.


Introduction


This document is created to serve as a guide while you explore the pCloudy platform. It will help you understand how to use, to get quick help and whom to contact while starting off with pCloudy. Though this is not a complete help document, it will act as a quick reference to begin using the platform.


About pCloudy


pCloudy is a mobile application testing platform which will help you to test your apps on hundreds of real devices. You can remotely access real devices and carry out Manual and Automation Testing.


Quick Start


Registration


The platform has a secure login process to protect the apps you test. In order to use the platform you must setup your login credentials first.


Where do I do this?


Simply, enter your details at https://device.pcloudy.com/signup, after a short verification you will be ready to sign-in.


In case of any issues, drop an email to support@pcloudy.com


Sign-in


Once you’ve signed up, you can access the platform with the help of your registered Email ID and Password.


In case of any issues, drop an email to support@pcloudy.com


Note: If your workstation has touch screen feature, enable TouchScreenBrowserSettings


Where do we go from here?


Once you login, you will be exposed to an array of devices and platform features. You might get overwhelmed and lost, but don’t worry, we have you covered.


A typical pCloudy user will follow these steps for testing mobile apps using the platform.


Divided into five parts –


1. How to select right device from the platform?
2. How to manage apps on the platform?
3. How to start testing your apps on the selected devices?
4. How to run automation scripts on cloud-based devices?
5. Additional Features


1. How to select right device from the platform?


To select the right device on the cloud the platform provides various filters. These filters will help you to select devices based on the OS versions, OEMs, Screen Size, Network, or Device Location.


Mobile Device Testing


There are two modes to access the devices on the cloud –


1. Instant Access – This provides immediate access to the available devices at that moment. Just hit the ‘Connect’ button on any device displayed in the Instant Access page and you will be ready to use the device.


2. Book your Device – In some cases you might want to reserve a device for the future. You can book a device in advance to keep yourself prepared for testing. With careful planning, with the help of ‘Book your Device’ mode you can make sure the devices are available when you need them and save time.


To learn more, refer to these links:


Managing your credits


To use the devices you need to have enough credits in your account:

  • To view the remaining credits in your account refer to this link
  • To buy more credits, click this link


How to manage apps on the platform?


The platform provides secure limited disk space to store the apps on the platform. This space can be used to store app installation files (apk or ipa) or test data (image files, zip, etc).


Refer these links to know how to upload your app files to the platform:


Manual Testing of Mobile Apps


The dashboard provides you with quick and easy access to use the different features to test your mobile apps.


Device Information


1. Device Screen: You can use the device same as how you use a device physically. You can use swipe actions, zoom-in, zoom-out and various gestures to control the device.

2. Main Panel: This panel provides options to view device info, install/uninstall apps, change device settings, tools to debug apps and run automation, and more.

3. Quick Action Bar: Frequently used controls like taking Screenshots, changing device orientation, sending text to device, and more

4. Logs and Performance: Real time device logs and app performance are displayed


Features

Here’s a list of some important features to test your apps –


1. Functional Tests

You can install/uninstall apps on the devices, you can use various gestures on cloud based devices just like how you do testing on physical device, you can mock GPS location, take screenshots, and much more. Here are some links that will help you:


2. Performance Profiling


Performance profiling of Android Apps – You can monitor the CPU usage, memory usage, battery consumption, frame render count of the app in real-time while testing an app.

Performance on iOS Device – You can monitor the CPU usage & memory usage of the device in real-time during testing.


3. Debugging mobile apps

You can capture bug and crash information in the form of logs, screenshots, videos, and stack trace information while testing your apps on devices.


4. Test Mobile Web Apps

You can test your web apps or website on various browsers on various devices.


5. Network Virtualization Tool

The app you tested in your lab environment will not work the same way when you use it in an elevator, or in a basement, or while you are travelling on a highway. The Network Virtualization Tool will help you to emulate different network environments and test your apps.


6. Device Tunnel

You can connect and use a device with ADB just like the way you connect it physically with USB/Wireless ADB. This is used to control a device using ADB commands and debug apps.


7. Reports


The reports section will contain the complete details of all your testing sessions. It will hold the screenshots, logs, videos and the performance details of the testing.


8. Automation


You can run your automation scripts on multiple devices in parallel. The pCloudy platform supports several automation tools. Here are some links to help you –


Other than the reports generated from the automation tools, you can view additional testing reports stored on the platform as well – Automation Testing Reports. This will contain the videos, logs, and performance graphs of the devices on which Automation execution was run.


9. Integration with Continuous Integration tool – Jenkins


You can use CI tools like Jenkins in integration with the pCloudy platform. This integration will leverage your testing practices to a whole new level. You can deliver quality mobile apps continuously by automating the process of build integration using pCloudy plugin for Jenkins.


Team Admin


To effectively manage the devices, users, apps, or credits on the platform you can use Team Admin.
Refer to article – Team Admin


Contact


Find detailed pCloudy knowledge base articles from support@pcloudy.com
You can reach out to us – support@pcloudy.com or info@pcloudy.com

“iOS 8 is the biggest iOS release ever — for developers and everyone else. But that wasn’t the goal. We simply set out to create the most natural experience. Each enhancement has a purpose. Every new feature deserves to be a new feature. Each function is more considered, each next step is more efficient. It all adds up to an even better experience — one that is pleasantly surprising at first and becomes utterly indispensable before you know it.”

What is new ?

Inter-App Communication

Inter-app communication means different things to different people. For some it’s the ability to push files from one app to another. For others it’s the ability to pull data into any field in any app. The core issue, however, is workflow. People just want an easier way to move their stuff around.

Touch ID Authentication

Touch ID is the name of Apple’s personal fingerprint identity sensor. It’s what currently lets you authenticate yourself to unlock your iPhone 5s and authorize iTunes and App Store purchases on your account.

 Custom keyboards

After years of waiting, Apple has finally brought support for third-party keyboards to iOS. Inside iOS 8, keyboards like Swiftkey and Swype, which have enjoyed huge usage on Android, will have system-wide access to all apps and services on your iPhone and iPad. Swiftkey has confirmed it’s onboard, but if you don’t fancy that, you’ll still able to enjoy Apple’s new QuickType keyboard. The company says the improved keyboard learns from the way you type and text, offering a pick of suggestions for your next word based on the content of your message or the person you’re conversing with. Planning a meal with your friend or loved one? The keyboard will auto-populate words like “dinner” or “eat” as you type. At launch, QuickType will support 14 regions including the US, UK, Canada, Australian English, Brazilian Portuguese, Chinese (that includes Hong Kong and Taiwan), French, German, Italian, Japanese, Spanish and Thai.

Family Sharing

New to iOS 8, a user can add six others as family members. Family members can share purchased apps, music, and books using the same credit card. iOS 8 can also automatically set up photo streams for all family members. Calendars may be synced between all members. Kids can also send iTunes download requests for apps, music, movies, and more to their parents provided this service is set up correctly.

Third-party widgets

iOS 7 split notifications and widgets apart, putting widgets in their own Today view, moving Weather to the Today Summary, and adding support for Calendar, Reminders, predictive location, and the Tomorrow Summary. Yet they were still limited to built-in apps and services.

iOS 8 and Extensibility take it even further, allowing App Store apps to offer up their own Today view widgets — helpful information status indicators, simple, interactive utilities, and ways to launch into the full app when and if needed — easily accessible from anywhere on the iPhone or iPad, informational and interactive.

What a new OS or device release means to the developers and Testers?

Update Your Device/OS Test Matrix

Maintaining Device /OS Test matrix is already a big challenge for organizations. It is always a big question that what device and OS combination should be included in the Test Matrix and what should be not. One way to set your Matrix in right direction is you can take the help of Google analytics that what devices your audience/users are coming from.Now each OS Device release we have to refresh this Matrix.

How should we proceed and what all areas we should focus more:-

Functional Testing

According to Apple’s developer site “iOS 8 includes over 4,000 new APIs that let you add amazing new features and capabilities to your apps. Deeper integration with iOS means you can extend the reach of your app content and functionality.”

Inter App communication

Test if your application is able to interact seamlessly with other apps and Able to transfer Data from one app to other.

Notification center

If your app is using Notification API it is properly updated in Notification center and your application is able to customize its Notifications in Device Notification center.

Touch ID Authentication

If Your Application is using Touch ID Authentication the is it working fine as per your implementation

A/B Testing

App Login with Touch ID

In iOS 8 developers can now use Touch ID to let their users log into their app. Typing in a password introduces a lot of friction into the signup flow, but Touch ID is also a new technology that isn’t perfect every time.
Just because Touch ID is available for app login, doesn’t mean it’s the best option for every user. Set up a simple A/B test to see how leading with one option vs. another impacts sign-ins and sign-ups. Depending on who your audience is and how they use your app, you may be surprised by the results.

Let’s face it; Touch ID doesn’t always work as promised. It’s important that your app respond before your users start to get frustrated and consider abandoning. Try testing different options for help text and UI elements to guide your users to a successful entry.

Extended Sharing Options

iOS 8 now lets developers share content from their apps with a new sharing options API. This release comes a big question: where will developers embed sharing actions? and what type of actions with sharing surface?

We recommend experimenting with different places in your app you can surface the option to share. Make sure you pick a consistent place that makes sense for users as part of their interaction flow. This can be hard to know for certain, so we recommend brainstorming some options with your team and testing as many as you can.

The types of actions you surface in your sharing options is also really important. Too many actions will clutter the experience and confuse people, threatening drop off. Think about the high-value actions you want your users to take. Start by highlighting only those. Then, progressively test into adding other actions based on user feedback and team ideas. If you start to see adding actions are negatively impacting your engagement, you know you might be going too far.

UI Testing


Remember these points before Testing

Size Class

With iOS 8, Apple is introducing “size classes”. Size classes have vertical and horizontal dimensions called “regular” and “compact”. The iPad in both portrait and landscape defaults to the regular size class in both horizontal and vertical directions. The iPhone in portrait defaults to compact size class for horizontal and regular size class for vertical. The iPhone in landscape defaults to compact size class for both horizontal and vertical.
Apple provides some automatic behaviors based on size classes. For example, if you rotate an iPhone app that uses standard components from portrait to landscape (from compact/regular to compact/compact) the navigation bar gets condensed and the status bar disappears entirely. That’s to maximize the content on a screen that’s suddenly gone from being tall to being very, very short — like a web page on Safari.
Developers are free to customize the layout for every orientation of every device they support as well. For example, they can have two buttons stacked on top of each other in portrait orientation to take advantage of the height, and those same buttons aligned side-by-side in landscape orientation to take advantage of the width. They’re the same controls, their position and other attributes simply change as the vertical size class changes.

Split view

Apple is also bringing split views to the iPhone. That means developers no longer have to maintain two separate interface hierarchies, one for iPad that contains split view, and one for iPhone that does not. Now they can maintain one hierarchy for both and the proper screens will all be rendered based on size class.

Changed UI API’s

With iOS 8 Release Apple has removed some of the UI API’s and a list of bug fixes in UI KIT made it very essential for user’s to test the UI thoroughly.

Orientation

You need to test the rendering of their application as per the changed classes and views

UX Testing

Enhanced Multitasking

iOS 8 comes with enhanced multitasking functionalities. Testing your app user experience with this enhanced Multitasking feature of iOS 8.

iOS 8 Touch ID authentications

Testing the user experience of your application with iOS 8 Touch ID authentications functionality.

Notification Center

How Your Application Notification pushed into Device Notification center or What happens when your Device is in Locked state etc.

Performance Testing

CPU usage by Your Application on this new OS and device.
App performance during interaction of one app with others.

Security Testing

Security will also be a major focus of this release. New iOS 8 features will make it even easier to keep track of all your passwords and make sure they are as secure as possible