
Last updated on : 16 Oct 2023
TestComplete Integration with Pcloudy
Overview
TestComplete is an automation tool which helps you to test your desktop, web and mobile application. This documentation will help you to integrate TestComplete with Pcloudy to run your existing TestComplete scripts on Pcloudy real devices.
Prerequisites
- TestComplete configured on the local machine.
- An account with Pcloudy.
- The Application needs to be uploaded to My Data section.
Steps to Run Tests on a Single Device
-
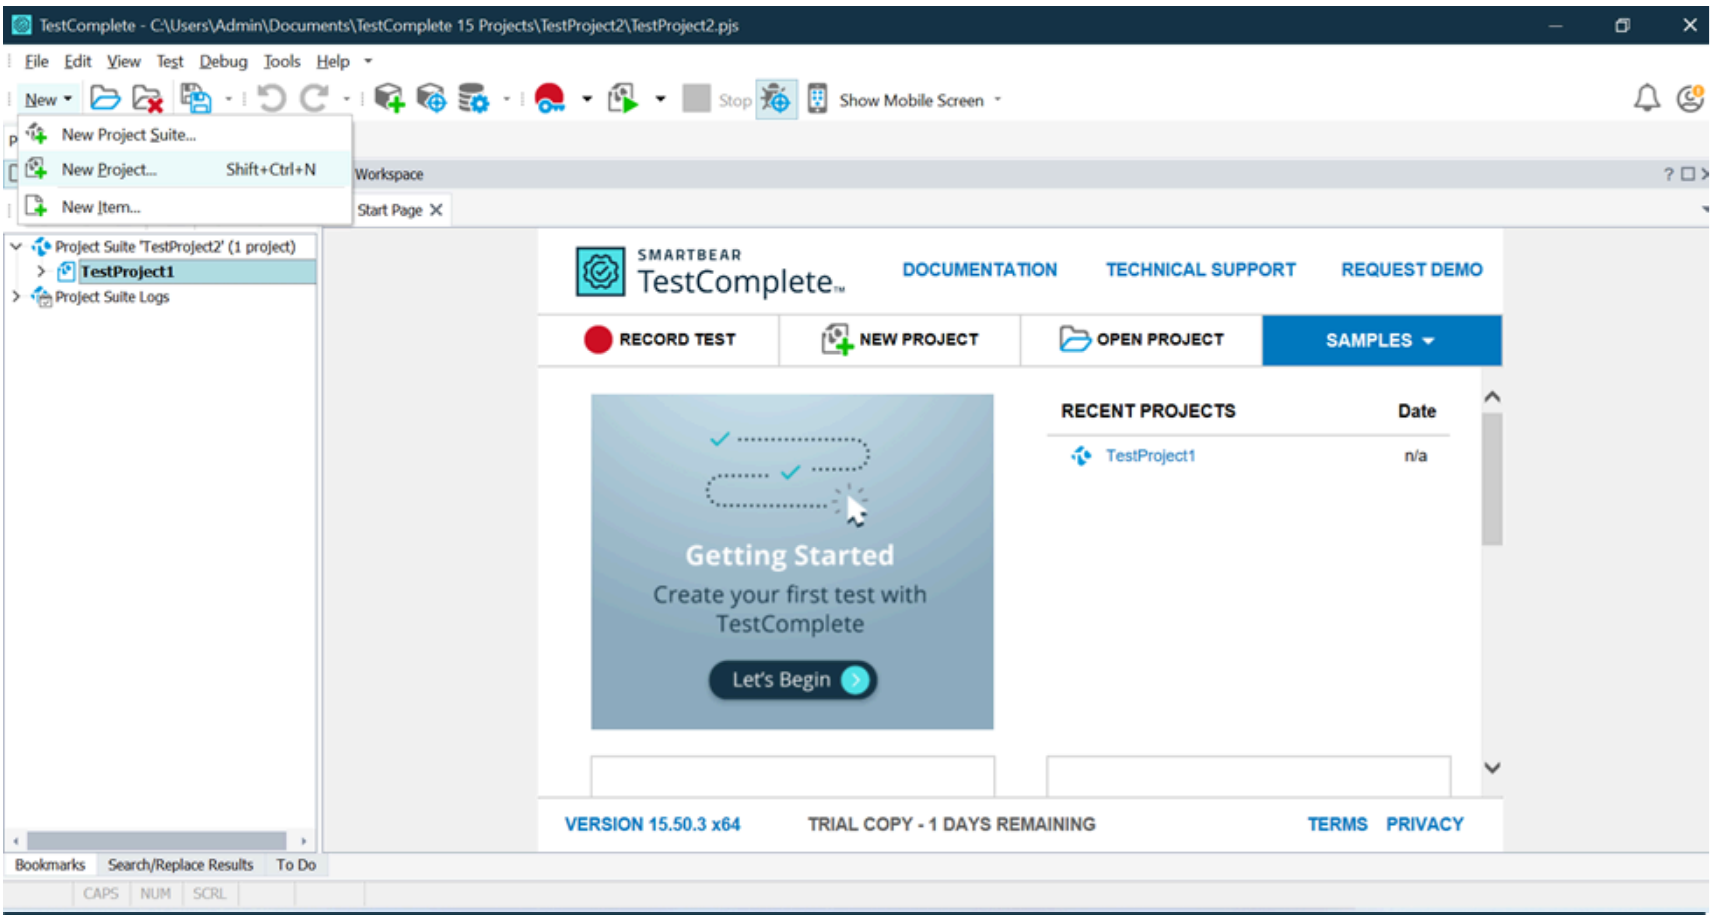
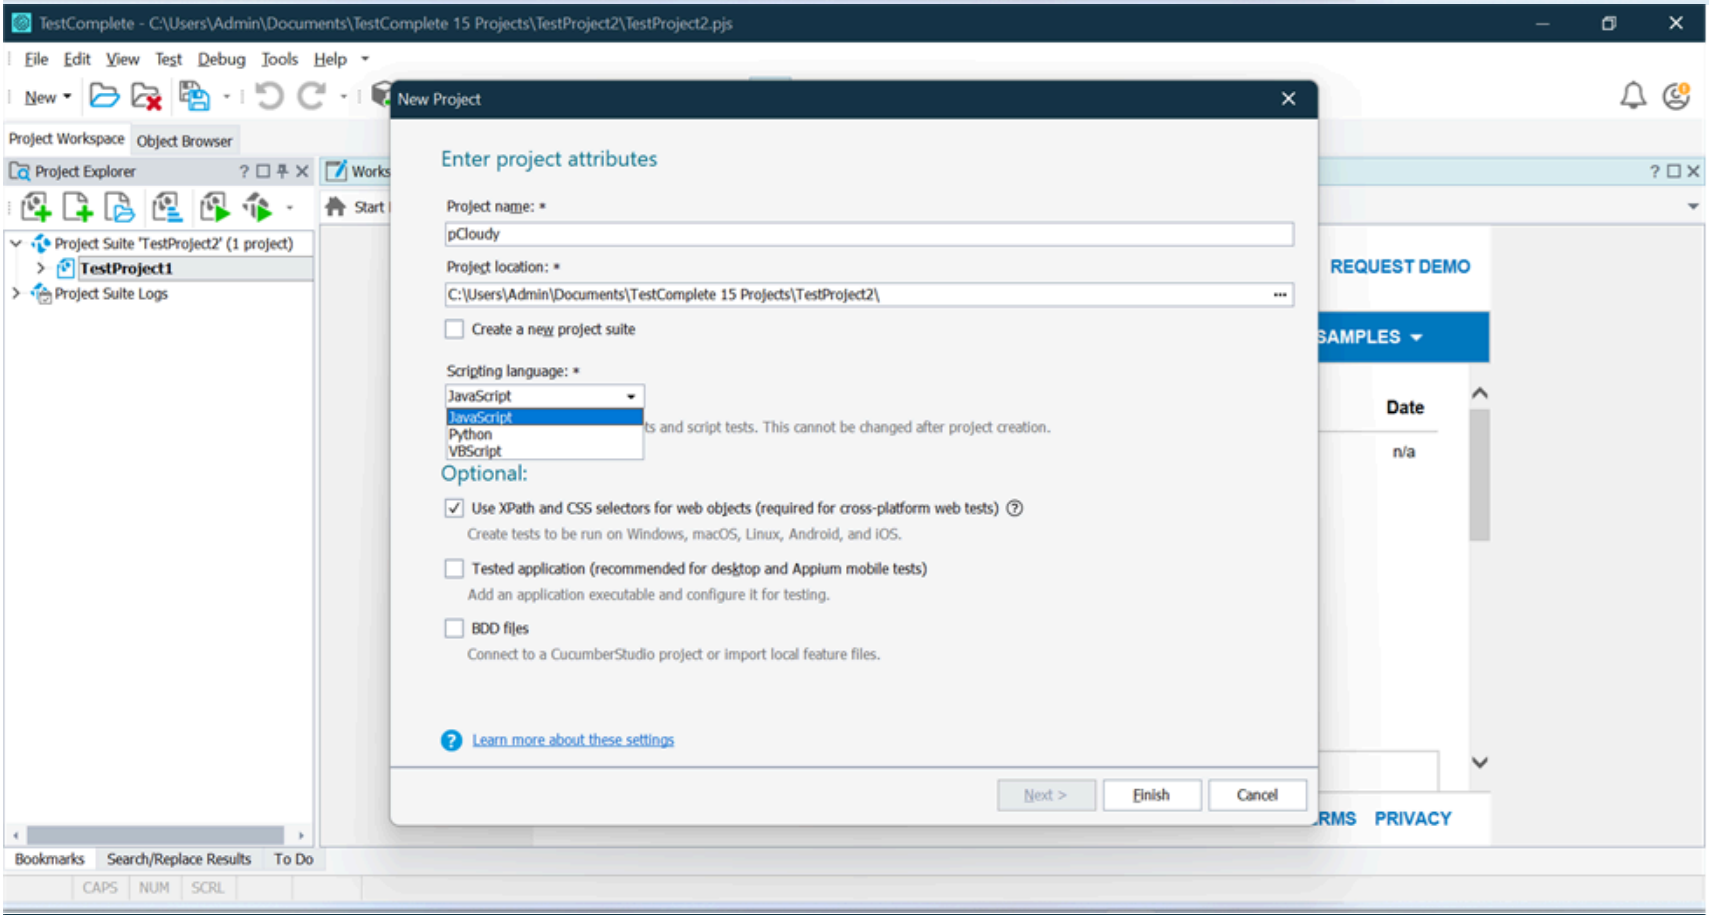
Launch TestComplete and create a new project by clicking on New and select the Scripting Language.
-
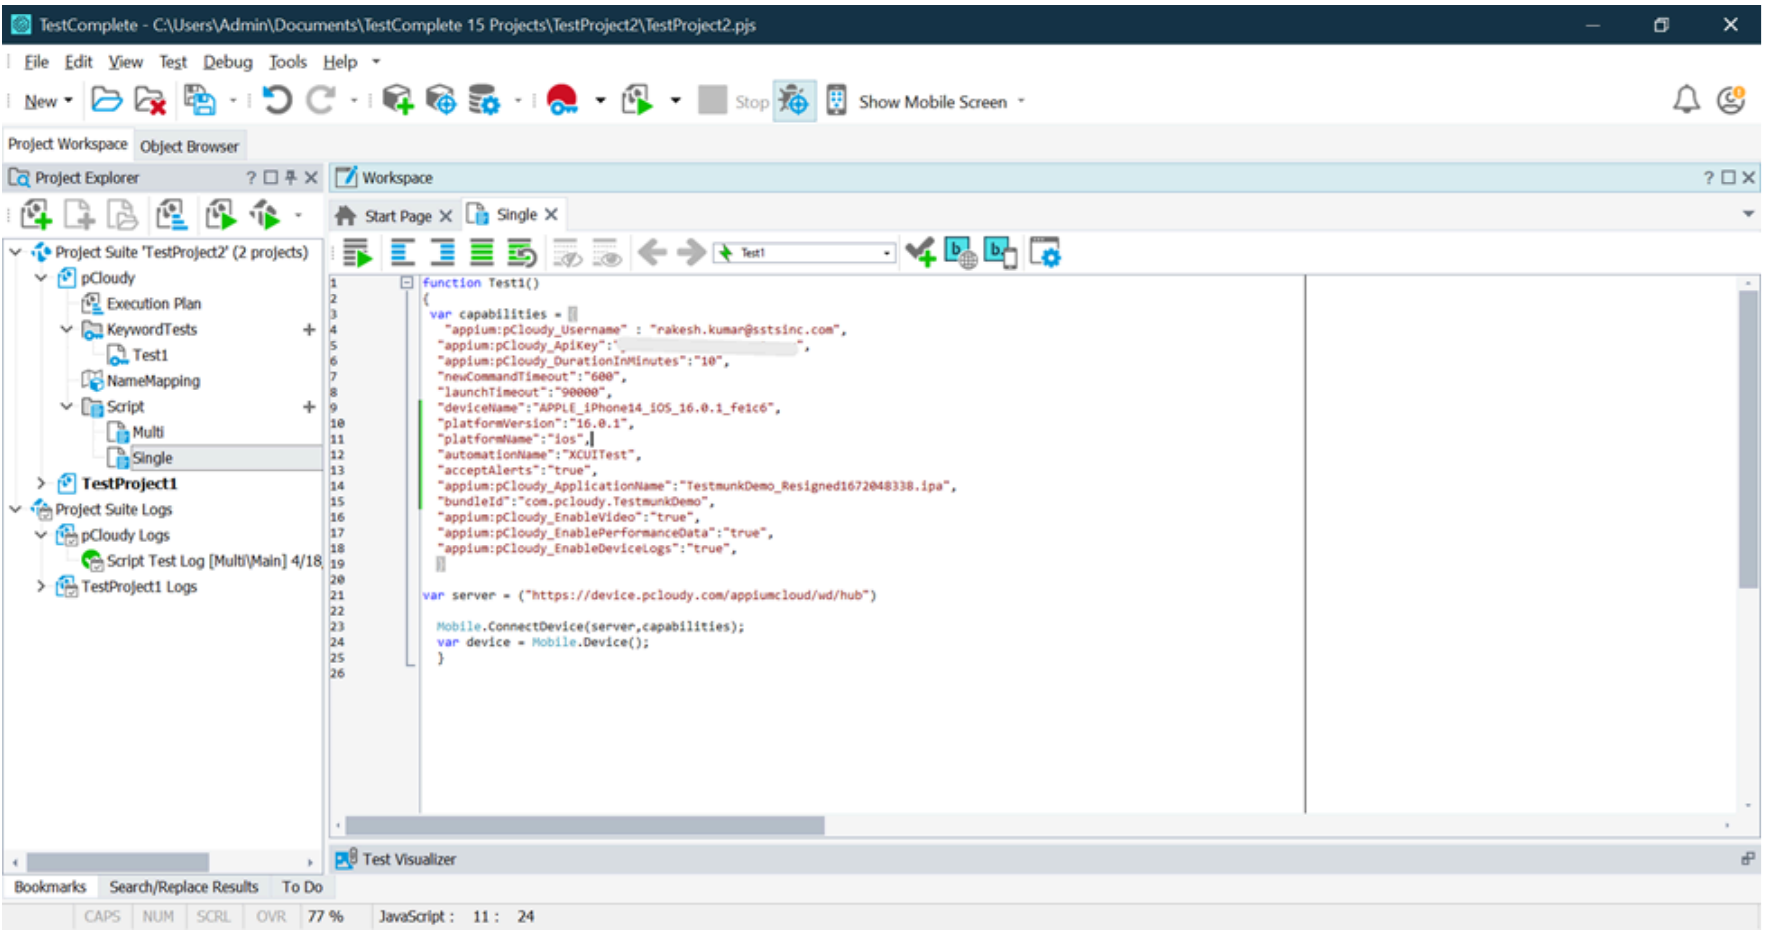
Create a New Unit under Script and add the capabilities in the script as mentioned below.
Example: We are connecting to an iOS device and installing an application to be launched.
Note:
- For iOS application, if it is a developer build, you need to Re-sign the application before you could install it on the Pcloudy devices.
- The user can create the capabilities using Capability Configurator from Pcloudy portal and add the prefix "appium" to Pcloudy specific capabilities as mentioned below and provide the "bundleId" for your iOS application.
Function Test1()
{
var capabilities = {
  "appium:pCloudy_Username" : "abcd@1234.com",
  "appium:pCloudy_ApiKey":"Your APIkey",
  "appium:pCloudy_DurationInMinutes":"10",
  "newCommandTimeout":"600",
  "launchTimeout":"90000",
  "deviceName":"Apple_iPhone14_ios_16.0.1_fe1c6",
  "platformVersion":"16.0.1",
  "platformName":"ios",
  "acceptAlerts":"true",
  "automationName":"XCUITest",
  "appium:pCloudy_ApplicationName":"TestmunkDemo_Resigned1672048338.ipa",
  "bundleId":"com.pcloudy.TestmunkDemo",
  "appium:pCloudy_EnableVideo":"true",
  "appium:pCloudy_EnablePerformanceData":"true",
  "appium:pCloudy_EnableDeviceLogs":"true",
}

var server = ("https://device.pcloudy.com/appiumcloud/wd/hub")
Mobile.ConnectDevice(server, capabilities);
var device = Mobile.Device();
}
-
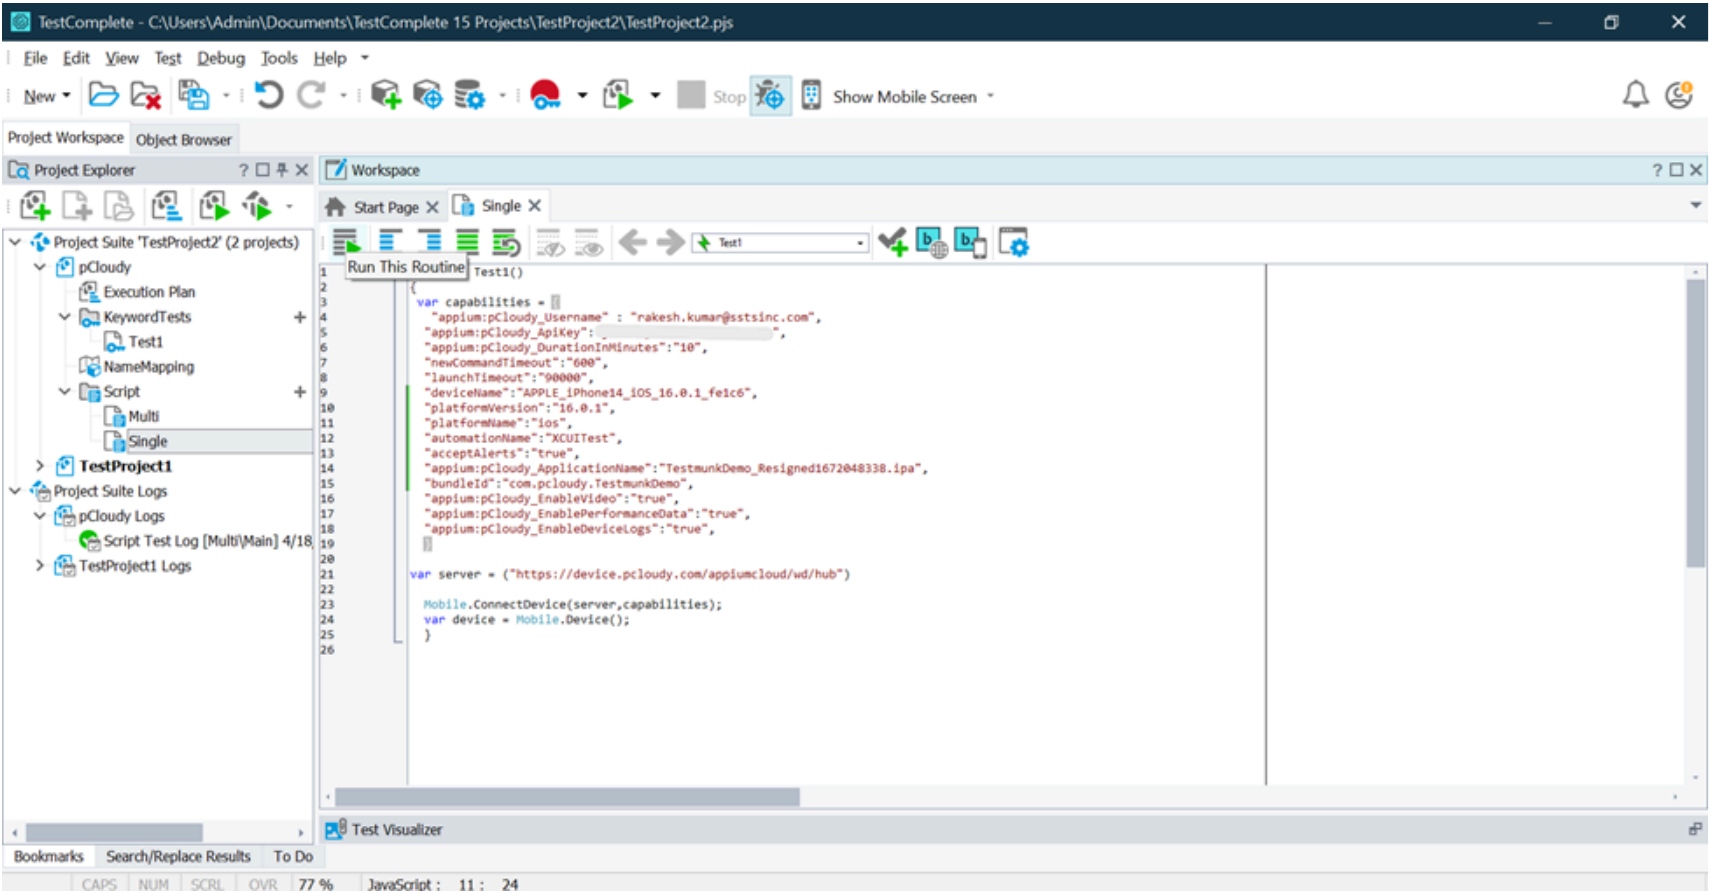
Click on Run This Routine to run the script.
-
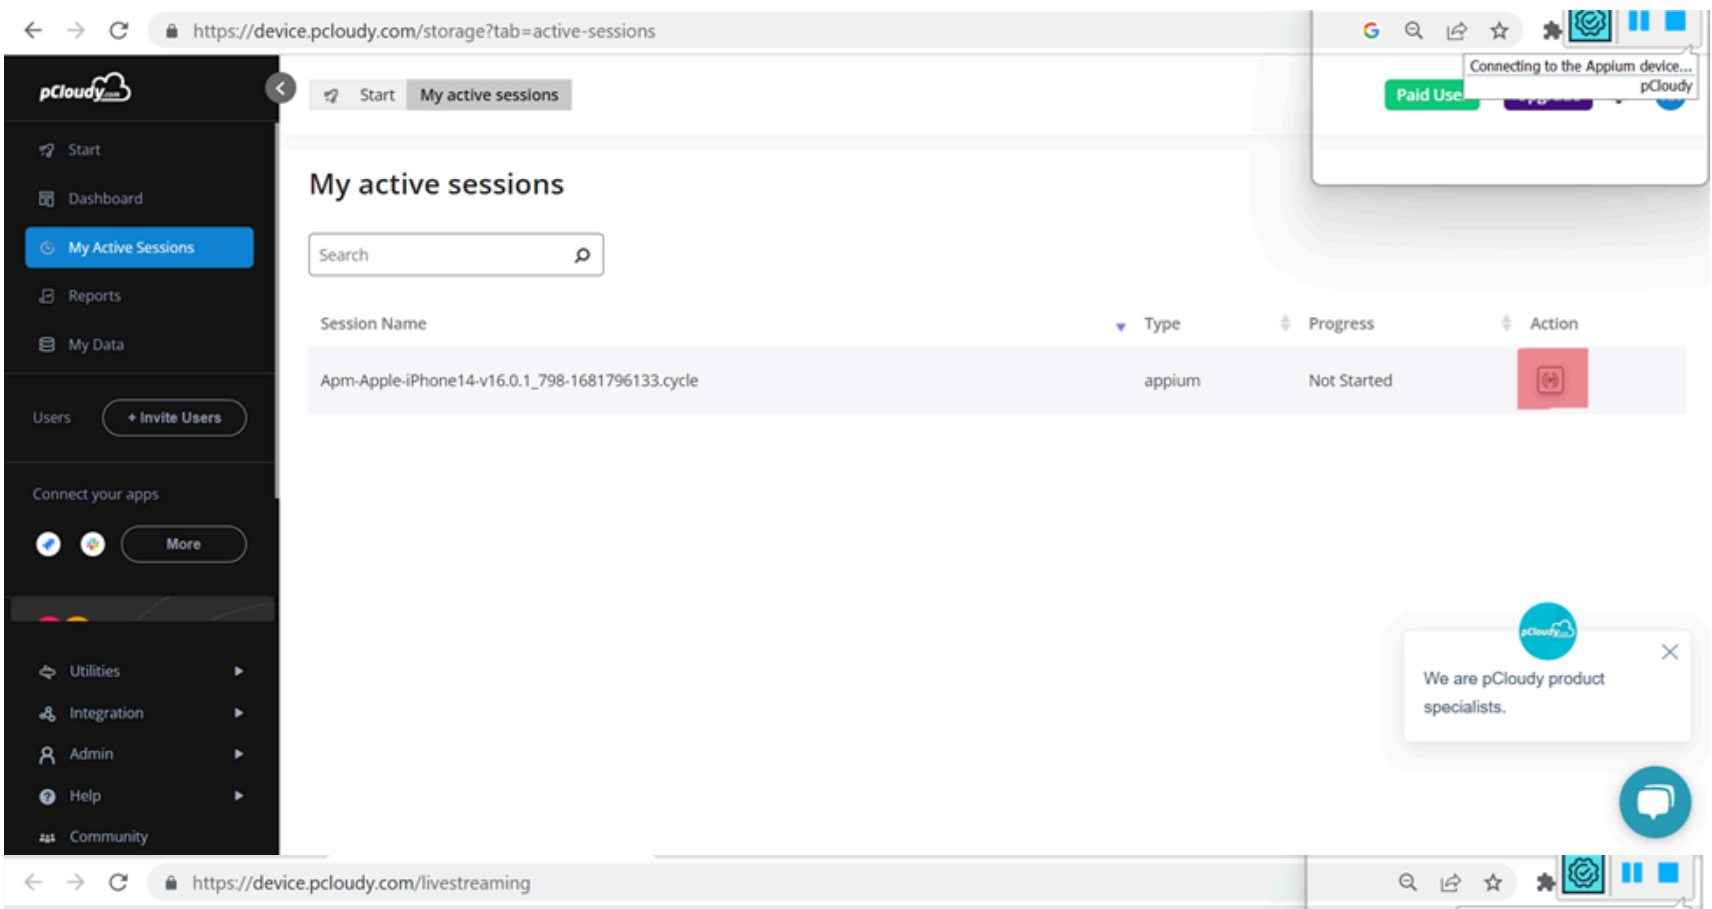
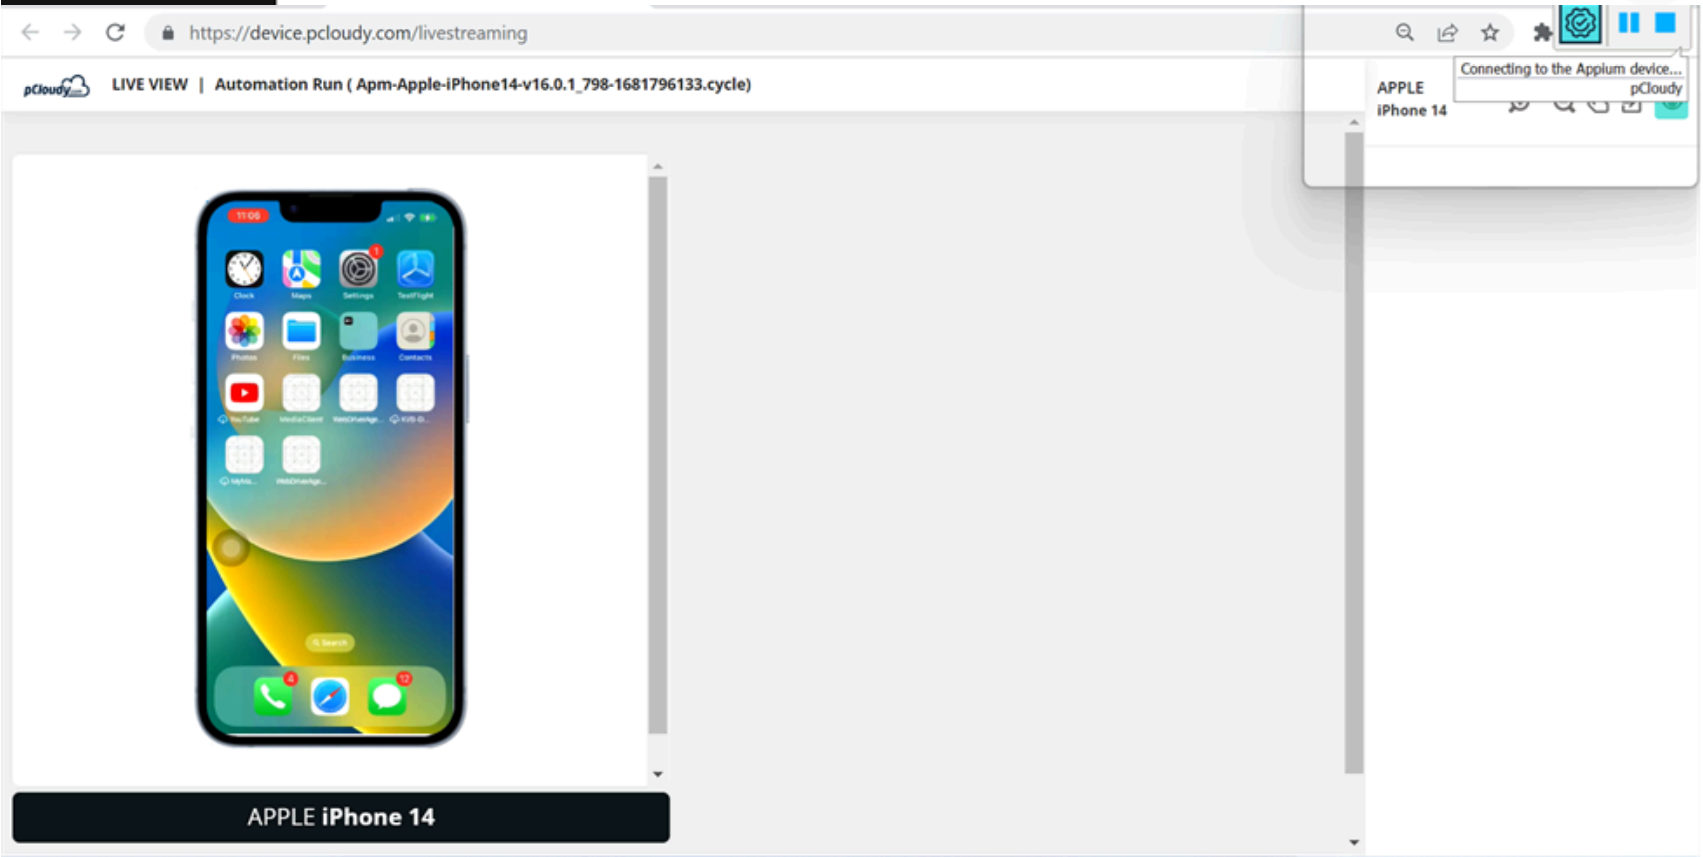
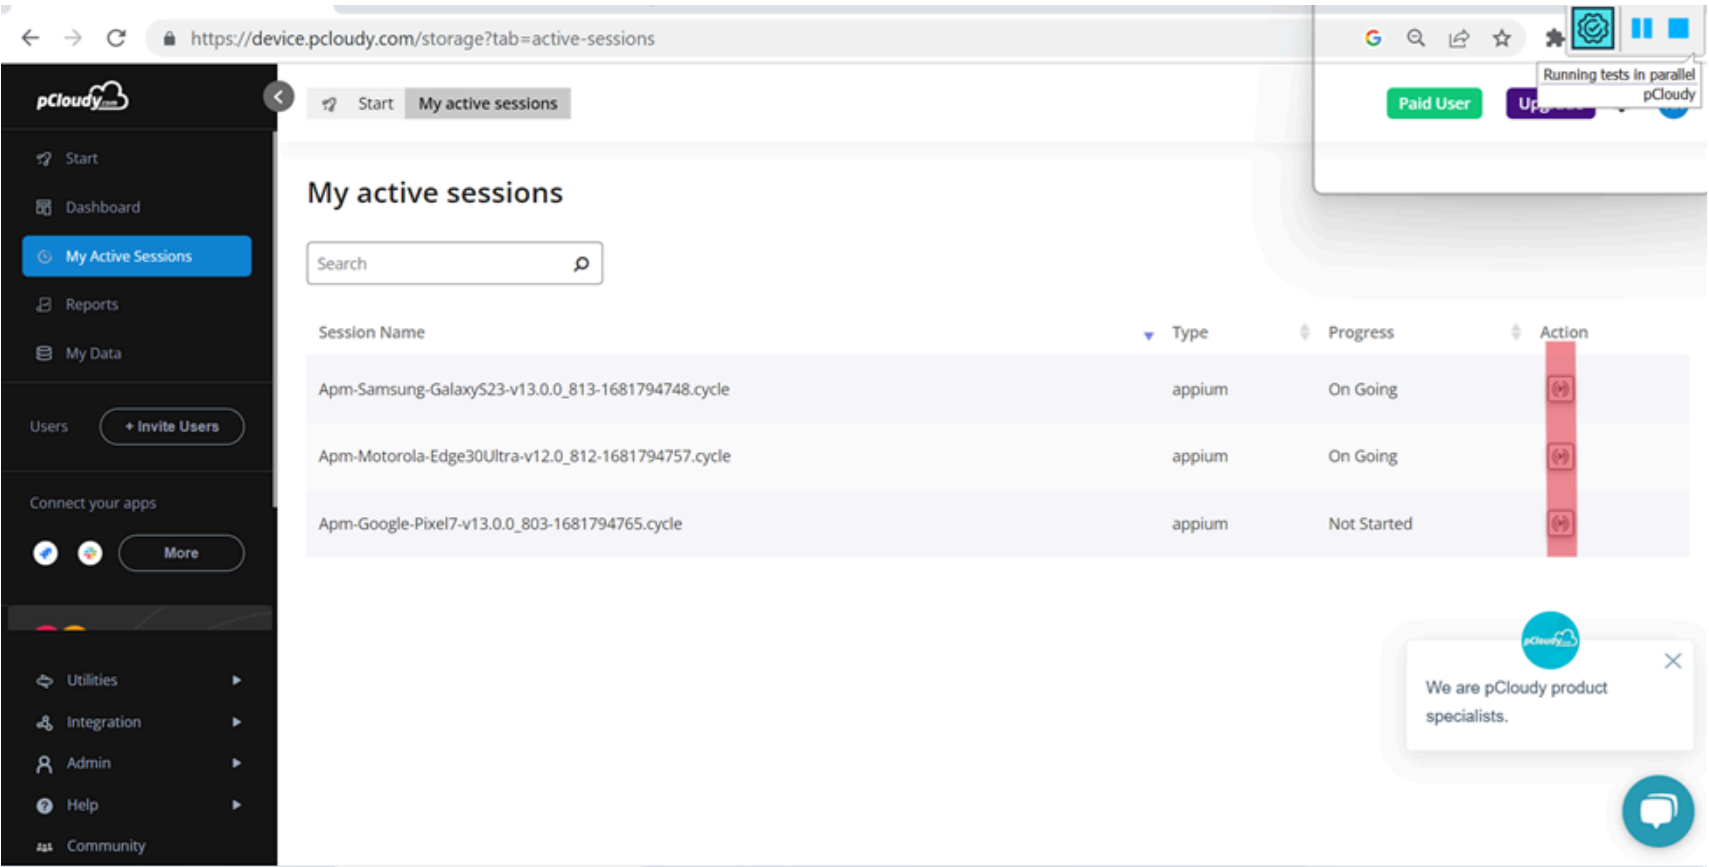
The mentioned device from the capabilities will be acquired and you can view the session live under the My Active Sessions tab on Pcloudy portal.
-
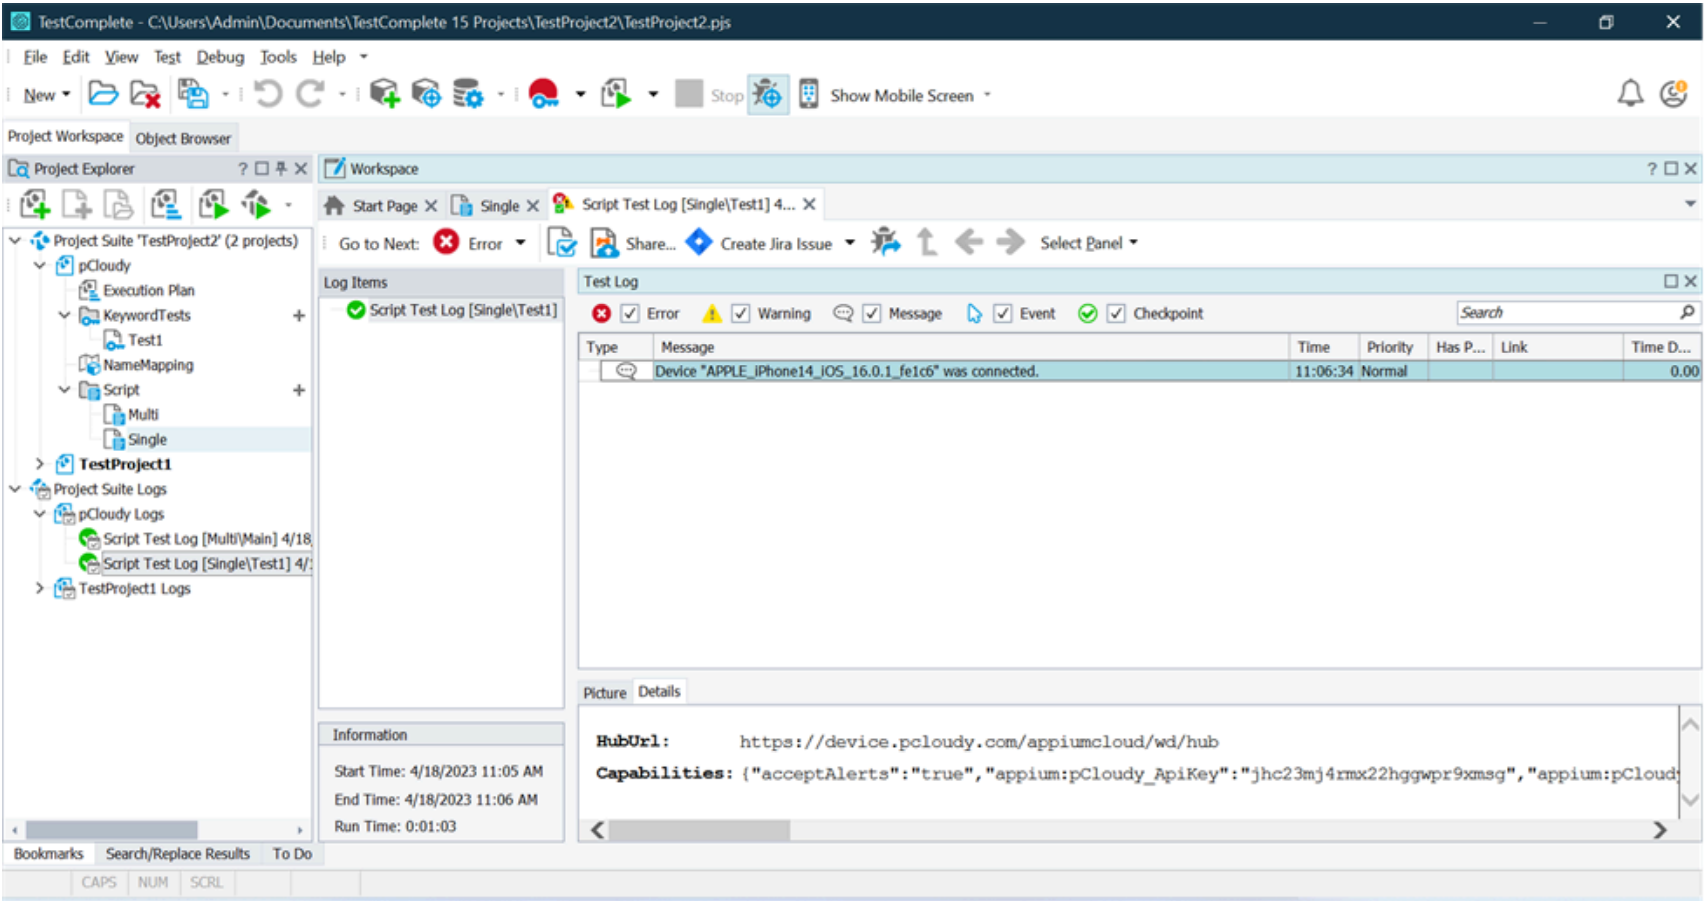
You can view the logs on TestComplete and you can get the reports for the session under the Reports section on Pcloudy portal.

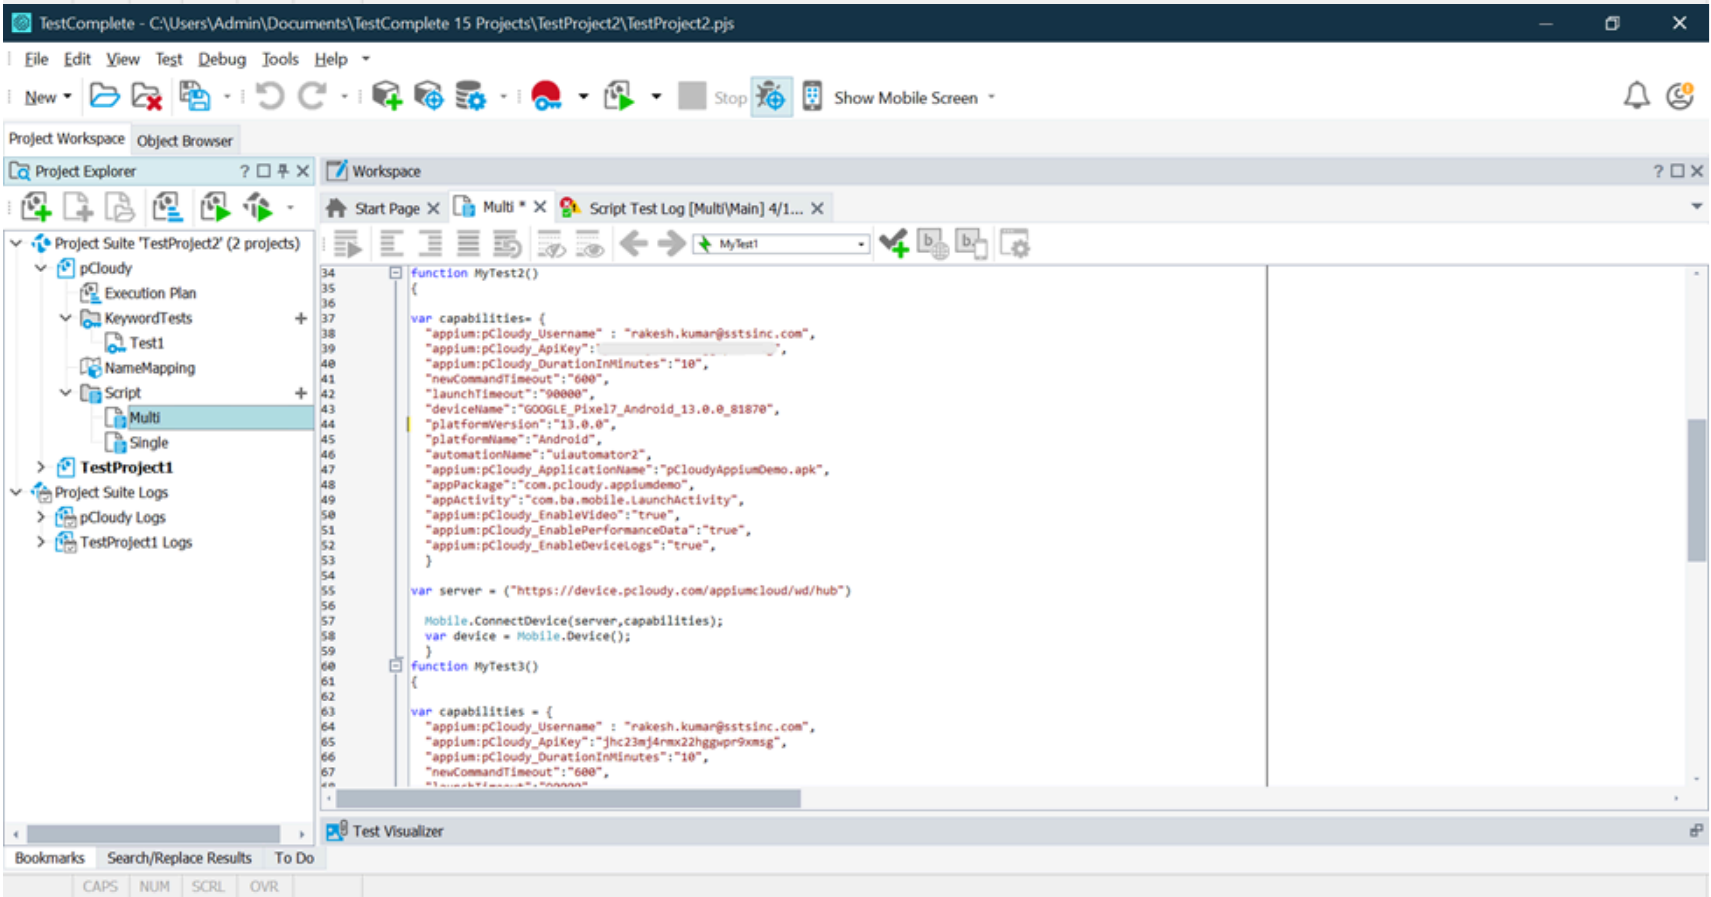
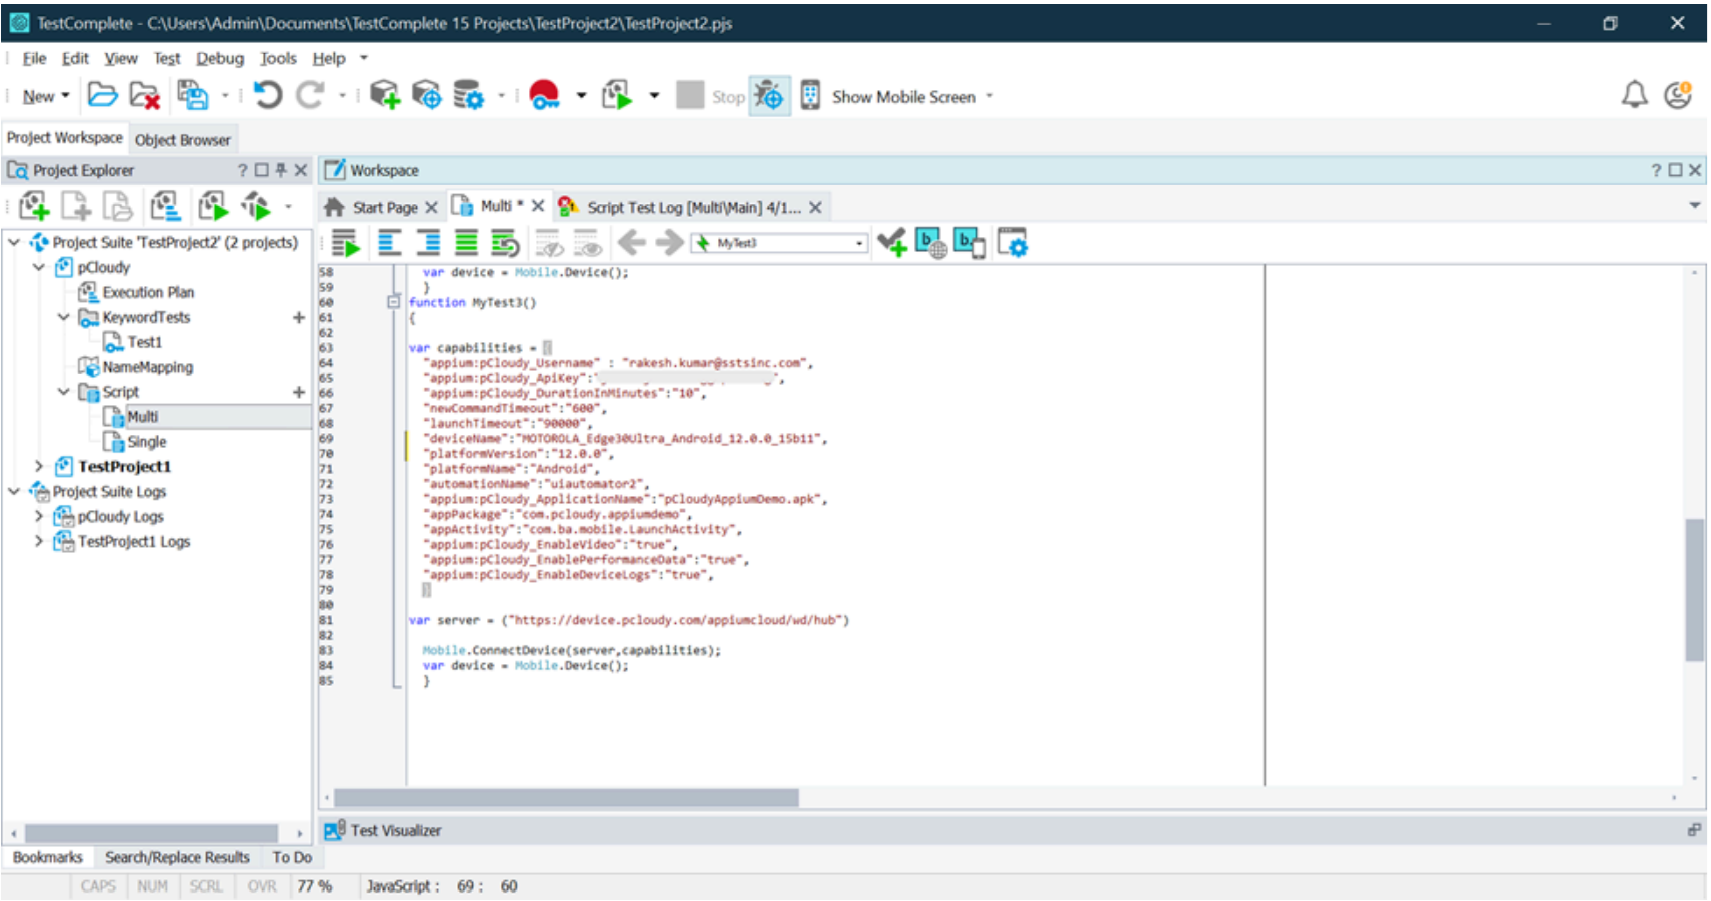
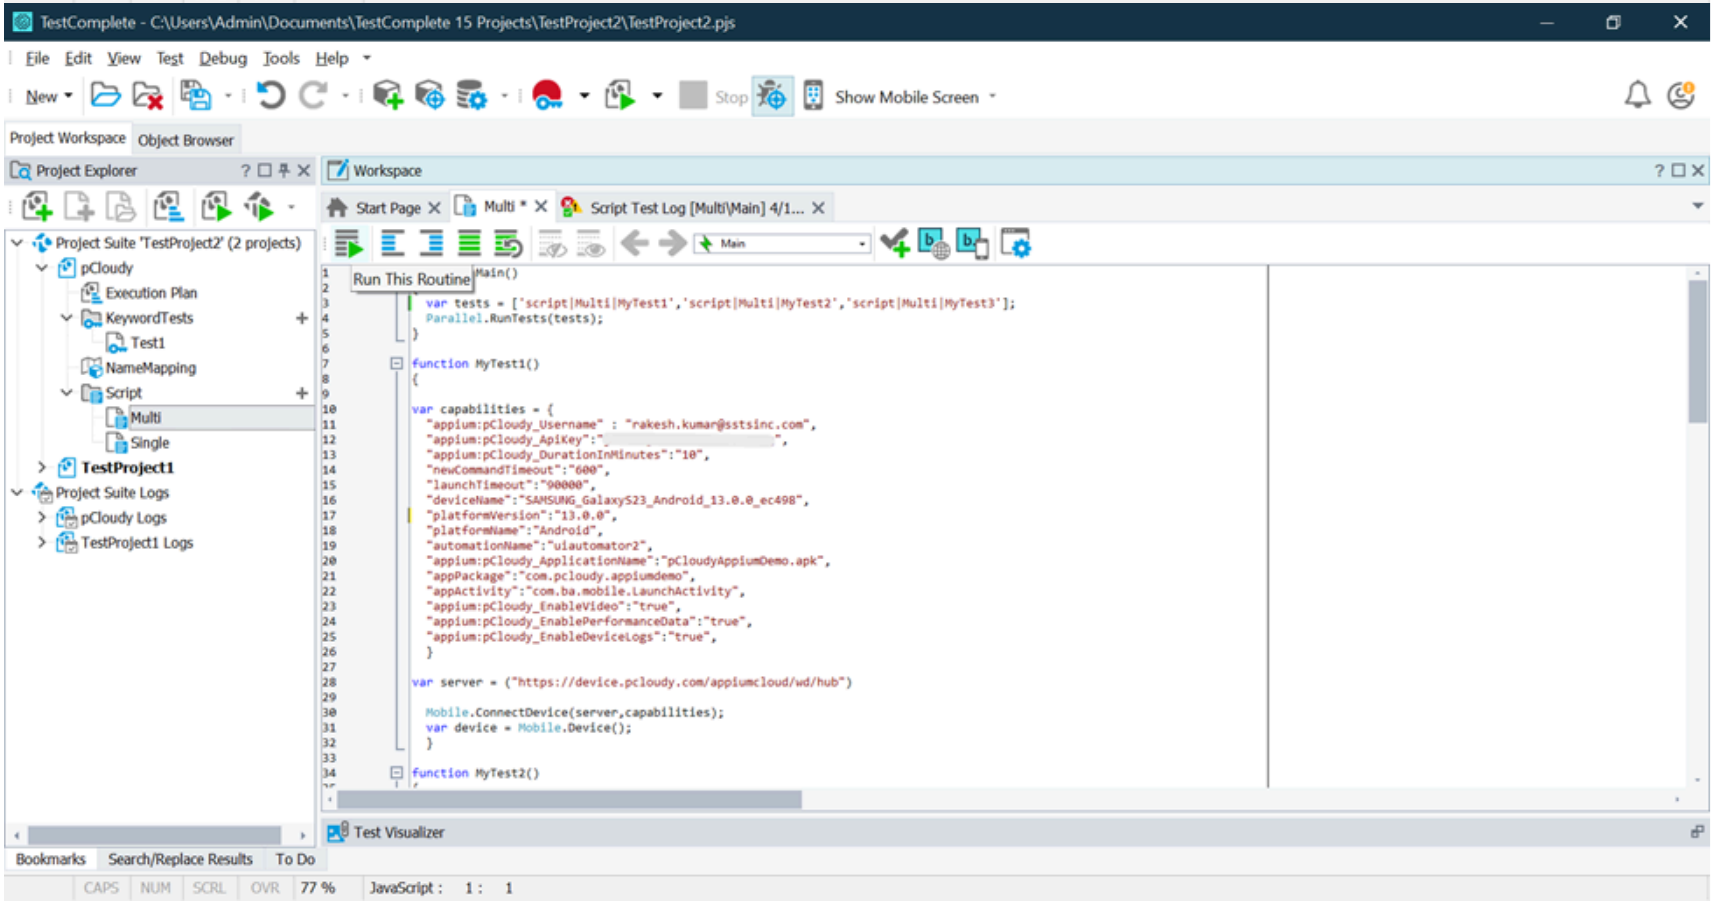
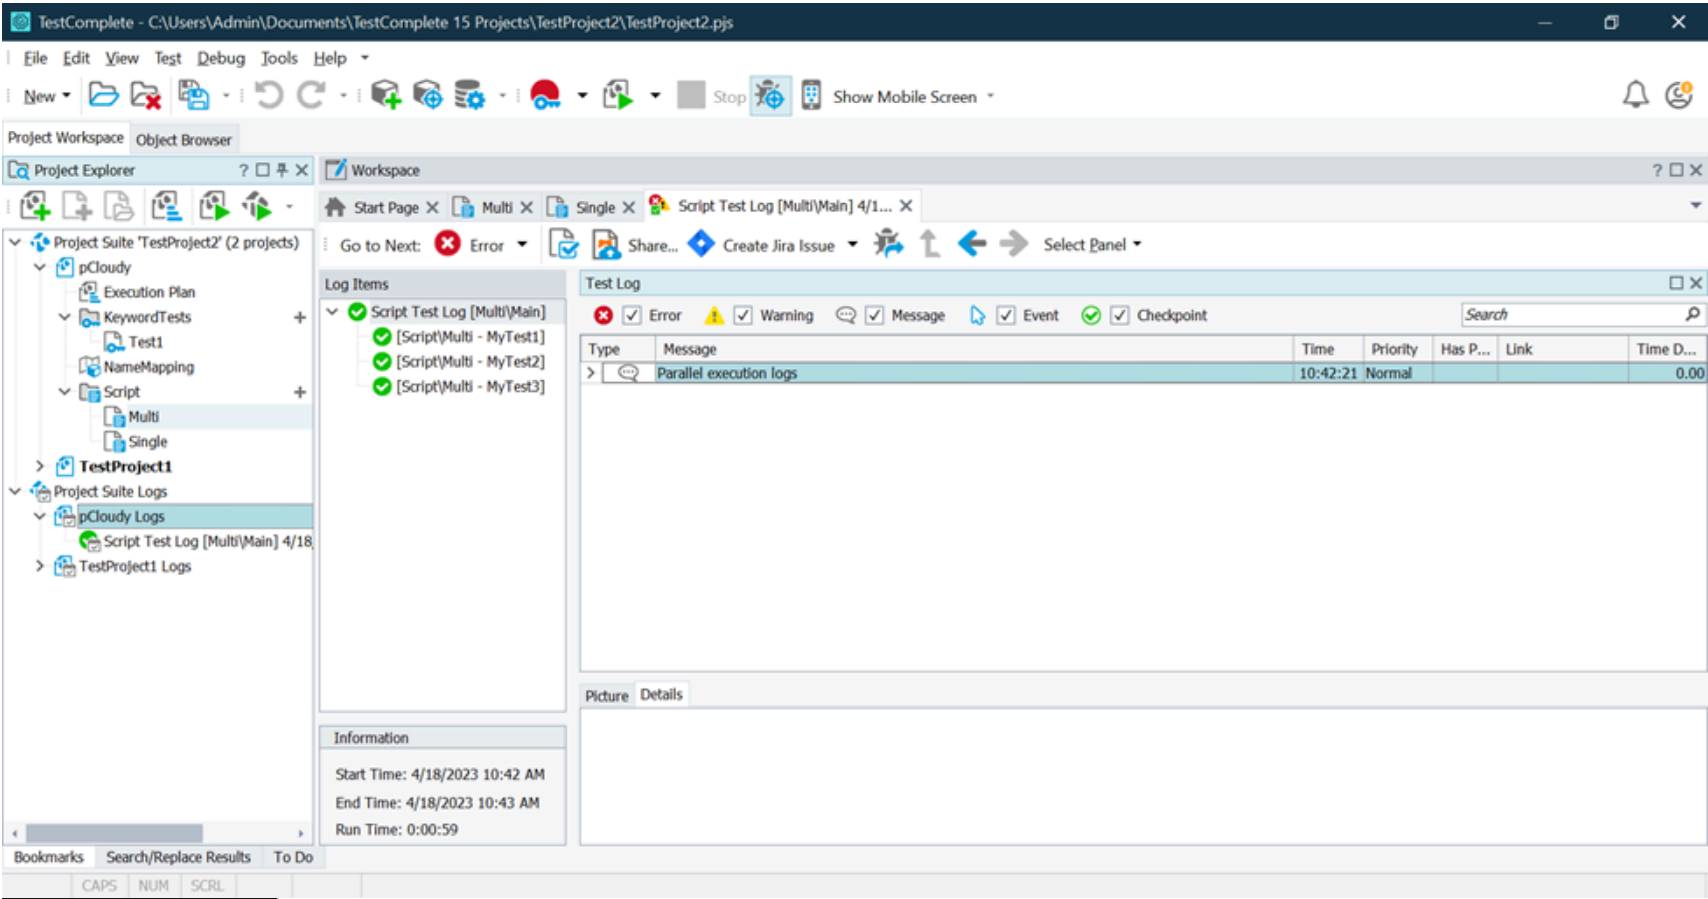
Running Tests in Parallel on Multiple Devices
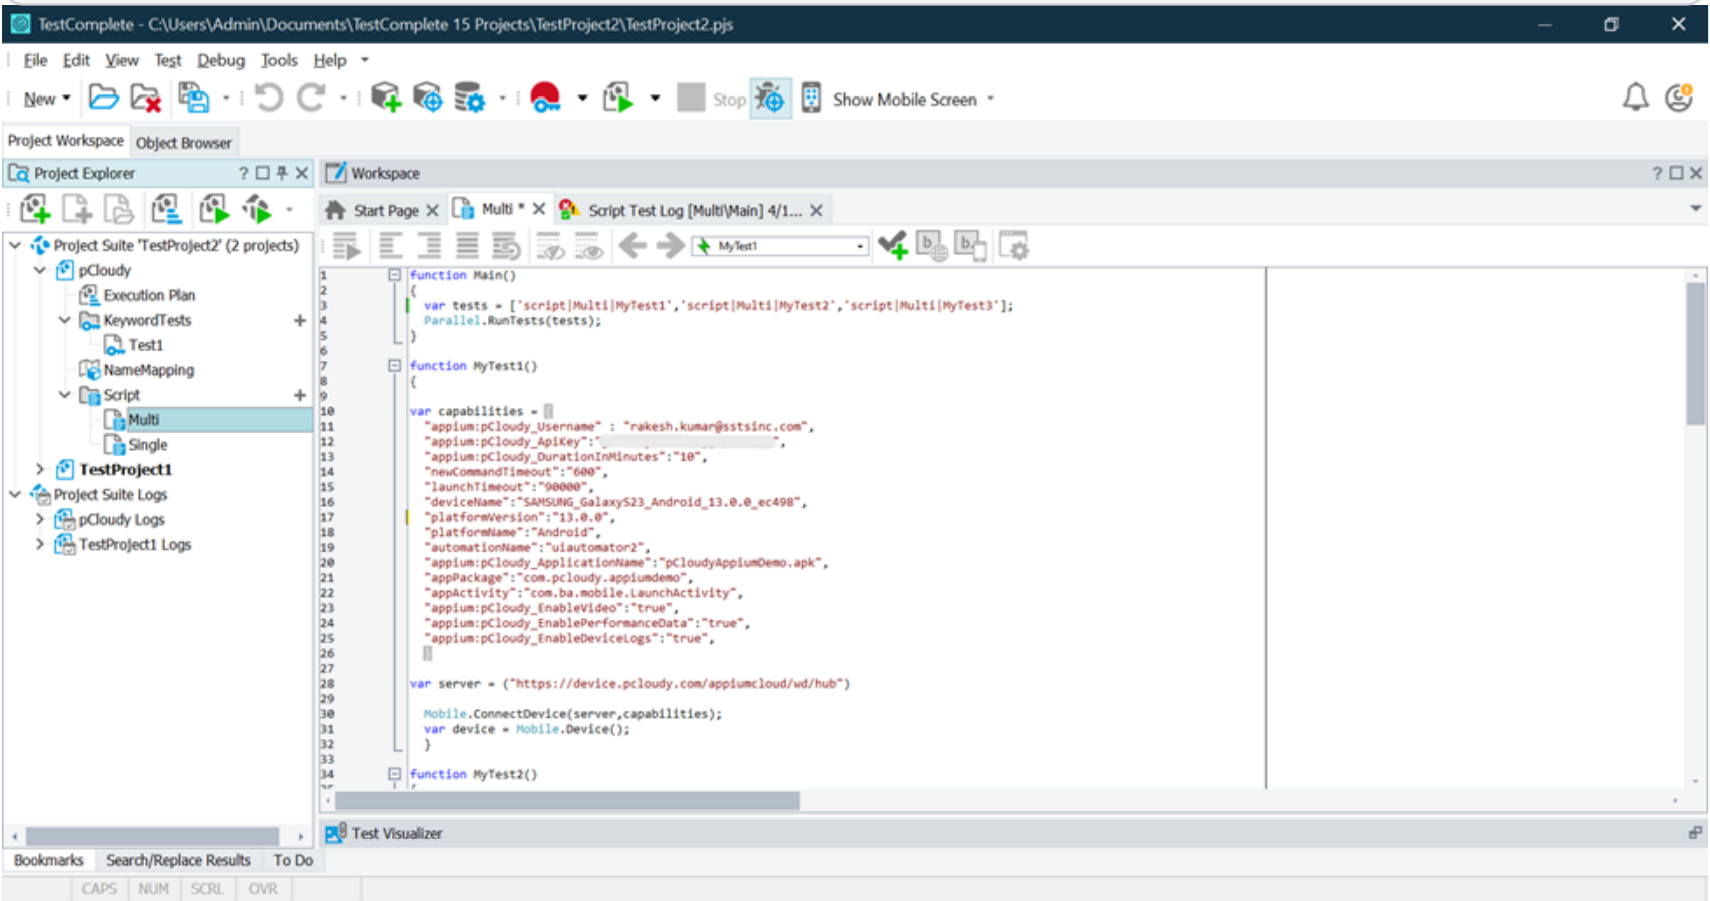
- Create a new Unit under Script and add the scripts as mentioned below.
Example: We are adding three different test cases (Function MyTest1, Function MyTest2, Function MyTest3) to acquire different Android devices in parallel on this script.
Note: You can create the capabilities using Capability Configurator from Pcloudy portal and add the prefix "appium" to Pcloudy specific capabilities as mentioned below.
Function Test1()
{
var capabilities = {
  "appium:pCloudy_Username" : "abcd@1234.com",
  "appium:pCloudy_ApiKey":"Your APIKey",
  "appium:pCloudy_DurationInMinutes":"10",
  "newCommandTimeout":"600",
  "launchTimeout":"90000",
  "deviceName":"SAMSUNG_GalaxyS23_Android_13.0.0_ec498",
  "platformVersion":"13.0.0",
  "platformName":"Android",
  "automationName":"uiautomator2",
  "appium:pCloudy_ApplicationName":"pCloudyAppiumDemo.apk",
  "appPackage":"com.pcloudy.appiumdemo",
  "appActivity":"com.ba.mobile.LaunchActivity",
  "appium:pCloudy_EnableVideo":"true",
  "appium:pCloudy_EnablePerformanceData":"true",
  "appium:pCloudy_EnableDeviceLogs":"true",
}

var server = ("https://device.pcloudy.com/appiumcloud/wd/hub")
Mobile.ConnectDevice(server, capabilities);
var device = Mobile.Device();
}
-
Choose Main for the execution and click on Run This Routine to run the scripts.

-
The mentioned devices from the capabilities will be acquired and you can view the sessions live under the My Active Sessions tab on Pcloudy portal.

-
You can view the logs on TestComplete and you can get the reports for the session under the Reports section on Pcloudy portal.

Did this page help you?