Overview
The New version PDA 2.0.0 comes with a ton of enhancements, some of them include Log out button, location filter enhancement, and much more.
You can Click here to download the latest PDA (2.0.0)
Enhancements
-
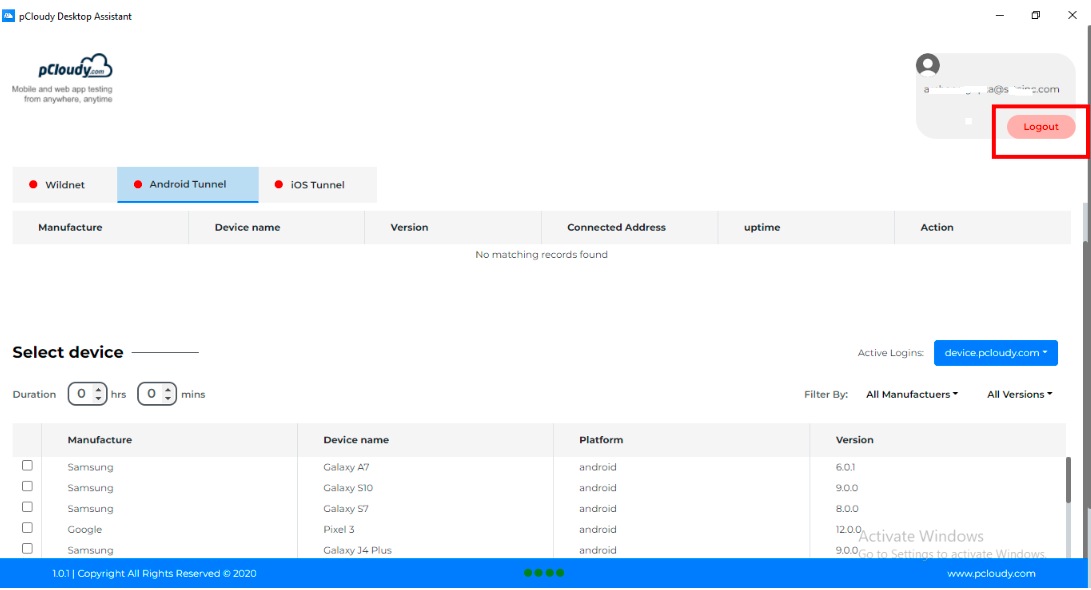
Provision of Log-out option: This enables the user to log out and log in again with the same or another credential without closing the application.
-
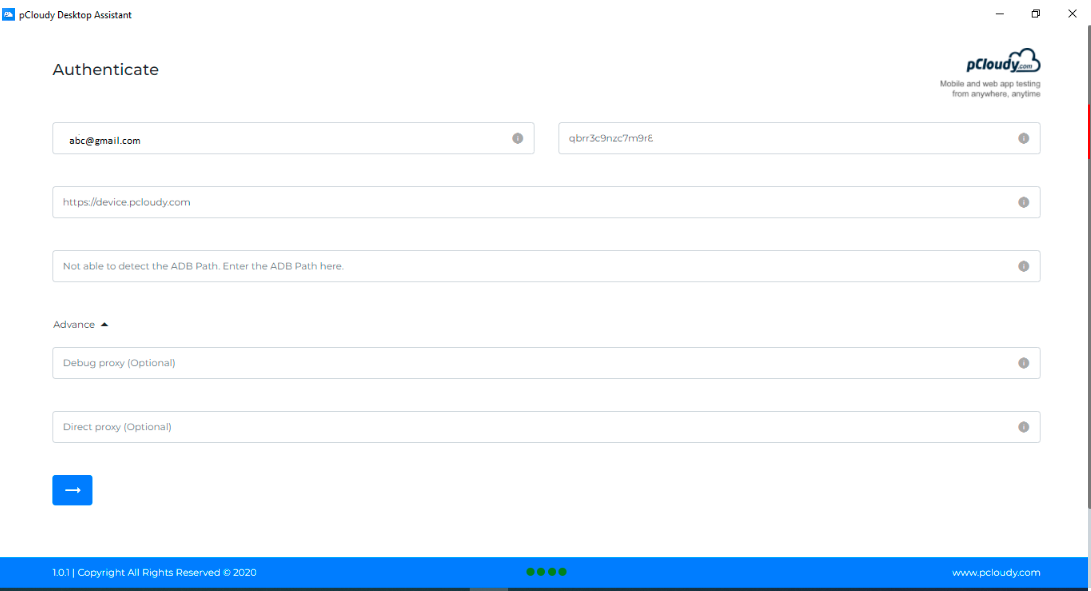
Autosave login detail: This enhancement helps the user to save time. Now entered details will get saved, once the user types them in. They don't have to enter login details every time they open the application.
-
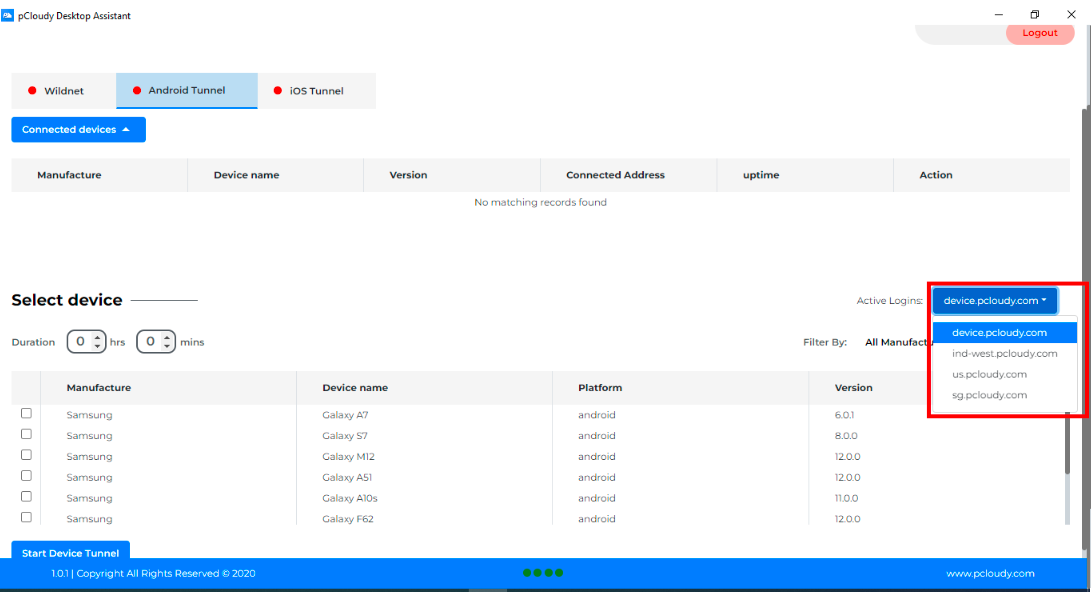
Device location filter enhancement: This enhancement prevents the user from manually entering sub-cloud detail. Once the user enters the main cloud detail, sub cloud is accessible just by changing the dropdown.
-
iOS Tunnel Enhancement: This enables users to have admin permission only once. Now they don't need admin permission(SUDO) each time they run the iOS tunnel.
- Steps to use Socat instead of SUDO
-
Install socat using brew
brew install socat
To Download tunnel Utils.zip Click here -
Go to Downloaded Folder
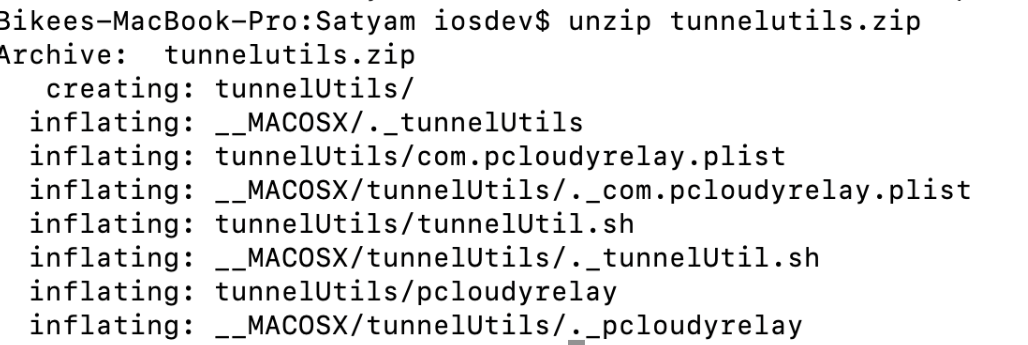
e.g.cd /Users/iosdev/Desktop/adam/
-
Give 777(all permission, read/write/execute )permission to script and executable.
-
Execute tunnelUtil.sh with sudo permission.
-
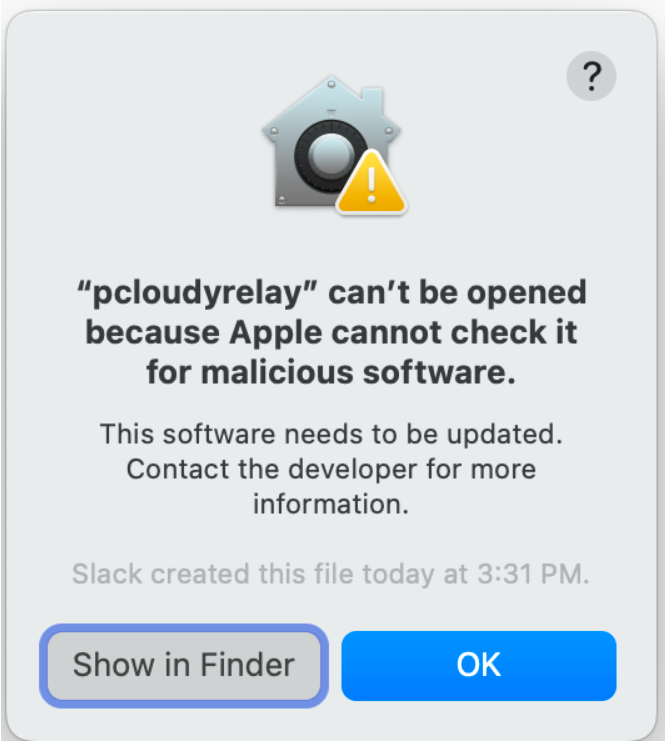
Click on the Ok button.
-
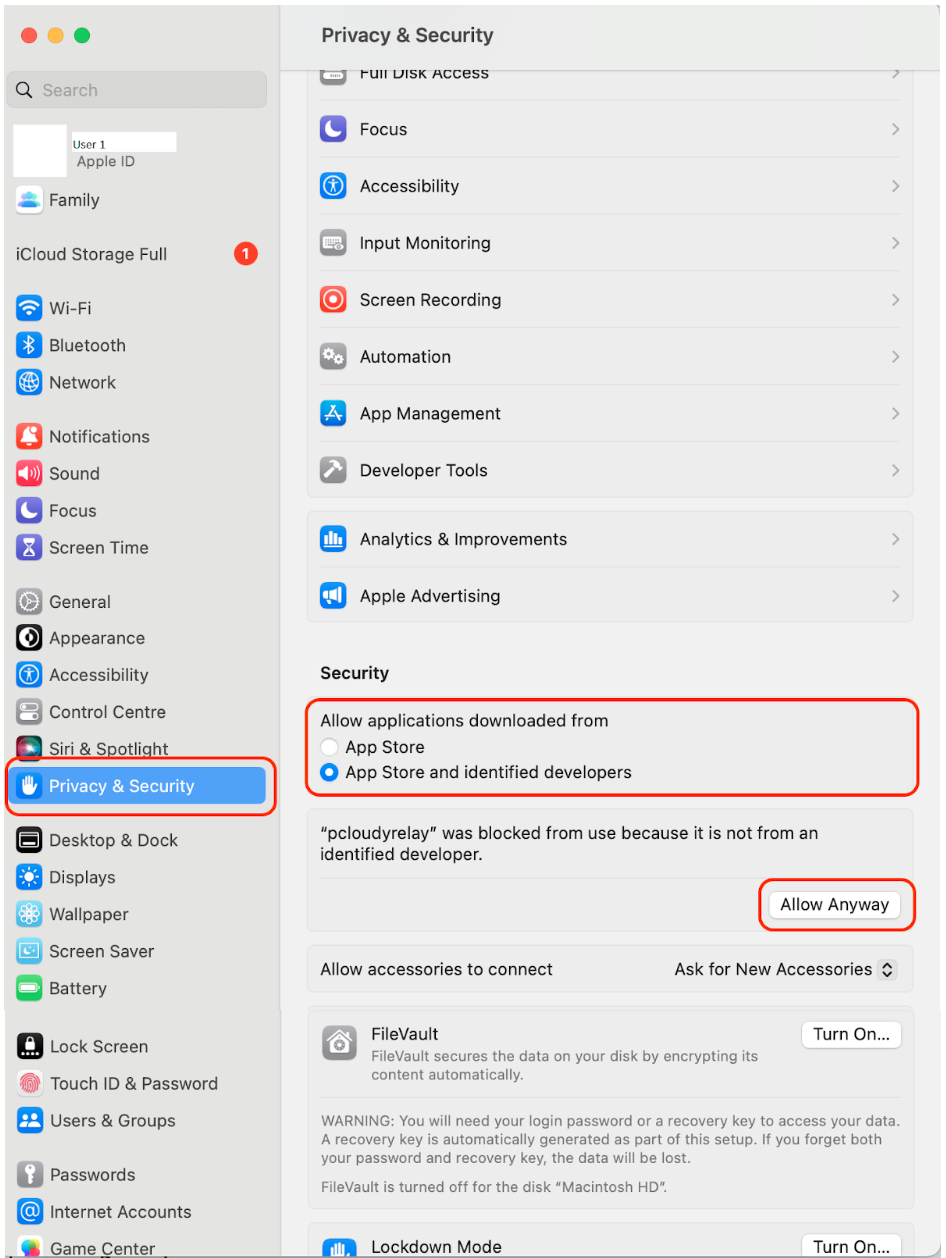
Open System Preferences -> Privacy and Security -> Security-> Select “App Store and identified developers” and click “Allow anyway”.
-
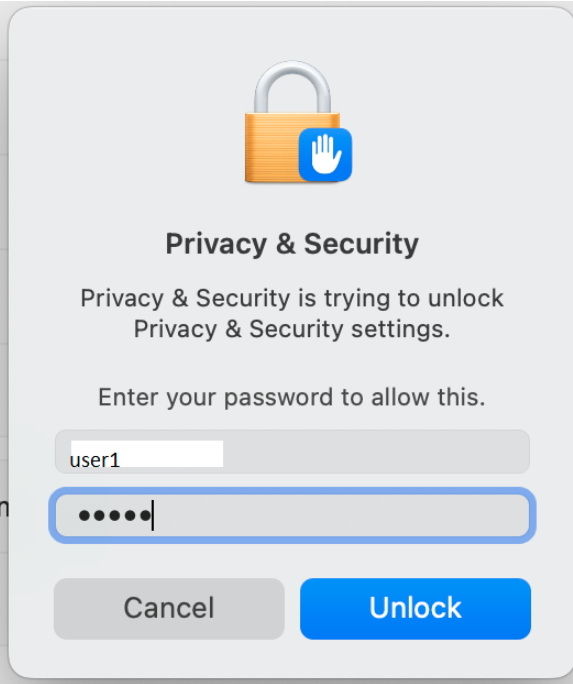
Enter Admin Password.
-
Run tunnelUtil.sh command with sudo again
-
- Steps to use Socat instead of SUDO
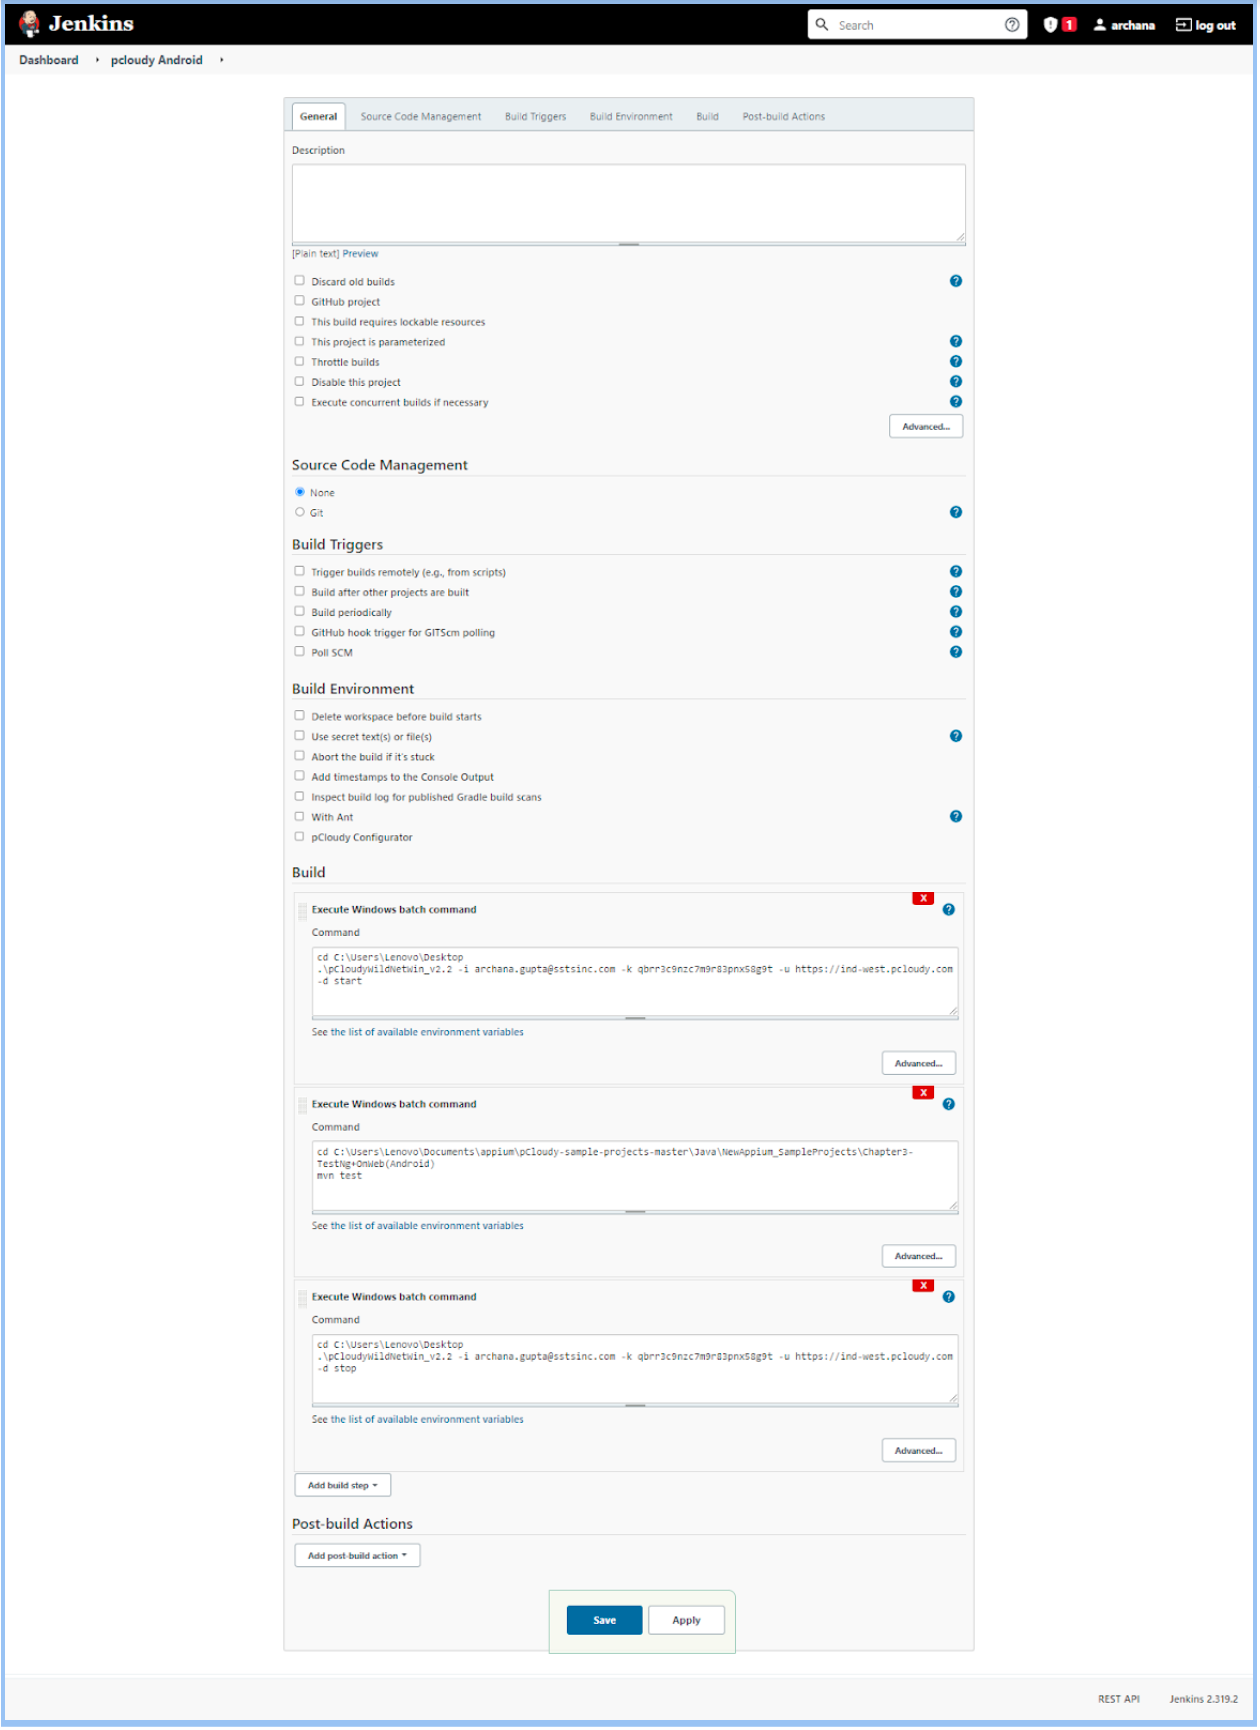
Running Wildnet using the Jenkins Pipeline
User can leverage the pcloudy wildnet utility as part of the CI process by integrating it with a Jenkins CI job on Windows, mac, or Linux. Using this utility user can run wildnet without using the PDA application.
Using this users can test their local site on any android/iOS device on the pCloudy platform. So Wildnet provides a platform to test private or internal servers on any Android/iOS device present on pCloudy.
Steps to Enable Wildnet using Jenkins Pipeline
-
Create a new Jenkins job
-
Download “Wildnet utility”.
- To download Demonised WildNet utilities Click here
- Make sure you extract from the archive
-
Activate the client
- To Start the wildnet, execute the below command
-
Email: User registered email on the pCloudy platform
-
Cloud URL is platform URL .e.g https://device.pcloudy.com
-
API access key: is the security token: To get the Access key - Login to the pCloudy platform->Go to Profile>Copy the access key
-
wildnet-demonise-utilities->unzip the downloaded utility and as per OS use the below-mentioned utility
-
For Linux use-pCloudyWildNetLinux_v2.2
-
For Mac use->pCloudyWildNetMac_v2.2
-
For Windows use->pCloudyWildNetWin_v2.2.exe
Eg:
C:\Users\Lenovo\Desktop\PDA1\wildnet-demonise-utilities>.\pCloudyWildNetWin_v2.2 -i abc@pcloudy.com -k ************* -u https://device.pcloudy.com -d start
-
-
To Stop the wildnet use below mentioned command
Eg:
C:\Users\Lenovo\Desktop\PDA1\wildnet-demonise-utilities>.\pCloudyWildNetWin_v2.2 -i abc@pcloudy.com -k ************* -u https://device.pcloudy.com -d stop
Run the below-mentioned executable command on the terminal:
To Stop wildnet
Refer below screenshot as an example
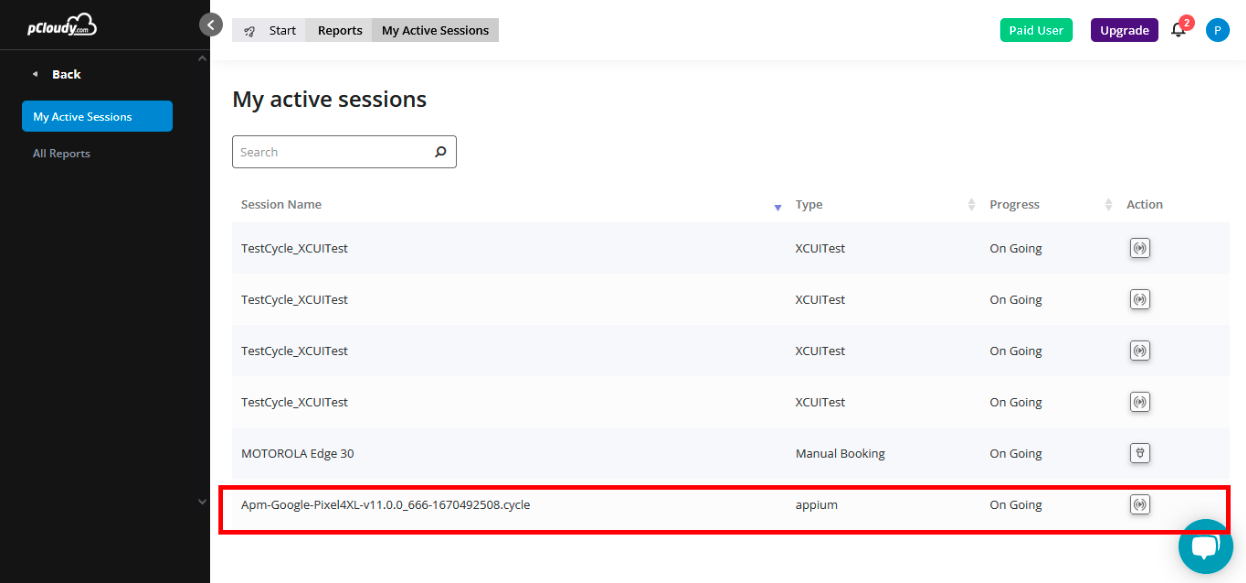
Login to the pCloudy platform and navigate to-> All Reports-> My Active Sessions