pCloudy has released a plugin for Android Studio which provides you access to the platform for performing manual and automation testing of mobile apps from within Android Studio IDE.
For Manual Testing
Now you can build and upload your Android Apps to pCloudy devices directly from your Android Studio project workspace.
If you are using Appium as automation tool and have created your Automation scripts as a project in Android Studio, you can run the scripts directly on pCloudy devices.
Prerequisites
1. An account in pCloudy with enough credits.
2. An API Access key for authentication with pCloudy.com
3. Chrome Browser on local machine
4. Android Studio IDE
5. Android Studio pCloudy plugin
Preparation
Reference the JAR files to Eclipse
Make a note the API Username and API Access Key
How to Install the Plugin
1. Download the Android Studio plugin for pCloudy
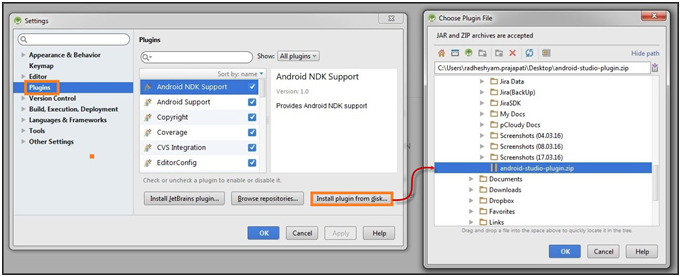
2. Open your Android Studio > go to Setting icon of Android Studio > Select Plugins > All available plugins are shown which can be filtered with the help of Show feature as per requirement.
3. Click on Install plugin from disk > Browse and select location of your downloaded Android Studio plugin of pCloudy
4. Click on OK
5. Now, you can see that pCloudy plugin has been successfully integrated to Android Studio.
Select pcloudy plugin and click on OK to proceed. Here, we are going to install pCloudy plugin for Android Studio from local disk. Click on Install plugin from disk
pCloudy plugin for Android Studio has been integrated successfully.
pcloudy-plugin-over-android-studio
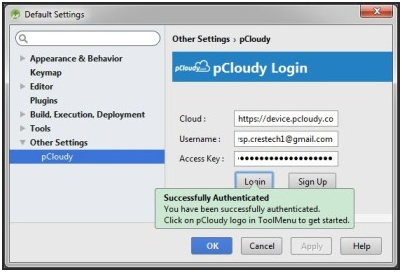
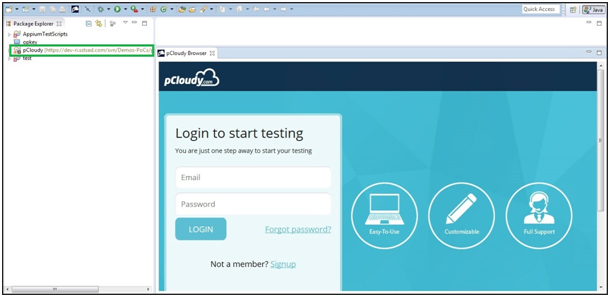
Click on pCloudy plugin icon shown on Android Studio. pCloudy Login page opens. Enter your Username and Access Key and click on Login. Your login credentials are verified. Click on OK to proceed.
Note: This is one-time task. Credentials will be valid until you logout.
Now, you are ready to use the Android Studio Plugin for pCloudy.
Manual Functional Testing of App
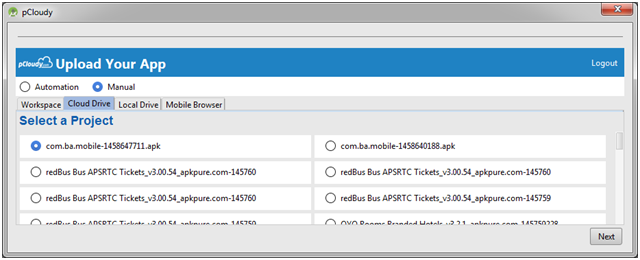
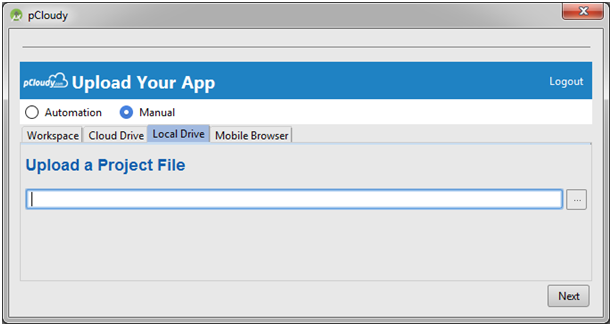
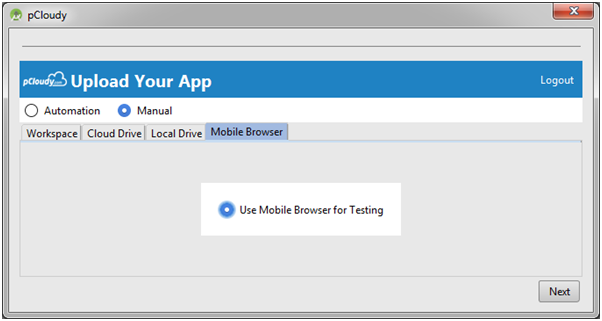
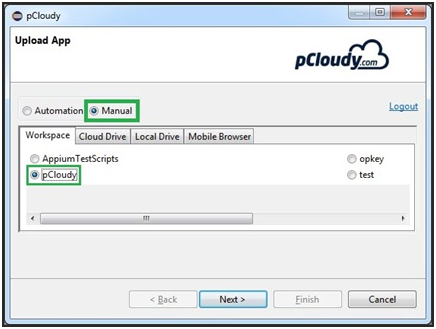
After successful login, upload your app screen appears. Workspace page helps you to select application path of your local machine.
Cloud Drive page lets you to select app from the list and click on Next to proceed.
Local Drive lets you to upload your app from your local machine to perform testing.
Mobile Browser enables you to use mobile browser for testing.
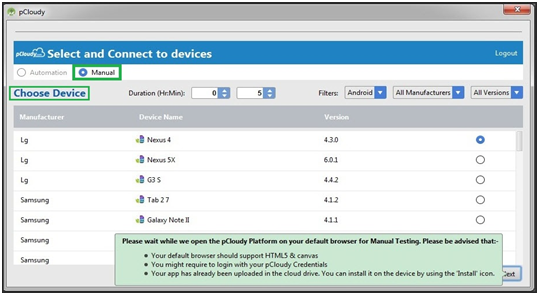
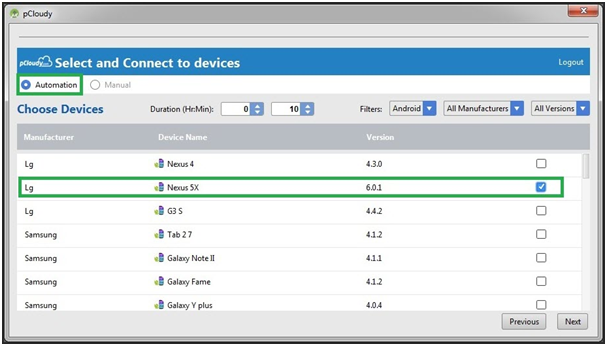
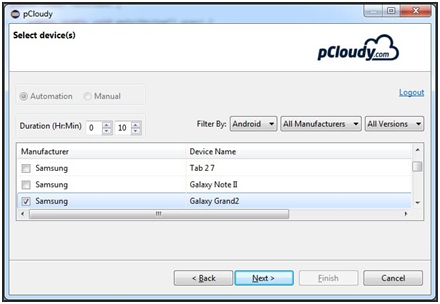
After selecting app, the next step is choosing a device. Select and Connect to devices page provides you list of devices which can be filtered by using filter parameters (Android/iOS, Manufacturer, and OS version). Select duration of your testing. The device will get booked for selected time duration.
When you click on Next, you get a message “Please wait while we open the pCloudy Platform on your default browser for Manual Testing. Please advised that…”
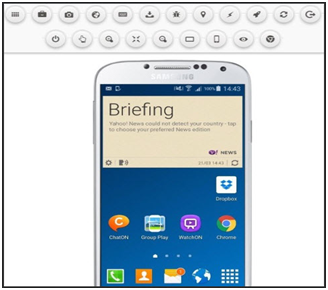
Just after few seconds, you will be redirected to the connected device page over pCloudy to perform manual functional testing of your app on selected device.
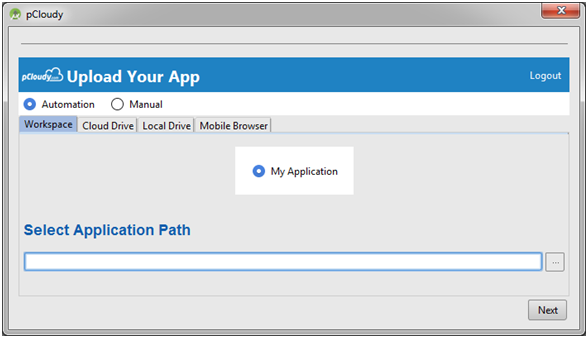
Similarly, the first step towards performing automation testing is selecting an app from workspace/cloud drive/local drive or use mobile browser.
Select your desired device; select duration of automation testing. You can filter devices displaying devices by using filter options (Android/iOS, Manufacturer, and OS version). Click onNext to proceed.
Note: Here, you can select multiple devices as well.
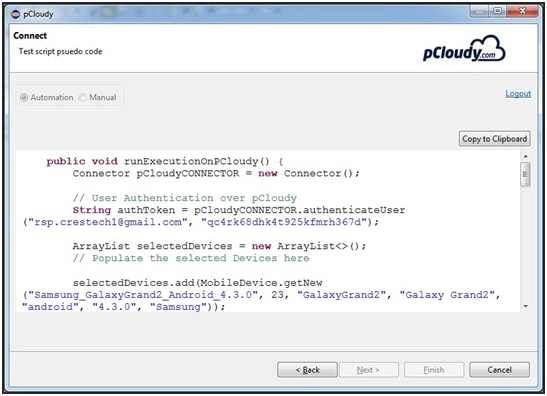
Finally, you get corresponding pseudo code for performing Automation testing of app. You can copy this pseudo code to clipboard and use it within your Automation script…
You will need the pCloudy java connector jar file for the above code to work. The pCloudy-java-conector.jar contains the API wrappers, classes & methods to use the pCloudy RestfulAPIs (without knowing how to call rest webservices from java). The gson.jar is a well known, opensource google library. You should add the pCloudy-java-connector.jar in its build path as a reference within your java project containing appium scripts.
pCloudy provides a plugin for Eclipse IDE. Using the plugin you can perform both manual and automation testing of mobile apps. The plugin provides a user interface to connect to the pCloudy platform. You can upload apps, book devices and perform your testing right from your IDE.
For Manual Testing
Upload your app to the cloud drive, select the device, and perform the manual testing of your app right from Eclipse.
For Automation Testing
This plugin helps you get a pseudo code for your Test Scripts to run on multiple pCloudy Real Devices in Parallel. Just install the plugin, login to pCloudy.com, upload your app, select devices and get the pseudo code.
Prerequisites
You have an account over pCloudy with enough credits.
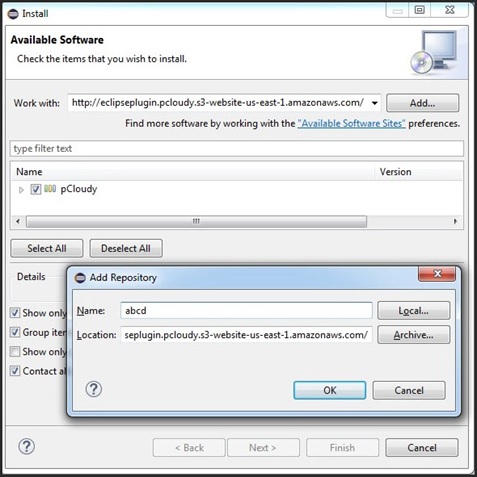
Click on Add, a new pop up window of Add Repository will open
Enter Name and Location, click on OK
Check pCloudy checkbox and then click on Next
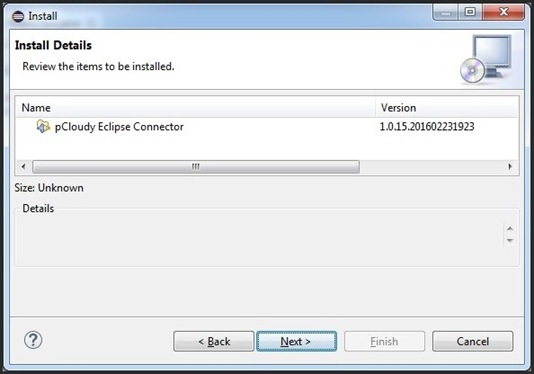
Now, you need to install pCloudy Eclipse Connector. Click on Next to begin pCloudy Eclipse Connector installation.
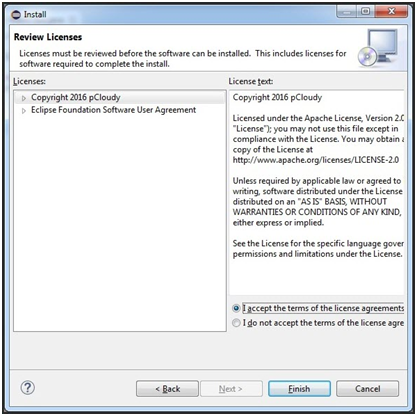
Further, check I accept the terms of the license agreements checkbox and click on Finish.
Installation of pCloudy Eclipse Connector begins.
On completion of pCloudy Eclipse Connector installation successfully, an alert message appears. Click on OK to proceed pCloudy plugin.
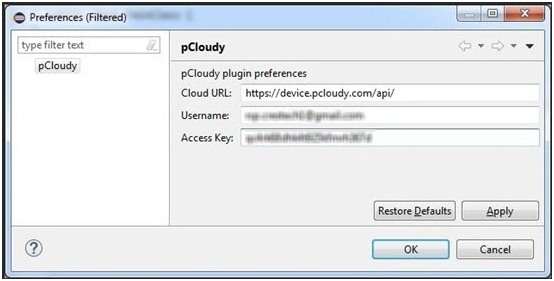
Now, enter Cloud URL of pCloudy along with registered Username and Access Key over pCloudy to login successfully. Click on Apply and then OK.
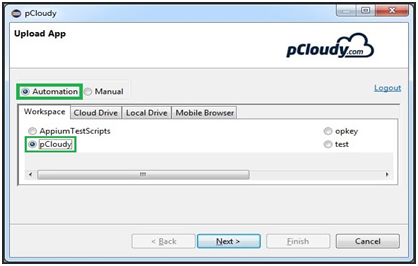
Now, you are able to perform Automation/Manual testing of apps based on Appium TestScripts/pCloudy/OpKey or Test as per your requirement.
Automation Testing of App
To perform automation testing of your app, here’s a checklist you need to prepare for Automation
Here, we are discussing about Test Automation of apps by over pCloudy.
Select Automation & pCloudy and then upload your app to be tested.
Click on Next to proceed.
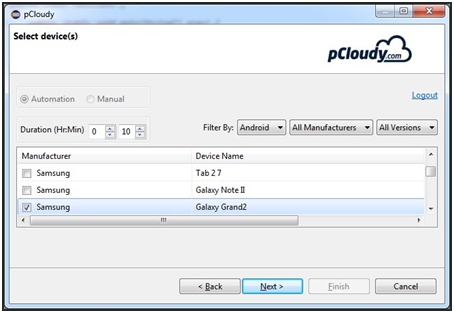
Select duration and filter list of devices by using given filter parameters (Android/iOS, Manufacturer, and Version). Select desired device (Ex. Samsung) and click on Next.
Finally, you get pseudo code for performing Test Automation. You can copy it to clipboard or copy it manually by selecting entire pseudo code.
You will need the pCloudy java connector jar file for the above code to work. The pCloudy-java-conector.jar contains the API wrappers, classes & methods to use the pCloudy RestfulAPIs(without knowing how to call rest webservices from java). The gson.jar is a well known, opensource google library. You should add the pCloudy-java-connector.jar in its build path as a reference within your java project containing appium scripts. See this link to learn how to add reference in eclipse.
You can download pCloudy-java-connector.jar & gson.jar(a dependancy of the pCloudy-java-connector.jar)
Manual Testing of App
If you want to perform Manual Testing of apps over pCloudy through Eclipse then select Manual way and pCloudy and upload app to be tested. Click on Next to proceed.
Select duration and filter list of devices by using given filter parameters (Android/iOS, Manufacturer, and Version). Select desired device (Ex. Samsung) and click on Next.
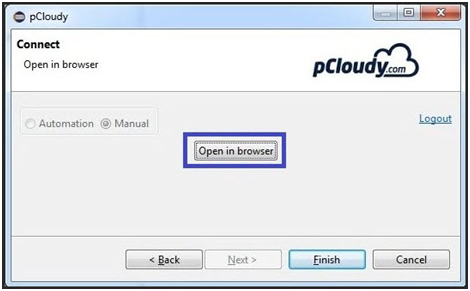
Now, you are recommended to open pCloudy in browser. Click on Open in browser and then on Finish.
When you click on Finish, pCloudy login page opens in eclipse. Now, you can login and perform manual testing on selected device as well
Fast Feedback — Every time someone pushes new code into the source repository, it is crucial to ensure that the integrity of the software is maintained. The plug-in enables you to receive immediate feedback and to help you understand which changes when introduced, made either the compile/build cycle or the tests to fail, and how to revert it.
Streamlines and saves time – Spend less time on build integration and more time on app development. Much of the work of frequent integrations is handled by automated build and testing systems, meaning developer time isn’t wasted on large-scale error-ridden integrations. On the other hand, when app developers need to test their apps on a number of mobile devices, a cloud platform like pCloudy helps you to easily select, manage, or schedule real devices for app testing. It drastically reduces the amount of time spent on device management activities like maintenance of the devices and controlling the version of OS on the devices; and not just that, it also provides an access to a host of iOS and Android devices to install and test your app on.
Continuously and consistently improve app quality – Using Jenkins allows you to receive immediate feedback from automated testing whenever a new code is pushed. Further, by automating the testing on a range of real devices helps you to improve the quality of the app. With this integration of Jenkins and pCloudy, any bugs can be instantly detected and resolved, keeping the app software in a state where it can be safely released at any time.
Speedy Development — Automated build integration and automated tests running on Real devices can be triggered anytime, this enables decreased wait time and results in faster development and deployment. Additionally, integration costs are reduced as serious integration issues are less likely.
Using continuous integration tools like Jenkins with a mobile device cloud platform like pCloudy is a powerful combination that definitely unlocks faster, better and economical means of testing and releasing quality apps.
Installing the Plugin:
An Overview:
pCloudy has released a plugin for Jenkins which provides you access to the platform for performing automation testing of mobile apps from within Jenkins on real devices.