
Last updated on : 07 Jul 2026
Katalon Studio
Overview
Katalon Studio enables you to perform automated Mobile and Web Testing by creating codeless automation scripts and with a powerful record and playback feature. Integrating Katalon Studio with Pcloudy will help you run your existing scripts on 5000+ browsers and device combination.
Prerequisites
- Pcloudy Account and the Pcloudy capabilities.
- Mobile Application must be uploaded to the section on Pcloudy portal.
- Katalon Studio configured on the user machine.
1. Record a Test Case on a Pcloudy Device in Katalon
Step 1: Configure Remote Settings in Katalon
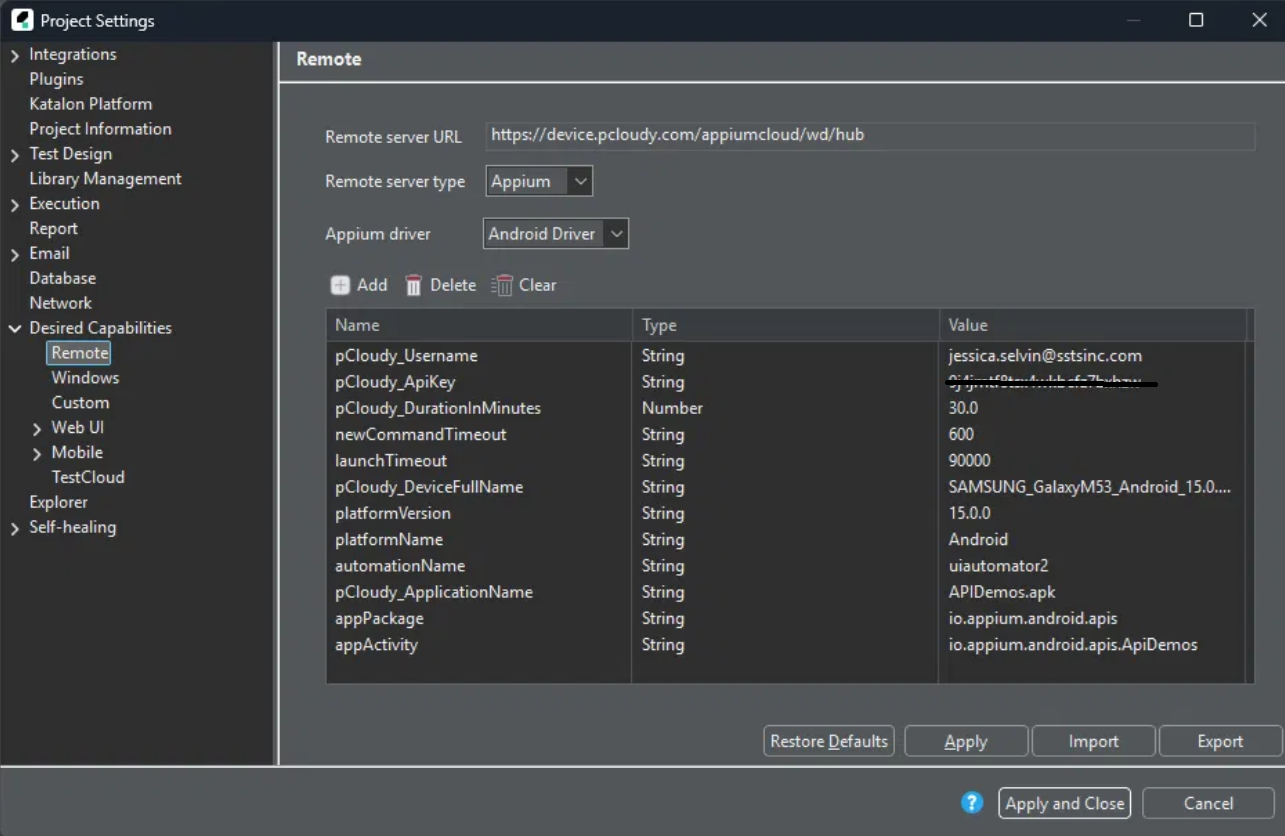
- Go to Project > Settings > Desired Capabilities > Remote
- Set the Remote server URL: https://device.pcloudy.com/appiumcloud/wd/hub
Note: To get the Remote Server URL, log in to Pcloudy, go to Capabilities under Mobile App Automation, select Appium, and copy the URL shown in the generated capabilities.
- Set Remote server type to Appium
- Set Appium driver to Android Driver (use iOS Driver for iOS applications)
Step 2: Add the Pcloudy Capabilities
Unlike Web automation, Pcloudy's mobile capabilities are added as flat key-value rows directly in the capabilities table — no Dictionary type is required here. Click Add for each row and enter:
| Name | Type | Value |
|---|---|---|
| pCloudy_Username | String | your Pcloudy account email |
| pCloudy_ApiKey | String | your Pcloudy API key |
| pCloudy_DurationInMinutes | Number | 30.0 |
| newCommandTimeout | String | 600 |
| launchTimeout | String | 90000 |
| pCloudy_DeviceFullName | String | e.g. SAMSUNG_GalaxyM53_Android_15.0 |
| platformVersion | String | 15.0 |
| platformName | String | Android |
| automationName | String | uiautomator2 |
| automationName | String | APIDemos.apk |
| appPackage | String | io.appium.android.apis |
| appActivity | String | io.appium.android.apis.ApiDemos |
- Click Apply and Close
Step 3: Select Katalon Recorder
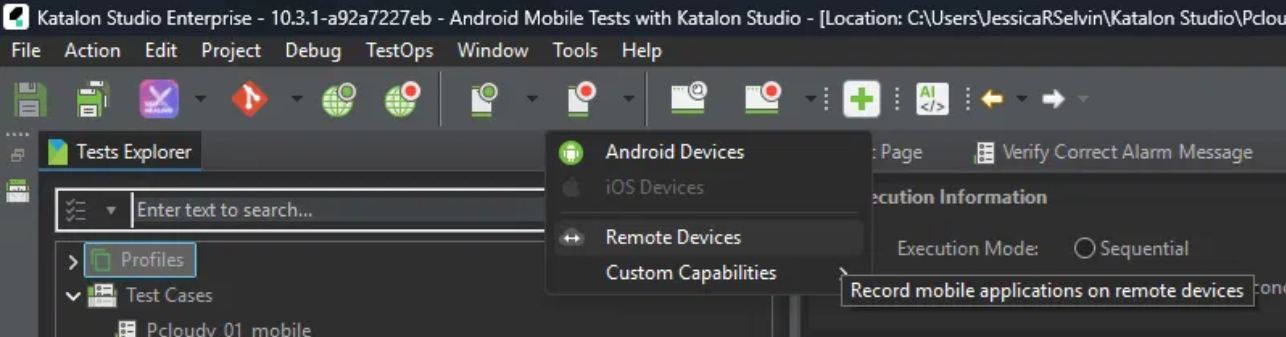
Katalon's Mobile Recorder can connect directly to a Remote Device session on Pcloudy, letting you capture objects and actions live on the device instead of writing test objects manually.
- In the toolbar, click the dropdown arrow next to the mobile recorder icon
- From the menu, select Remote Devices
Note: This menu also lets you record against local Android Devices or iOS Devices — select Remote Devices specifically to record on a Pcloudy session.
Step 4: Configure the Recorder
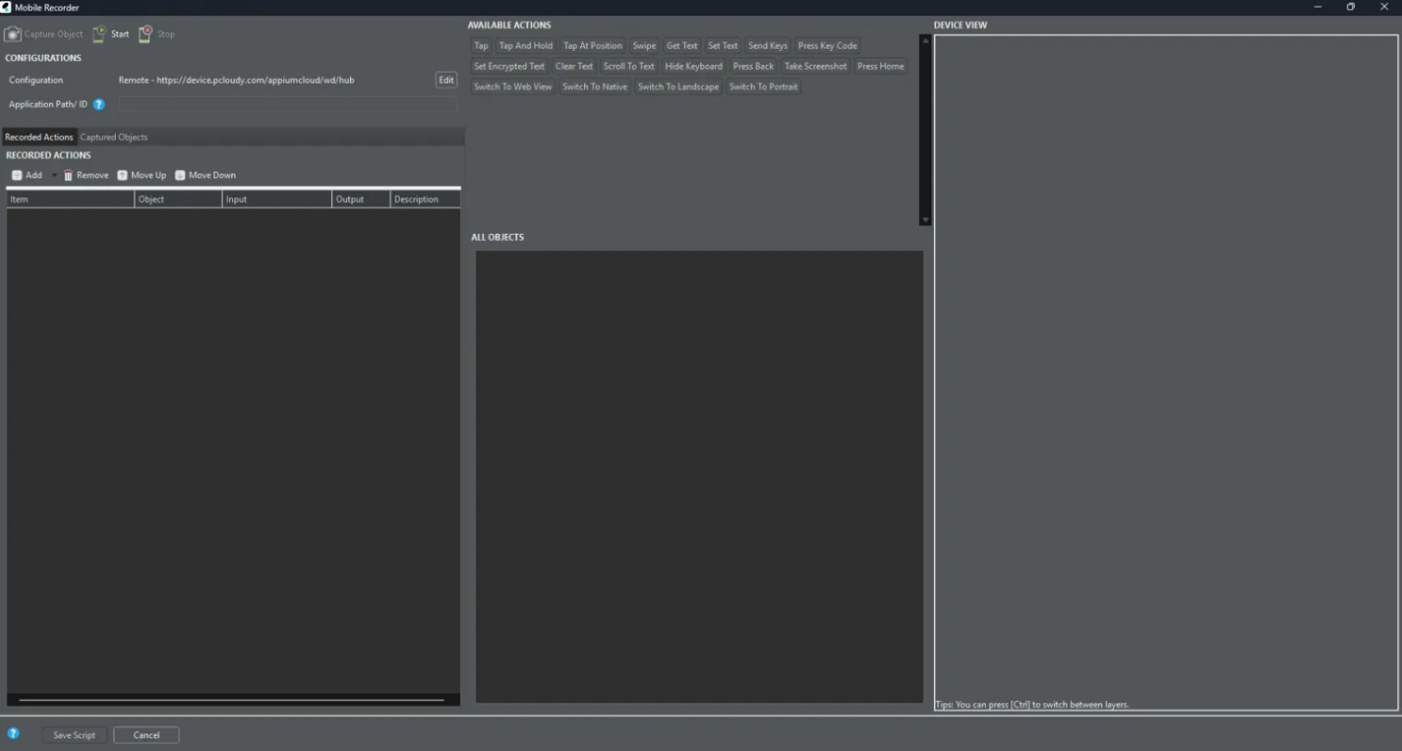
- In the Mobile Recorder window, check the Configuration field — it should already show your Remote setup:
- If it doesn't, click Edit to point it to the correct Remote configuration (the one set up in Project > Settings > Desired Capabilities > Remote)
- Leave Application Path/ID blank if the app capability (pCloudy_ApplicationName) is already defined in your Remote capabilities — Katalon will launch that app automatically
Step 5: Start Recording
- Click Start
- Katalon will launch the session on the Pcloudy device, and the live device screen will appear in the Device View panel on the right
Capture Objects and Actions
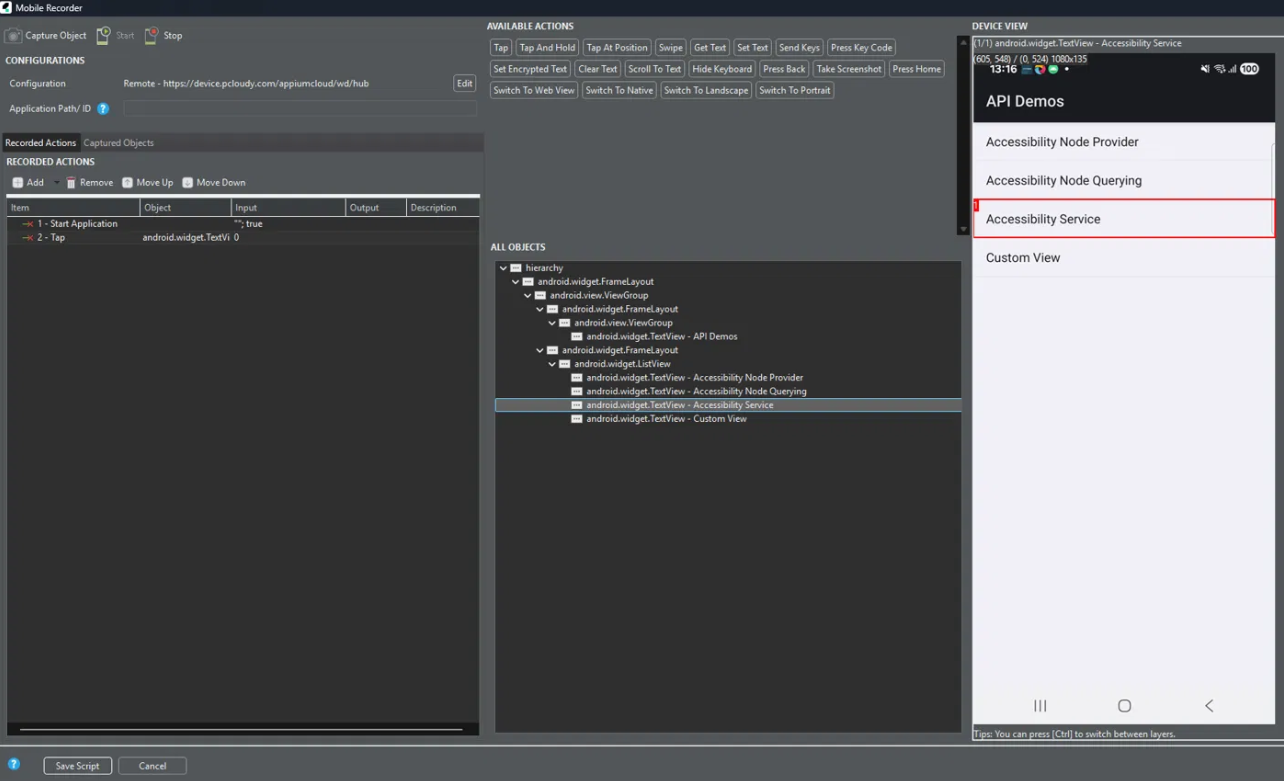
- Click Capture Object, then click any element directly on the Device View screen (e.g., a menu item like "Accessibility Service")
- The captured element appears highlighted with a red box in Device View, and is added to the All Objects tree on the left, showing its full hierarchy path (e.g., android.widget.TextView - Accessibility Service)
- Use the Available Actions buttons (Tap, Tap And Hold, Get Text, Set Text, Swipe, Press Back, Press Home, etc.) to record an action against the captured object
- Each action you perform is added as a new row in Recorded Actions with its Object, Input, and Output
Save the Script
- Once all required steps are recorded, click Stop
- Click Save Script
- Katalon converts the recorded actions into a test case, with each captured object automatically added to the Object Repository
2. How to Run Katalon Mobile Test Cases on Pcloudy
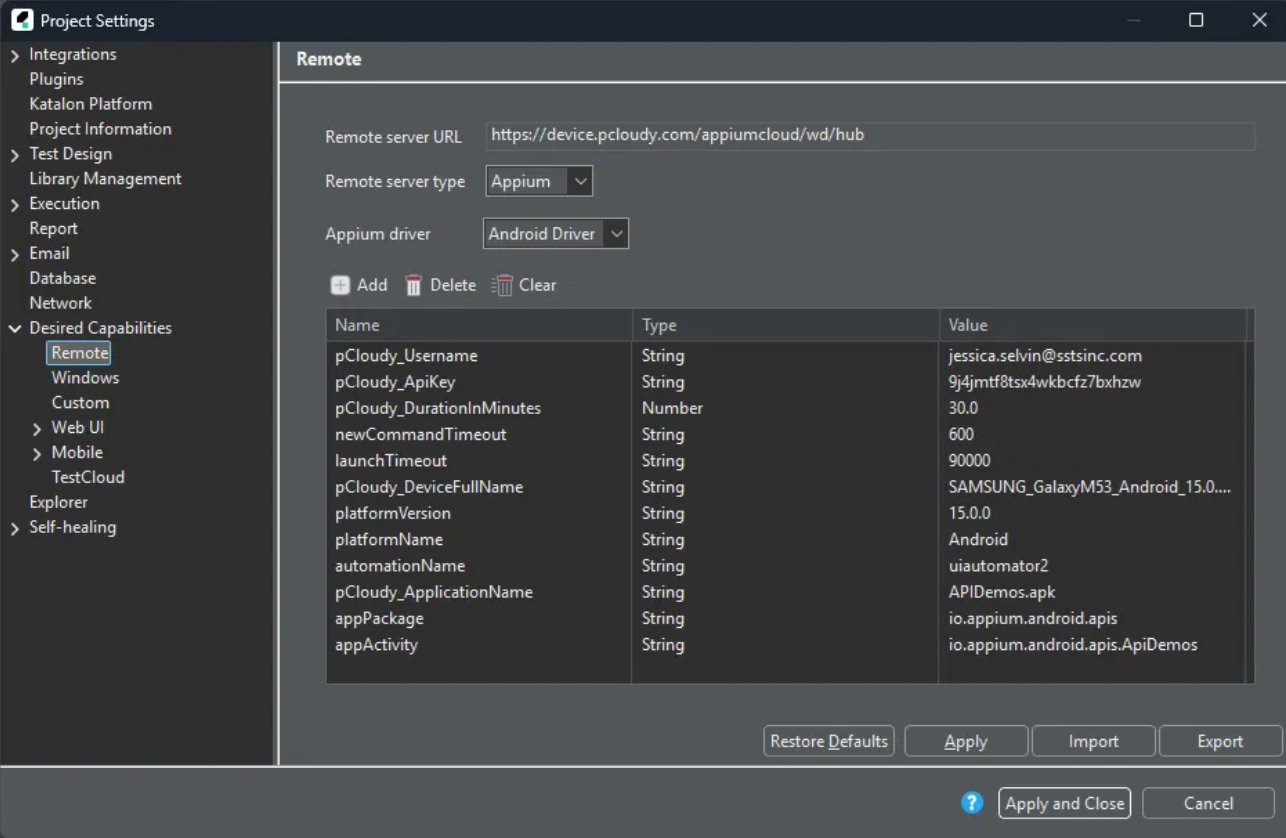
Step 1: Configure Remote Settings in Katalon
- Go to Project > Settings > Desired Capabilities > Remote
- Set the Remote server URL: https://device.pcloudy.com/appiumcloud/wd/hub
Note: To get the Remote Server URL, log in to Pcloudy, go to Capabilities under Mobile App Automation, select Appium, and copy the URL shown in the generated capabilities.
- Set Remote server type to Appium
- Set Appium driver to Android Driver (use iOS Driver for iOS applications)
Step 2: Add the Pcloudy Capabilities
Unlike Web automation, Pcloudy's mobile capabilities are added as flat key-value rows directly in the capabilities table — no Dictionary type is required here. Click Add for each row and enter:
| Name | Type | Value |
|---|---|---|
| pCloudy_Username | String | your Pcloudy account email |
| pCloudy_ApiKey | String | your Pcloudy API key |
| pCloudy_DurationInMinutes | Number | 30.0 |
| newCommandTimeout | String | 600 |
| launchTimeout | String | 90000 |
| pCloudy_DeviceFullName | String | e.g. SAMSUNG_GalaxyM53_Android_15.0 |
| platformVersion | String | 15.0 |
| platformName | String | Android |
| automationName | String | uiautomator2 |
| pCloudy_ApplicationName | String | APIDemos.apk |
| appPackage | String | io.appium.android.apis |
| appActivity | String | io.appium.android.apis.ApiDemos |
- Click Apply and Close
Step 3: Update the APK Name in Script Mode
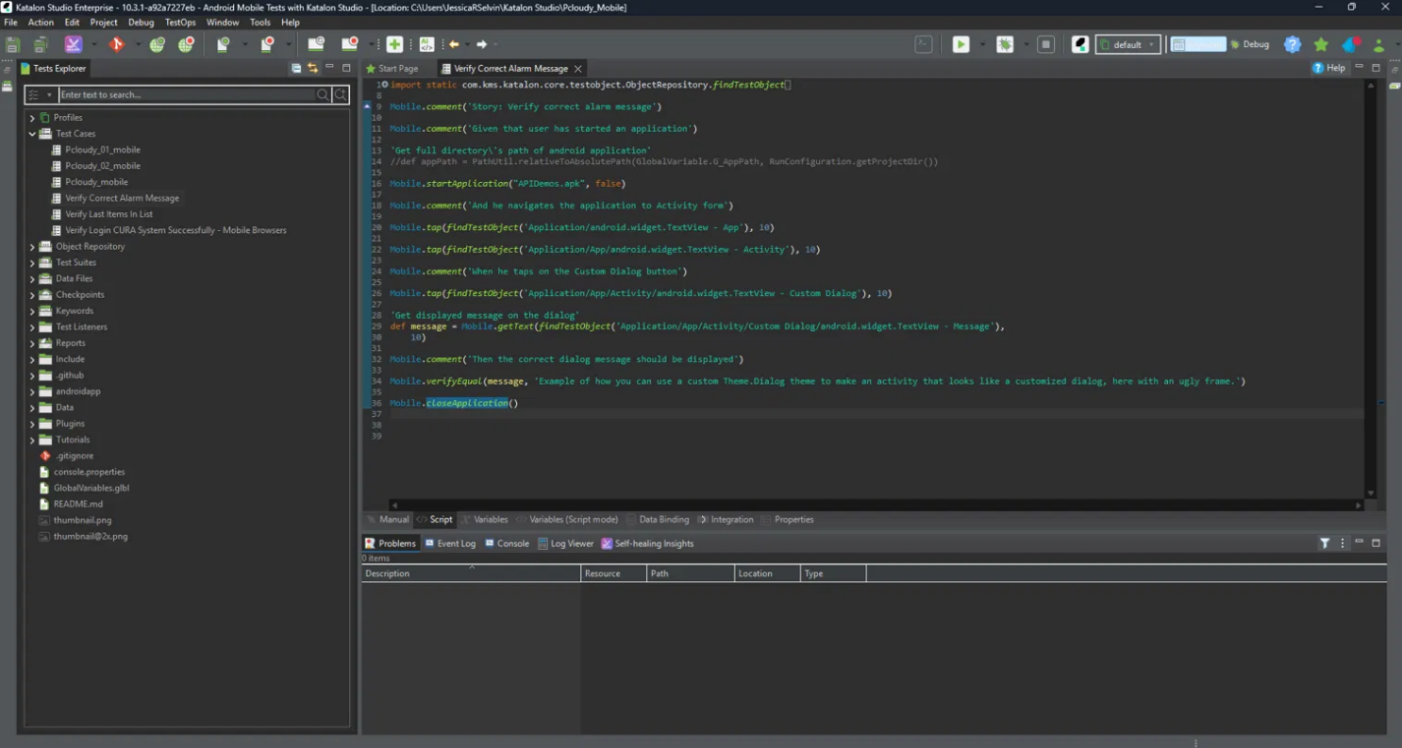
Before running, open your test case and switch to Script view. Update the Mobile.startApplication() line to reference the correct APK name uploaded to your Pcloudy account:
Mobile.startApplication('APIDemos.apk', false)
Replace 'APIDemos.apk' with the exact filename of your application as it appears under pCloudy_ApplicationName in your capabilities (Step 2) — this must match exactly, including case, or the session will fail to launch the app.
Step 4: Run the Test Case on Remote
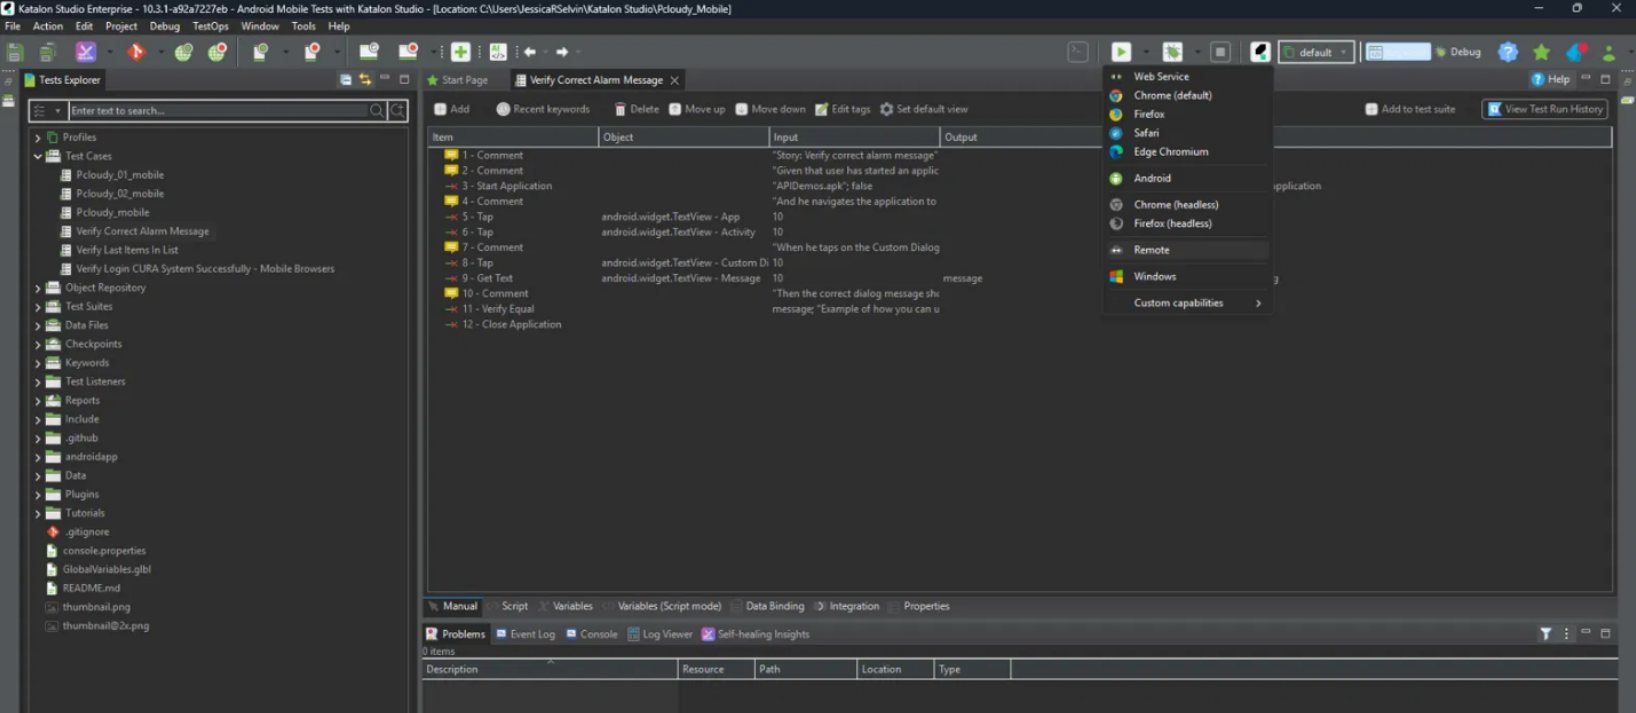
- Open your test case
- Click the dropdown arrow next to the Run button in the toolbar
- From the list select Remote
- Katalon will use the Remote server URL and capabilities configured in Step 1–2
Step 5: Verify Execution
In Katalon's Log Viewer:
- Runs: 1/1, Passes: 1, Failures: 0
- Each step (startApplication, tap, getText, closeApplication) shows a green checkmark with its execution time
In Pcloudy Dashboard (My Active Sessions):
- A session appears for the selected device (e.g. SAMSUNG_GalaxyM53_Android_15.0), Type: automation, Progress: On Going — confirming Pcloudy received and is running the session
- You can click the screen icon under Action to view the live session, or the link icon to get a shareable session link
- In Pcloudy Dashboard → Report, you would be able to view reports for your test case
Parallel Execution on Pcloudy
You can run multiple Test Suites concurrently on Pcloudy using a Test Suite Collection, with each suite requesting its own separate device session.
Step 1: Set "Run with" to Remote for Each Suite
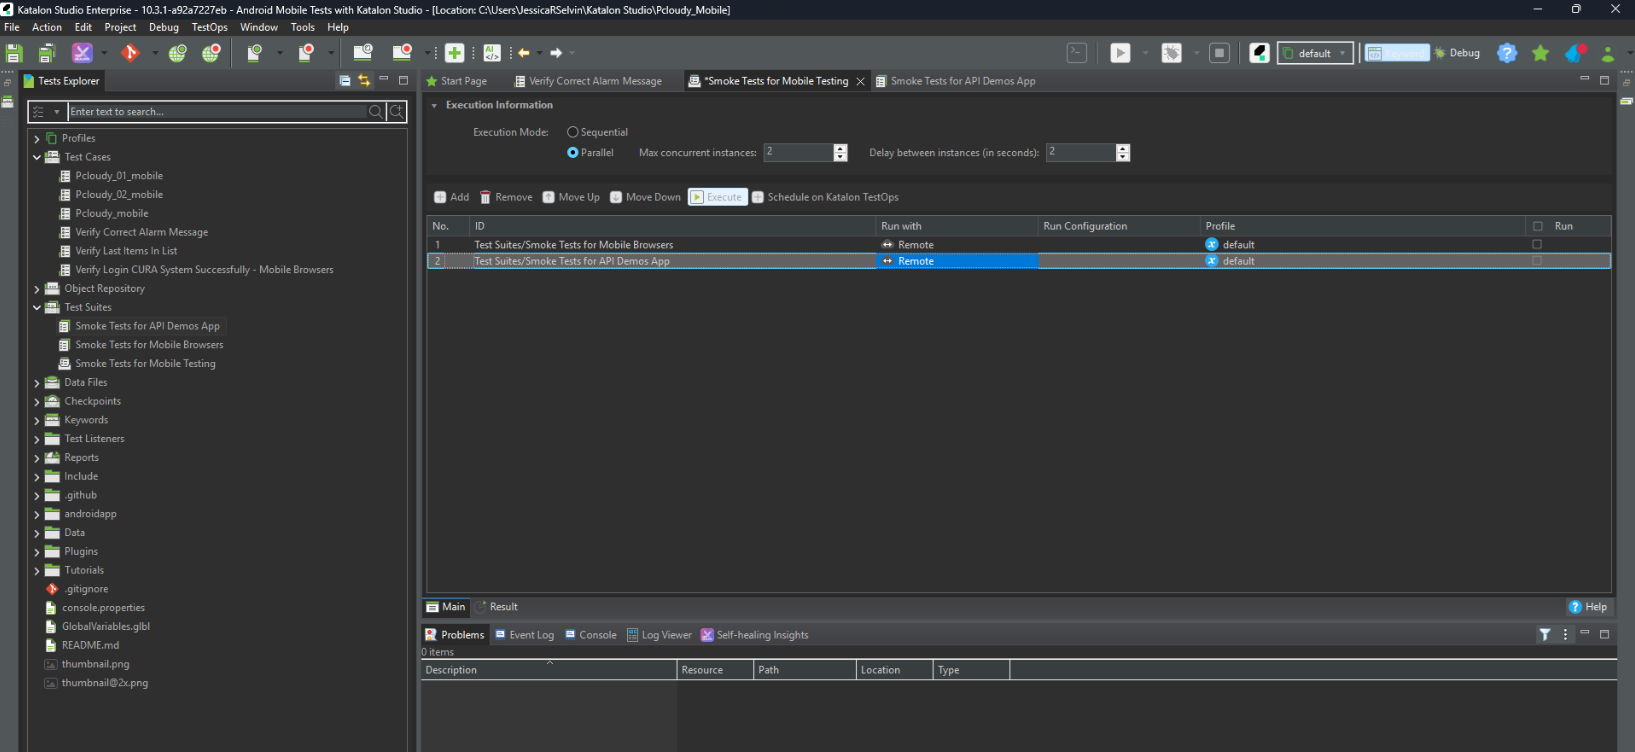
Open your Test Suite Collection and, for each row in the table, set the Run with column to Remote:
All suites draw from the single shared Remote capabilities set up in Project Settings > Desired Capabilities > Remote (the device capabilities configured earlier).
Step 2: Set Execution Mode to Parallel
In Execution Information at the top of the Test Suite Collection:
- Execution Mode: select Parallel
- Max concurrent instances: set this to match your Pcloudy plan's concurrent device session limit
- Delay between instances (in seconds): optional stagger between launching each instance (e.g., 1 second)
Step 3: Click Execute
Katalon will dispatch all suites to Pcloudy, running up to Max concurrent instances at the same time.
Step 4: Verify Parallel Sessions on Pcloudy
- In Pcloudy Dashboard → My Active Sessions, you should see multiple device sessions running simultaneously — one per suite currently executing, each showing Progress: On Going.
- In Pcloudy Dashboard → Report, you would be able to view reports for each individual test case run.
Did this page help you?