CSS Selectors in Selenium
Selenium WebDriver is one of the popular web automation tools. It is open source and is preferred by many automation engineers to automate the websites. Using Selenium WebDriver is quite simple and easy. We need to follow the following simple steps to write an automated test:
- Locate an Element on the WebPage using Browser’s Dev Tools
- Using Selenium WebDriver’s findElement/findElements method we need to supply the locator to locate the element on the web page.
- Write automation tests and perform assertions.
Before we start writing the test, let’s understand what are locators in Selenium as these are needed in the first step to automate the tests using Selenium WebDriver.
What are locators in Selenium WebDriver?
Locators in Selenium are used to identify and locate web elements on a web page. They can be found by inspecting the HTML source code of the web page by using the Developer tools option provided by the browsers. There are eight different locator strategies that can be used with Selenium WebDriver.
In the following section, we will be discussing the types of locator strategies.
Types of Locators in Selenium WebDriver?
The following are various Locator Strategies supported by Selenium WebDriver:
- ID: Used to locate an element by its ID.
- Name: Used to locate an element by its name.
- TagName: Used to locate an element by its HTML tag.
- ClassName: Used to locate an element by its CSS class.
- LinkText: Used to locate a link by its visible text.
- PartialLinkText: Used to locate a link by the partial value of its visible text.
- XPath: Used to locate an element within the HTML document by evaluating an XPath expression.
- CSS selector: Used to locate an element by its CSS selector.
What are CSS Selectors?
CSS Selectors are used within Selenium to locate elements on a web page. They are beneficial because they are shorter than XPath locators and allow for a more clear and crisp method to locate the element. They work by using patterns to match tags and their attributes, such as class or ID.
CSS Selectors can be used in combination with each other and can also be chained together. They are supported in all the modern browsers and are a great way to quickly and precisely locate elements within a web page.
There are five types of CSS Selectors in Selenium WebDriver:
- Using ID
- Using ClassName
- Using Attribute
- Using Substring
- Using nth-child
Locating elements using CSS Selectors
Using CSS Selectors is pretty simple and easy, you just need to open the browser’s developer tools, read the DOM and find the values easily.
Copying CSS Selector from Browser directly
Browsers also provide an option to copy the CSS Selectors directly from the DOM, you just need to follow the given steps:
Open the Browser and navigate to the pCloudy website’s Login page, open Developer Tools in Chrome Browser by pressing F12 key or clicking on the three dots below the “X” button >> More tools >> Developer Tools
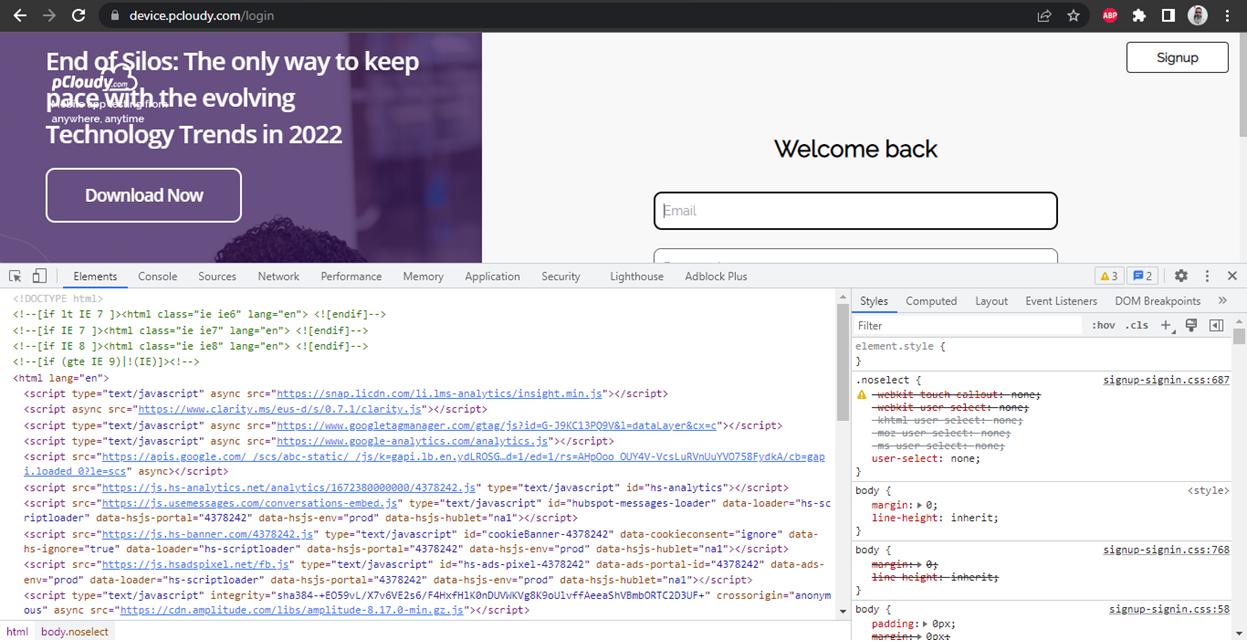
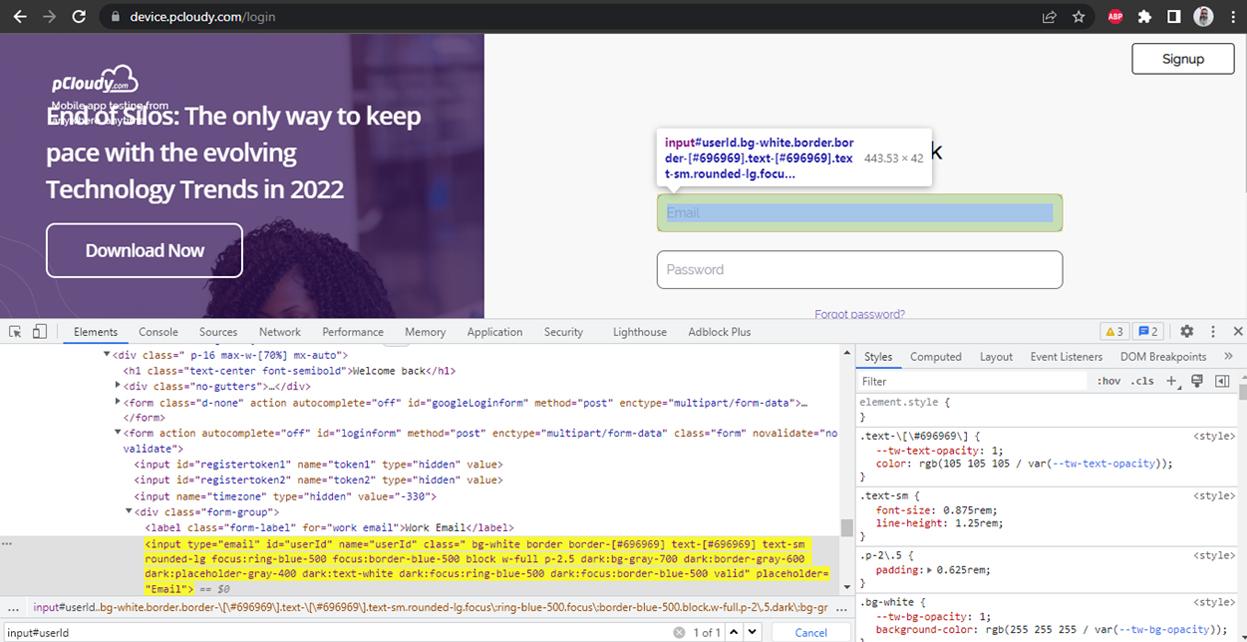
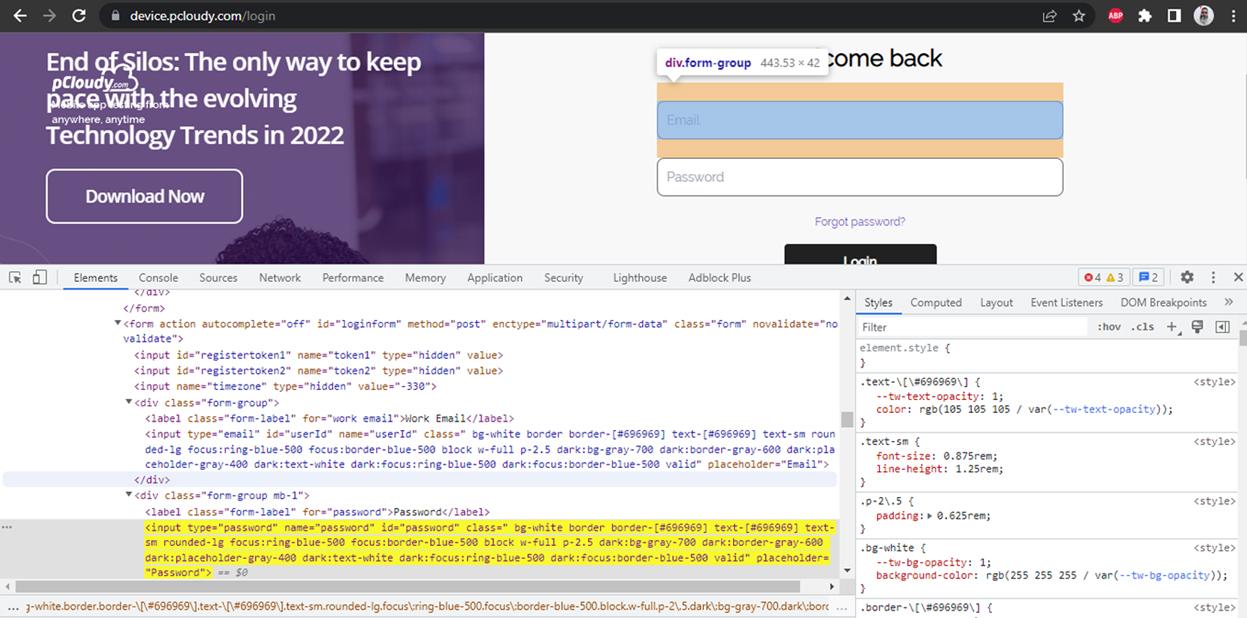
Now let’s try to locate the CSS Selector for email Id field by inspecting the field >> right click on the DOM element >> Copy >> Copy Selector
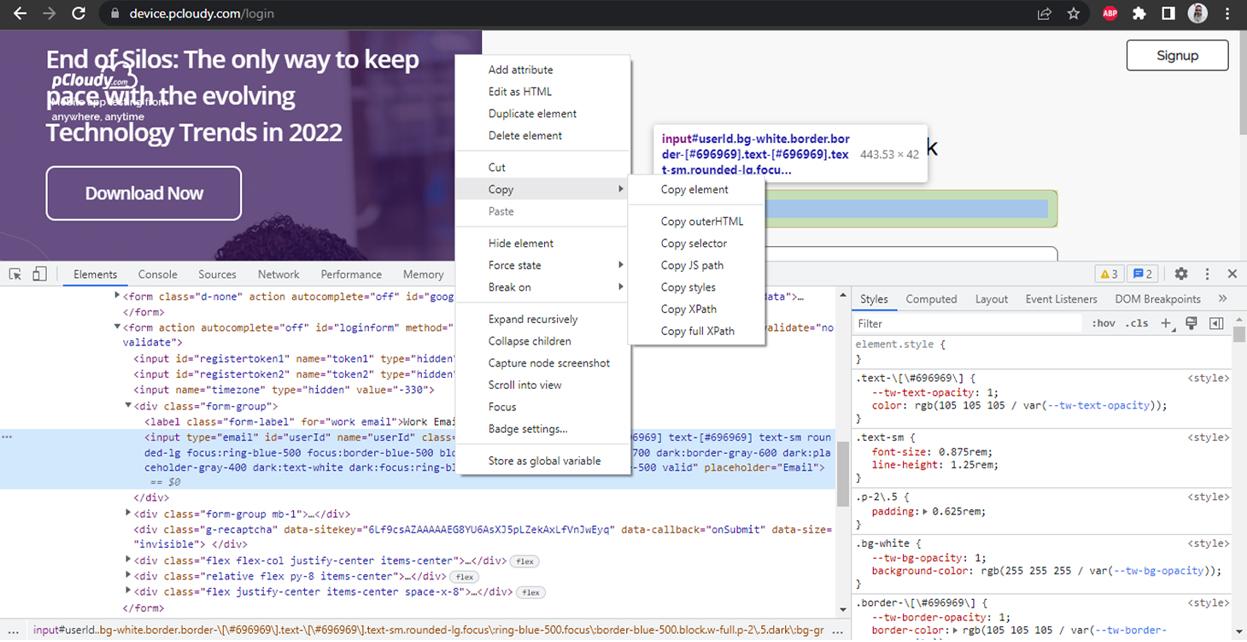
Press Ctrl + F to open the finder in the DOM and paste the value we just copied by pressing
Ctrl + V. It should have copied the “ID” of the field #userId
We can also write the CSS Selectors by inspecting the elements manually from the DOM using the following:
With ID
Syntax
<#><Value of ID attribute>
While Using CSS Selector, “#” is used to locate an element with an ID.
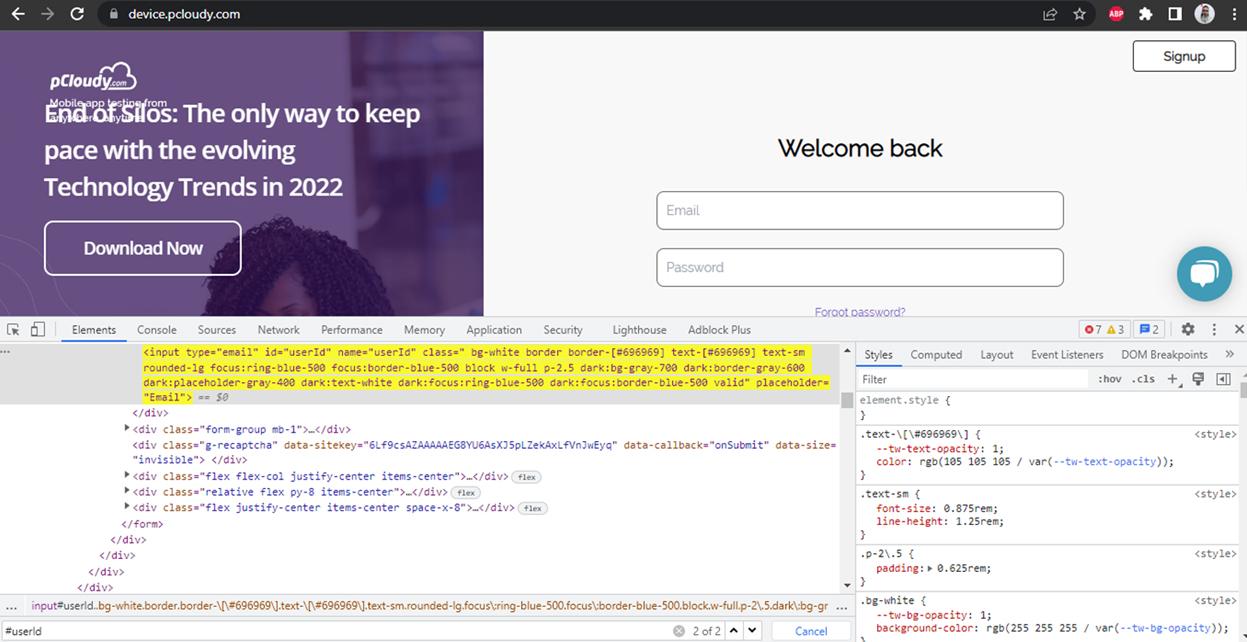
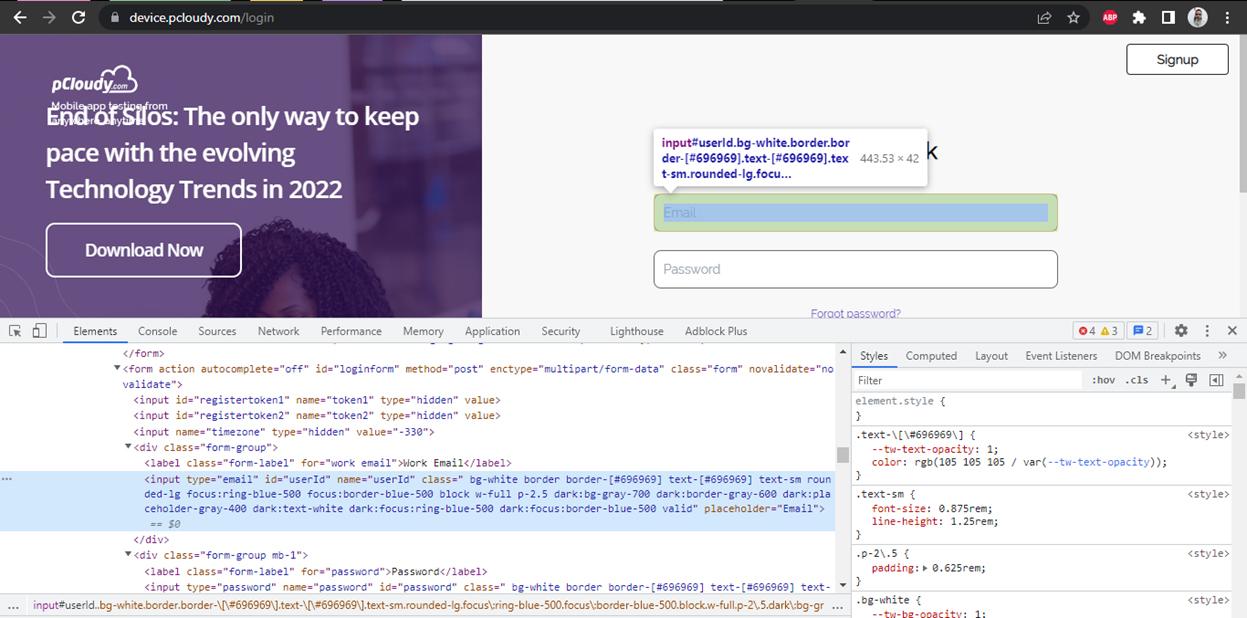
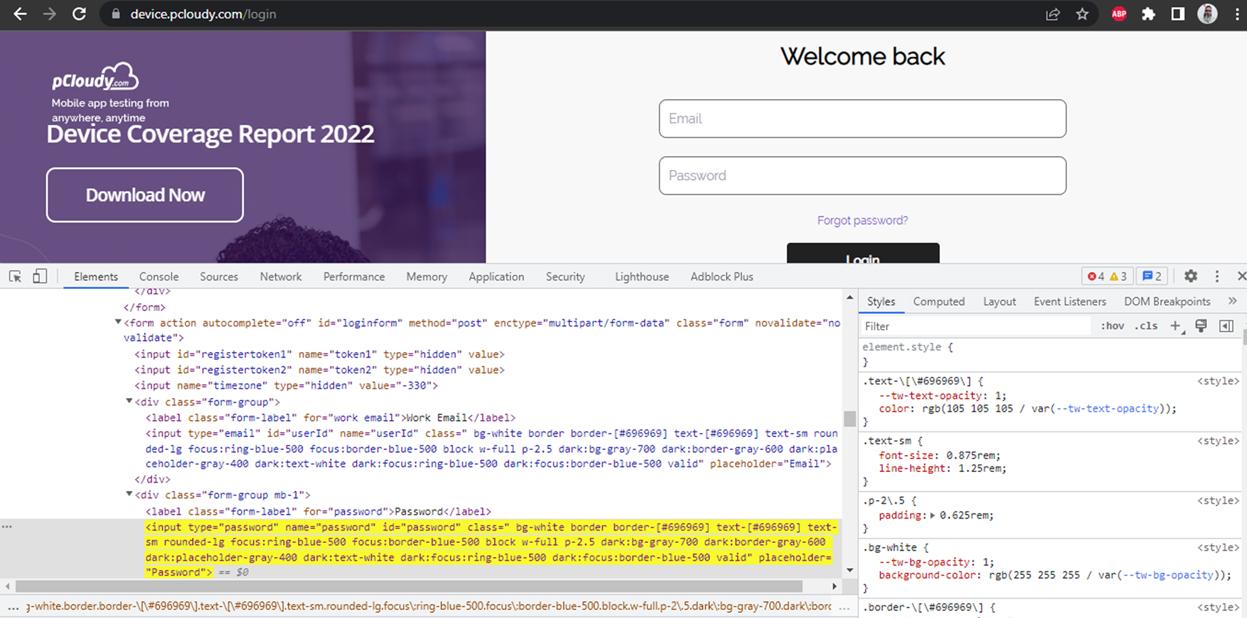
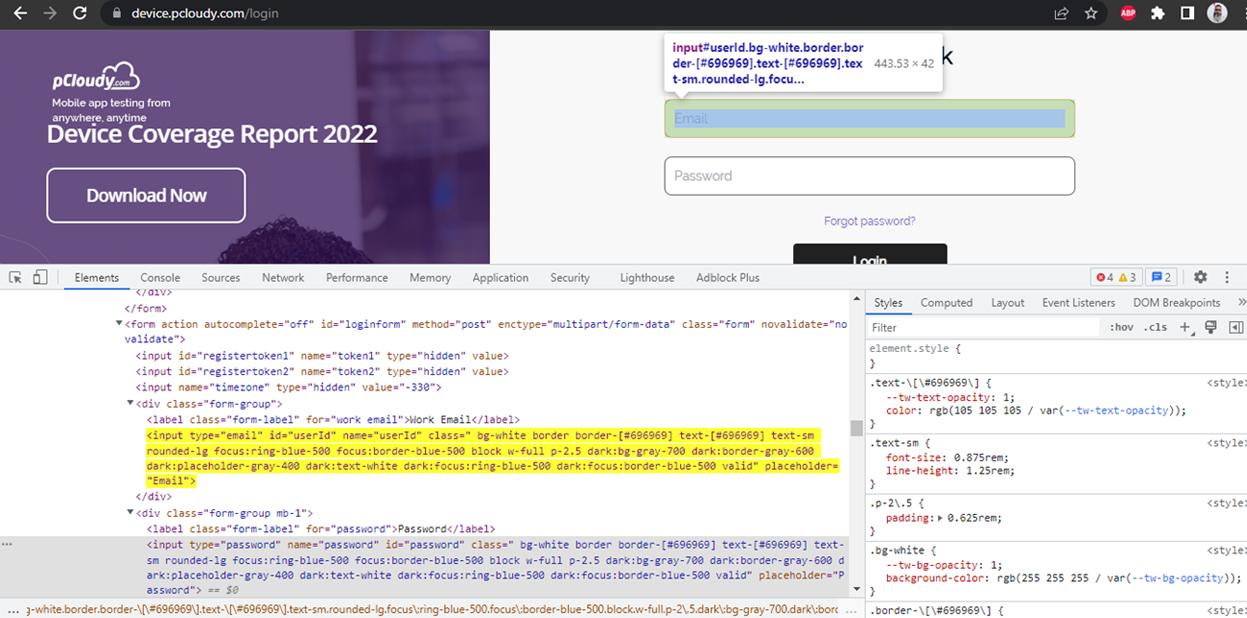
Let’s take the example of the Login page of pcloudy.com website and locate the email field. Below is the Screenshot of the page, we can notice that ID for the field is “userId”
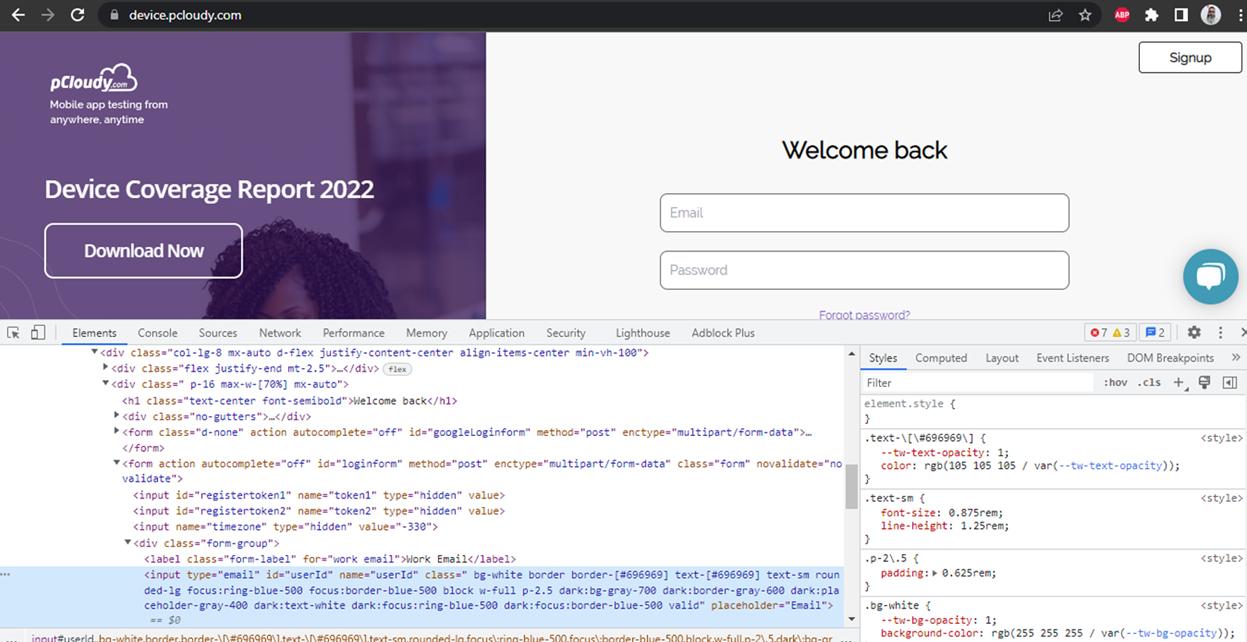
We can use #userId as CSS Selector for locating this field and write the code as
driver.findElement(By.cssSelector(“#userId”)) in our Selenium tests.
Using ID with TagName
Syntax
<HTML tag><#><Value of ID attribute>
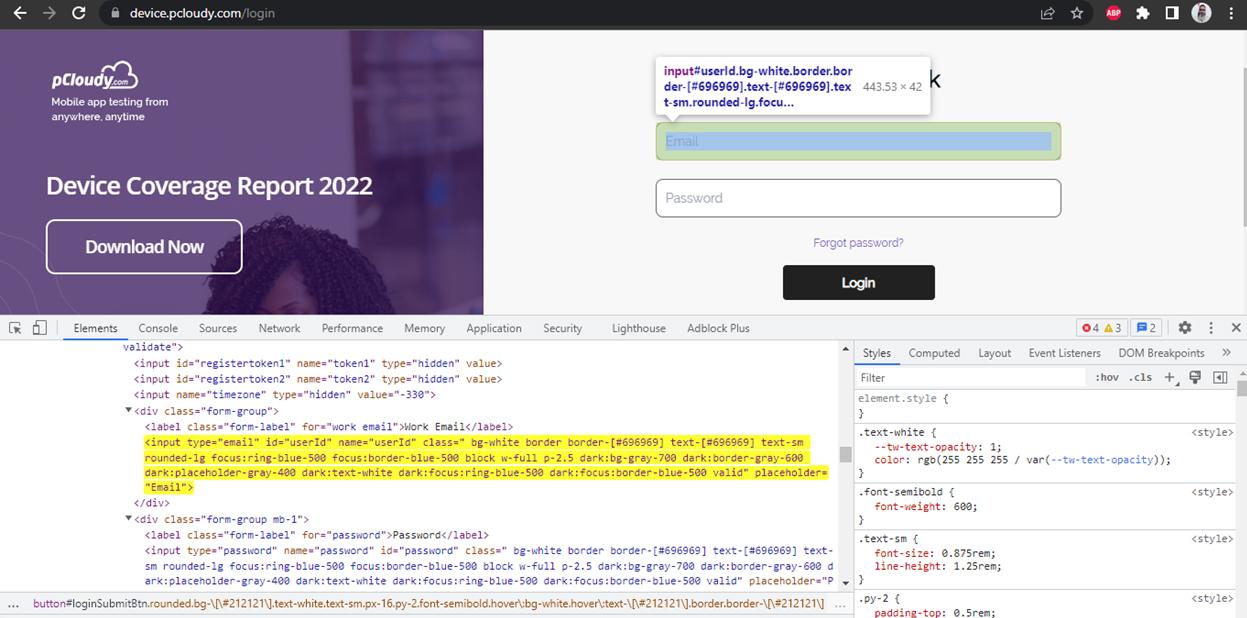
In the example we saw above for the email field on Login Page we see that HTML tag <input> is used for the email field.
We can combine both the HTML Tag and ID and use it for locating the email field and use the CSSSelector as input#userID.
Using ClassName
Syntax
<.><Value of Class attribute>
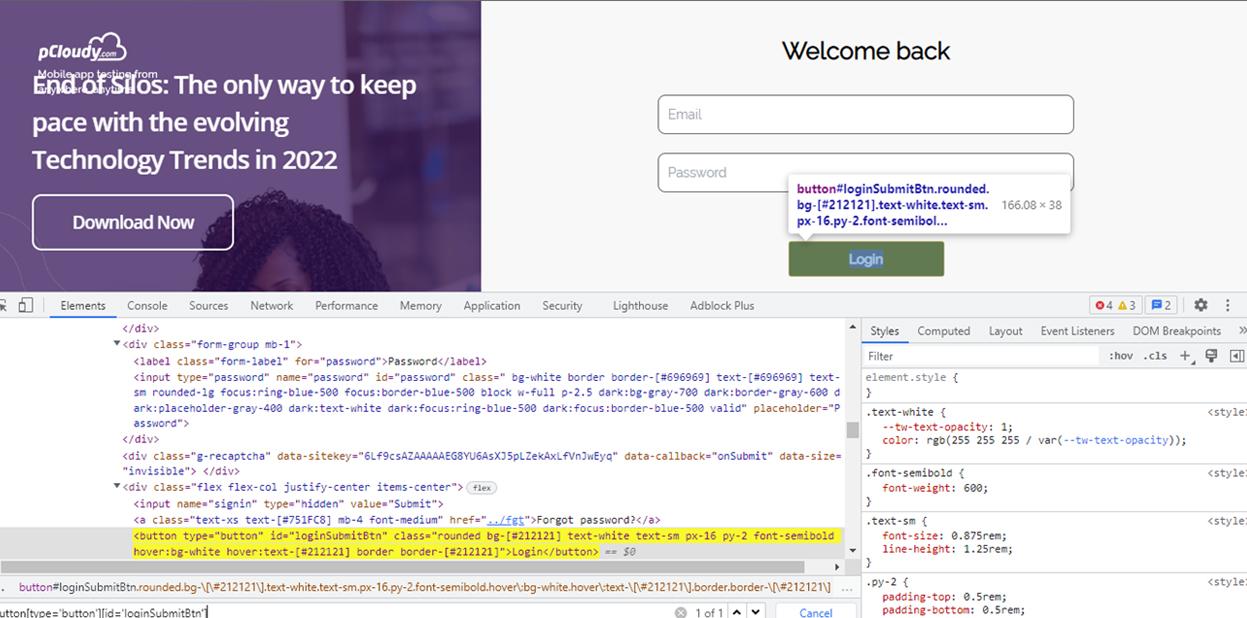
(.) – A Period/Dot refers to the Class attribute in CSS Selector. In the example we saw above for the Login Page, let’s locate the Welcome header text using ClassName, below is the screenshot of the Page
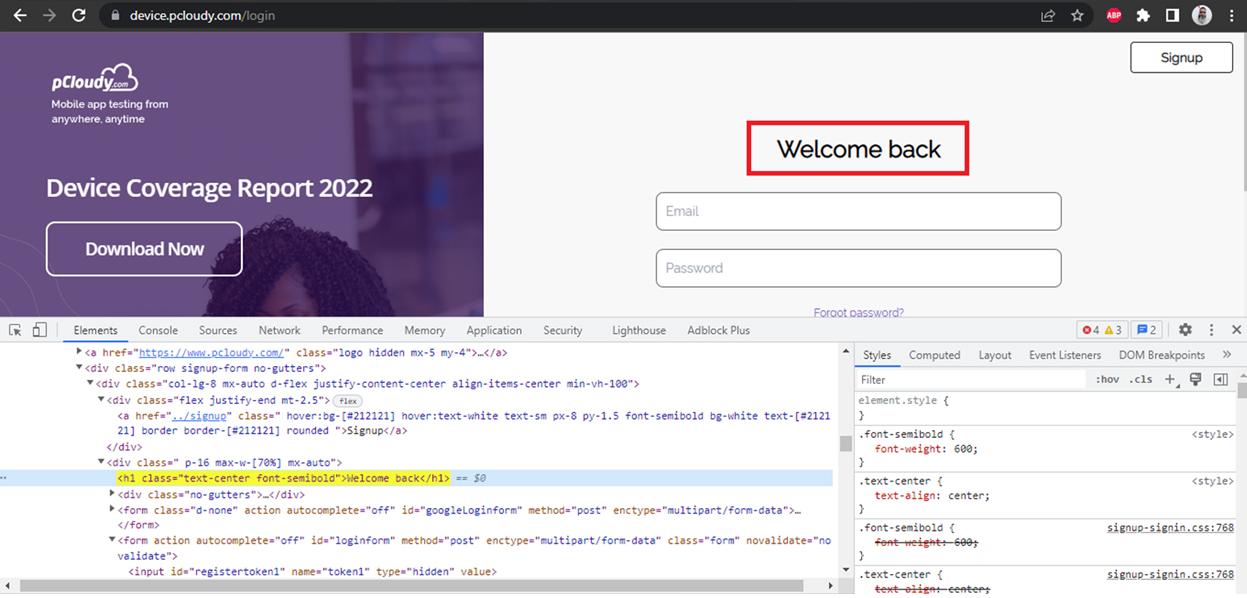
Here is the DOM
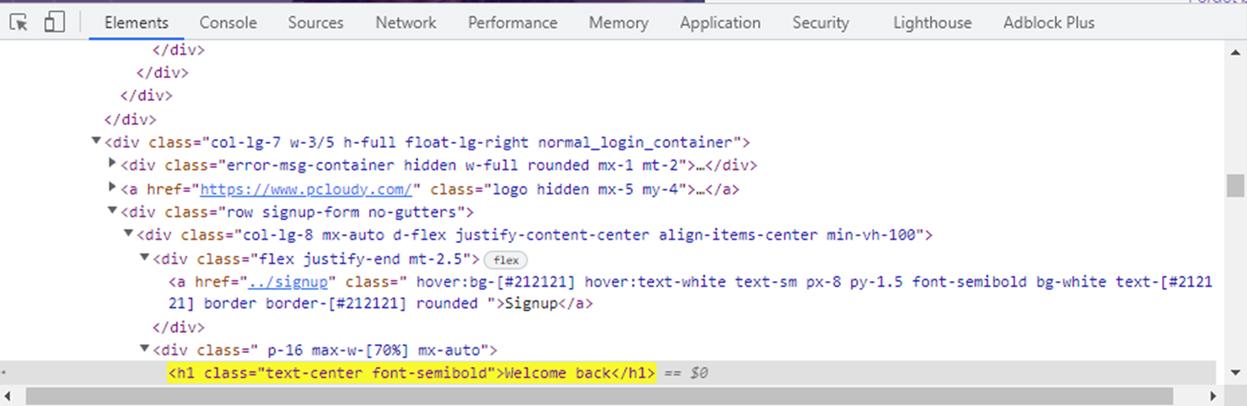
Welcome Text is in the h1 Tag element which is child of class – “p-16”, class “p-16” is a child of “d-flex” class whose parent is “signup-row” class and finally “normal_login_container” is the top node class. Hence the CSS Selector for this Welcome header will be .normal_login_container .signup-form > .d-flex > .p-16 > h1.text-center
The dot before the name refers to class.
Note the “>” sign before “.d-flex” in the CSS Selector, it is used for selecting the class that is a direct descendant of “.signup-form” class. Similarly “>” after other class names as well.
Using Attributes
Syntax
<HTML tag><[attribute =’value of attribute’]>
An attribute can be a value, type, name, etc. which could be a unique value that allows to identify the web element.
Note: Value of the attribute needs to be supplied in single quotes.
In the example of the email field we saw above, there is a tag <input> having attribute as “type=email” and “name=userId”:
We can use the CSS Selector for the email field using name attribute follows:
input[name=’userId’]
Using combination of type and id attribute
Lets now try to locate the Login button by providing multiple attributes.
So, if we see in the screenshot below we see that the HTML tag is <button> and has the attribute type as “button”, also it has the attribute id as “loginSubmitBtn”.
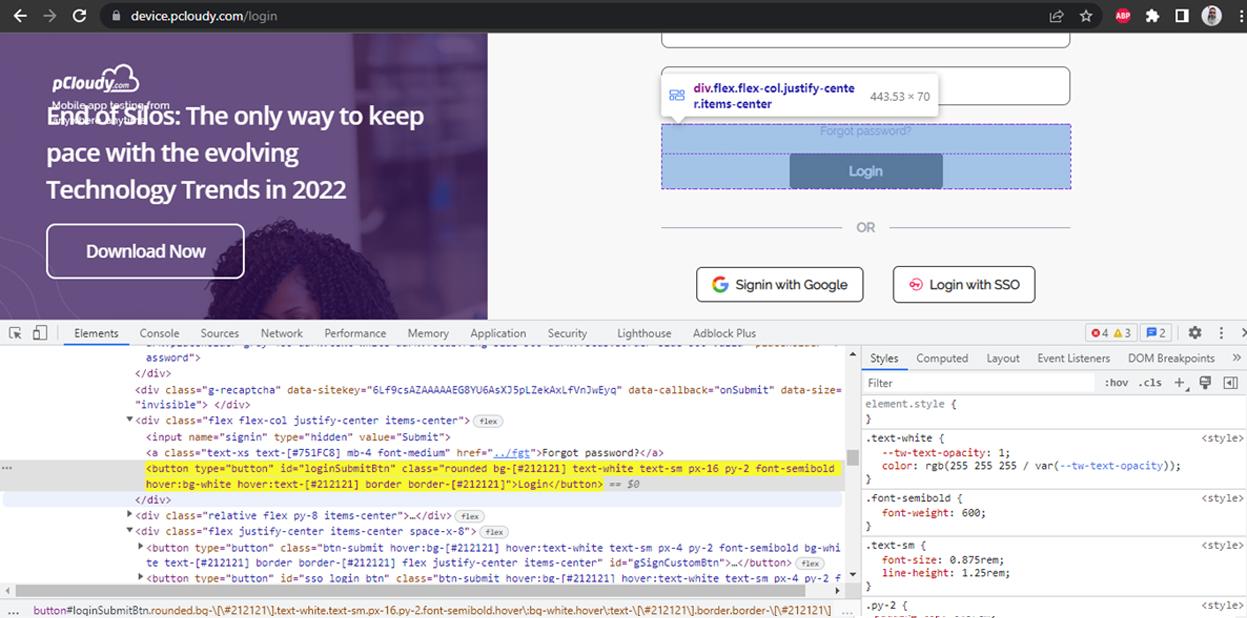
By combining both of these two we can write the CSS Selector for locating the Login button as
button[type=’button’][id=’loginSubmitBtn’]
Using SubString
CSS Selectors also allow the flexibility to match the partial strings to locate an element on the web page.
Matching partial Strings can be done in the following 3 ways:
- Matching a Prefix (Starts With)
- Match a Suffix(Ends With)
- Matching a Substring(Contains)
- Matching a word(Contains)
Match a Prefix
Syntax
<HTML tag><[attribute^=’prefix of the string’]>
(^=) is used to match the string using a prefix.
Let’s take the example of the password field from the Login Page and try to locate it using the prefix of the name attribute.
The name attribute for the field is “password”, we can write the CSS Selector as
input[name ^=’pass’] as it starts with ‘pass’.
Match a Suffix
Syntax
<HTML tag><[attribute$=’suffix of the string’]>
($=) is used to match the string using a suffix.
Let’s take the example of the password field from the Login Page and try to locate it using the suffix of the name attribute.
The name attribute for the field is “password”, we can write the CSS Selector as
input[name$=’rd’] as it ends with ‘rd’.
Match a Substring
Syntax
<HTML tag><[attribute*= ‘Substring’]>
(*=) is used to match the string using a substring.
The name attribute of the email field is “userId”, we can write the CSS Selector as
input[name*=’ser’]
Match a word
Syntax
<HTML tag><[attribute~=‘word’]>
(~=) is used to match the word.
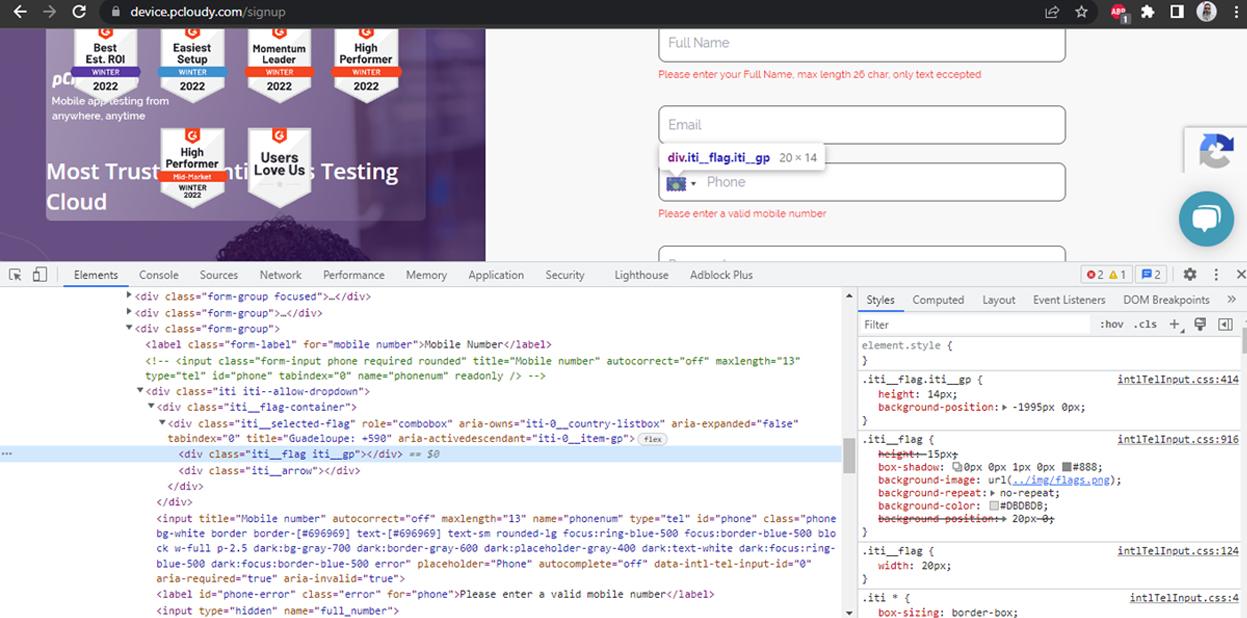
Let’s take the example of the Phone field from the pCloudy’s Signup page and try to locate it using the matching word of the ClassName for the respective country codes.
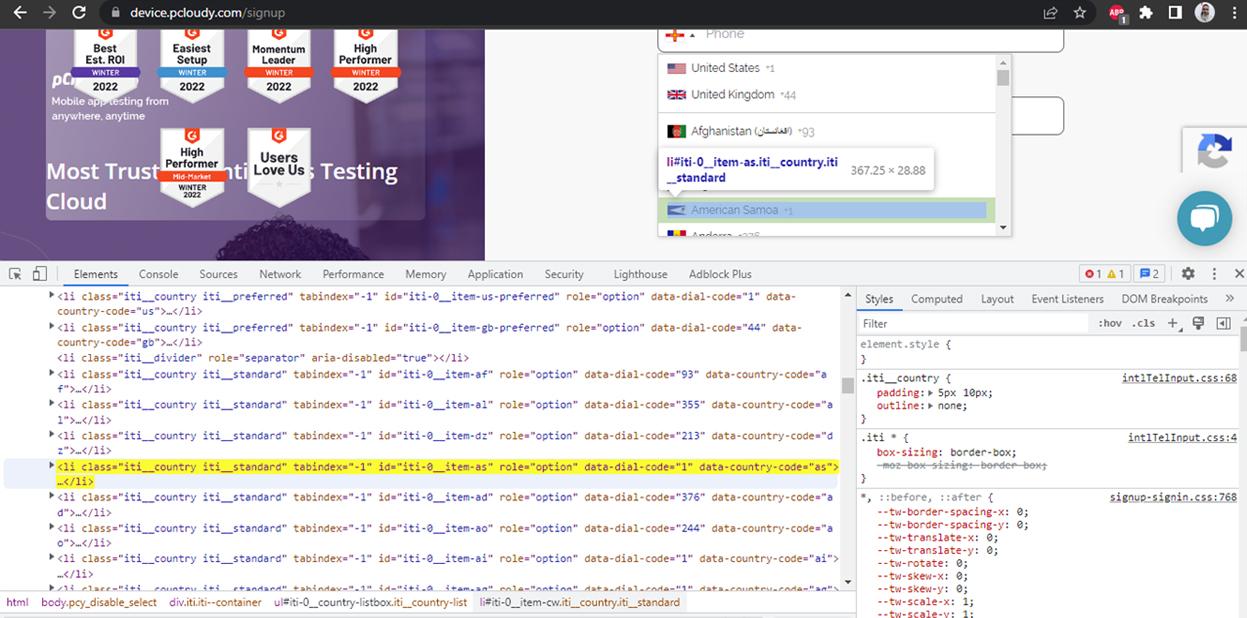
The Class Name for the country code dropdown list field is “‘iti__country”, we can write the CSS Selector as
li[class~=’iti__country’] and it will locate all the respective elements containing the classname iti__country.

Using :nth-child
Syntax
:nth-child(n)
nth-child matches every element that is the nth child of its parent.
Let’s take an example of the Country list dropdown displayed in the Phone field on the signup page of pCloudy website.
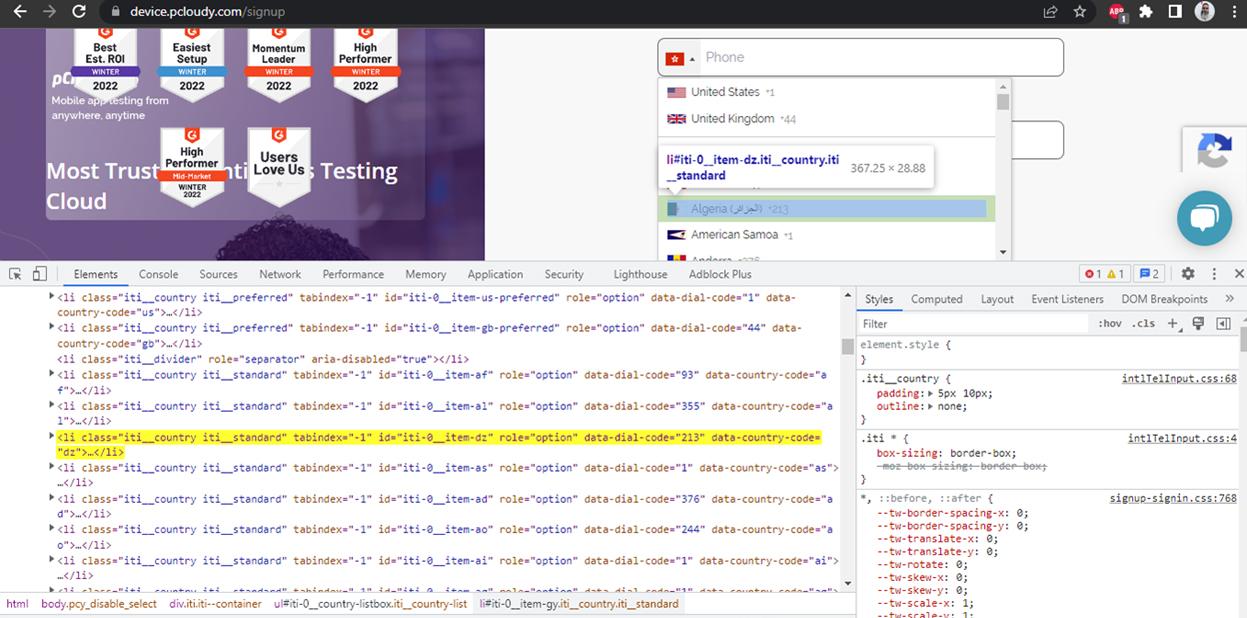
This field has multiple <li> tag elements, we can use the nth-child selector to iterate through this list and select the required element.
So, if we want to select the country code of Algeria(it is 6th child), so we can write the CSS Selector as ul> li:nth-child(6)
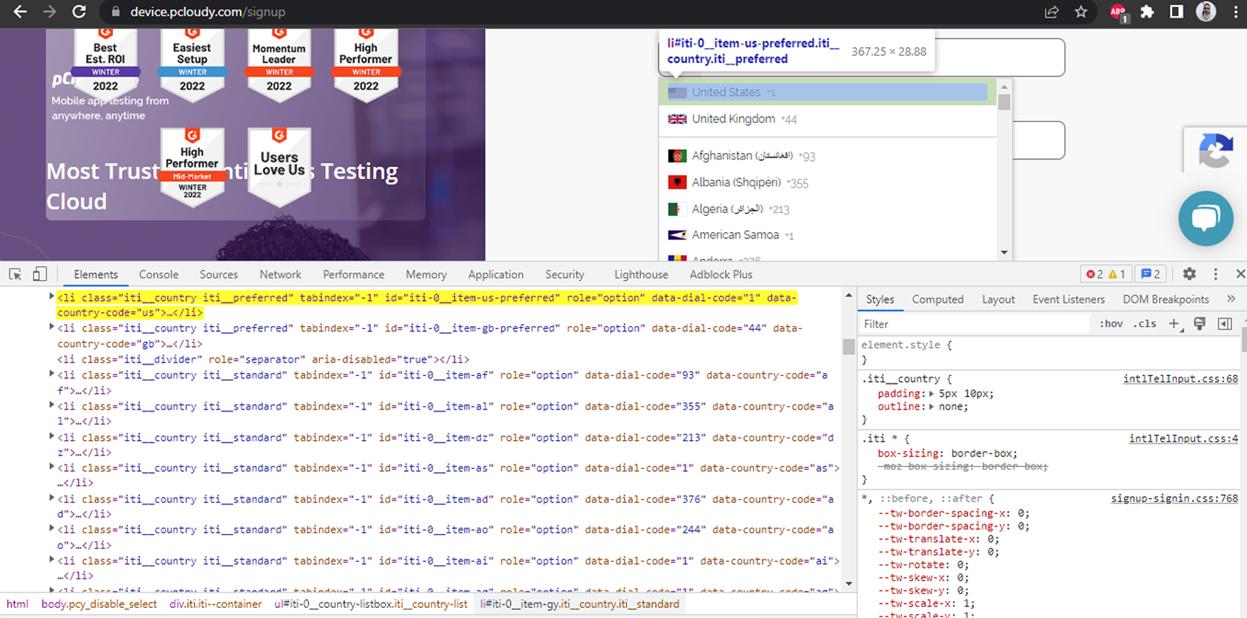
Selecting the first child
Now, if we want to select the first country code in the list we can use the CSS Selector as ul> li:first-child. It selected “United States” in the list as it is the first child.
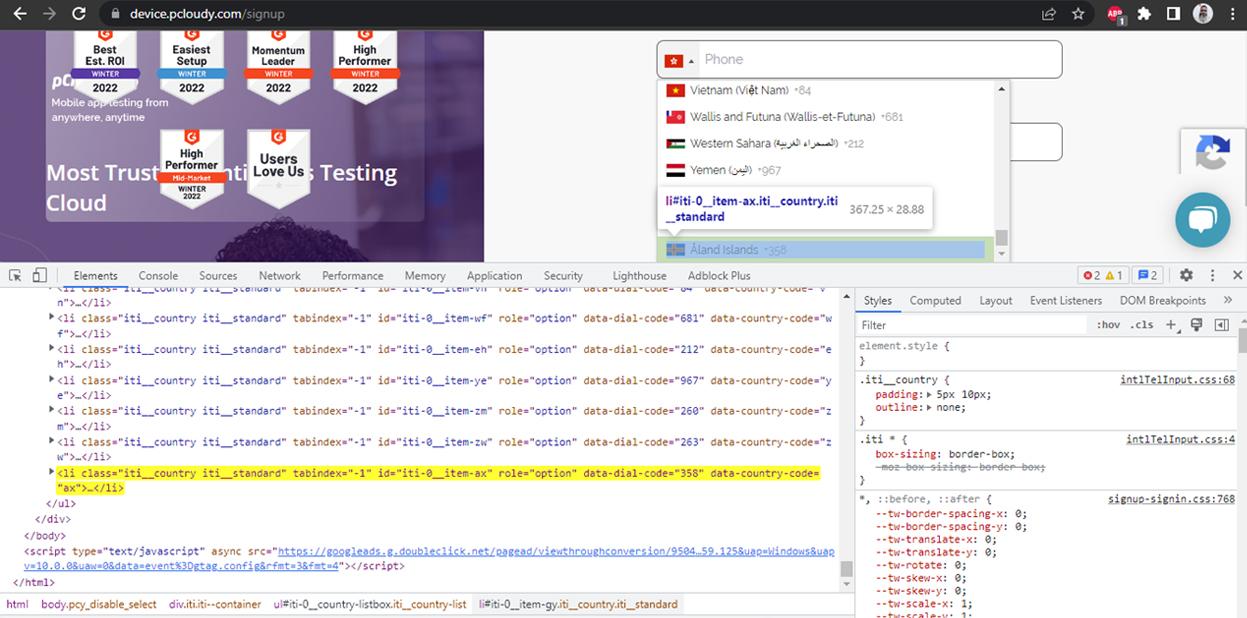
Selecting the last child
Similarly, to select the last child we can use the CSS selector ul> li:last-child
It selected “Åland Islands” as it is the last child.
Best Practices for Writing CSS Selectors:
Favor Unique and Stable Selectors:
Aim to use CSS selectors that are unique to the specific element you want to interact with. Avoid using selectors that may match multiple elements or have a higher chance of changing frequently. Prioritize using ID selectors or combining multiple attribute selectors to achieve uniqueness. By favoring unique selectors, you reduce the risk of accidentally interacting with unintended elements.
Avoid Overly Complex Selectors:
Keep your CSS selectors as simple and concise as possible. Complex selectors with multiple levels of nesting and combinators can make the code harder to read and maintain. Use the appropriate level of specificity required to uniquely identify the element, but avoid excessive specificity that makes the selector brittle.
Regularly Review and Update Selectors When Necessary:
Periodically review your CSS selectors to ensure they are still valid and reliable. Web applications may undergo changes, such as UI updates or structural modifications, which can impact the effectiveness of your selectors. Stay proactive by revisiting and updating selectors as needed to maintain the stability and accuracy of your test scripts.
Tips to Debug and Troubleshoot CSS Selector Issues:
Inspect the Element:
Use browser developer tools (e.g., Chrome DevTools, Firefox Developer Tools) to inspect the web element you want to interact with. Verify that the element has unique attributes or classes that can be targeted using CSS selectors. Test your CSS selector directly in the browser’s console to ensure it matches the intended element.
Verify CSS Selector Validity:
Ensure that your CSS selectors are valid and correctly written. Typos or missing characters in the selectors can cause them to fail. Utilize online CSS validator tools or browser extensions that can validate the syntax and correctness of your selectors.
Leverage Selector Specificity:
Understand the concept of selector specificity, which determines the priority of selector matching. In cases where multiple elements match your selector, adjust the specificity by adding or removing attribute selectors or using different combinators.
Use CSS Selector Testers:
Explore online CSS selector testing tools that allow you to enter a selector and see which elements it matches. These tools can help verify the accuracy of your selectors before incorporating them into your Selenium automation scripts.
Consider Alternative Locator Strategies:
If you’re experiencing difficulties with CSS selectors, consider alternative locator strategies like XPath selectors or using other attributes (e.g., name, link text, partial link text). XPath can be particularly useful for complex element traversals or when CSS selectors are not providing the desired results.
Conclusion
CSS Selectors selectors are easy, precise and simple to use in Selenium tests and these selectors provide flexibility to the user so he can create his own selector and use it to find an element. It also adds to the readability part as CSS selectors are easily readable and understand which field we are referring to.
I would suggest trying your hands on locating the elements in your selenium tests by using CSS Selectors.
Happy Testing!
Automate with Selenium
Automate your web app testing by running your selenium scripts on multiple real desktop browsers with ease.
Get a free demo