Anshuman Chatterjee | Posted on | 2 min Read

You can fix the issues in your Android phone by connecting it with your computer and writing some easy commands. For this, you will need some command line tools which you can download from the Android developer’s site. If you are using Windows then you will need to visit the manufacturer’s page for your device and download the ADB and fastboot drivers for Windows. But first, let’s understand what are Android shell commands.

Android Shell Commands

ADB is Android Debug Bridge which is a command line utility included with Google’s Android SDK. It provides a terminal interface to control your Android device connected to a computer using a USB. ADB can be used to run shell commands, transfer files, install/uninstall apps, reboot and more. You can also backup and restore your android devices using these commands.


Want to test your Mobile App?

Join pCloudy Platform!

Signup for Free


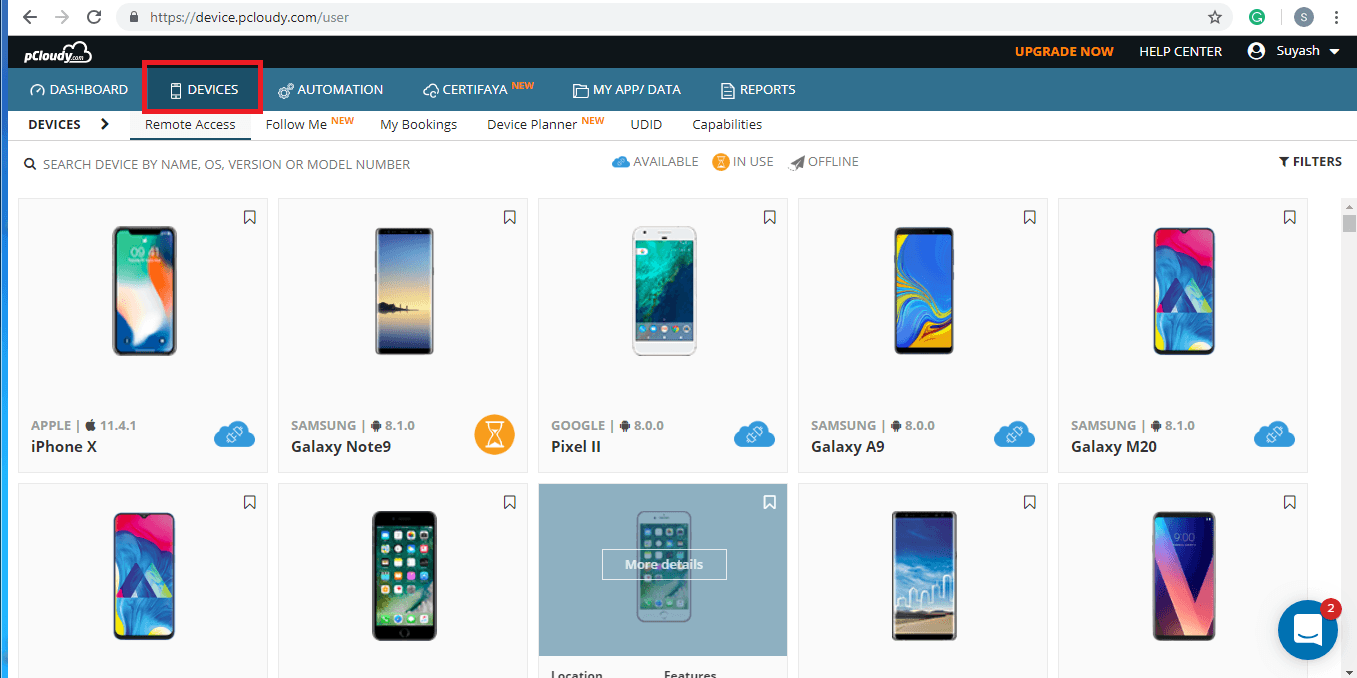
pCloudy also allows you to execute ADB Shell Commands on the connected device to perform mobile testing.


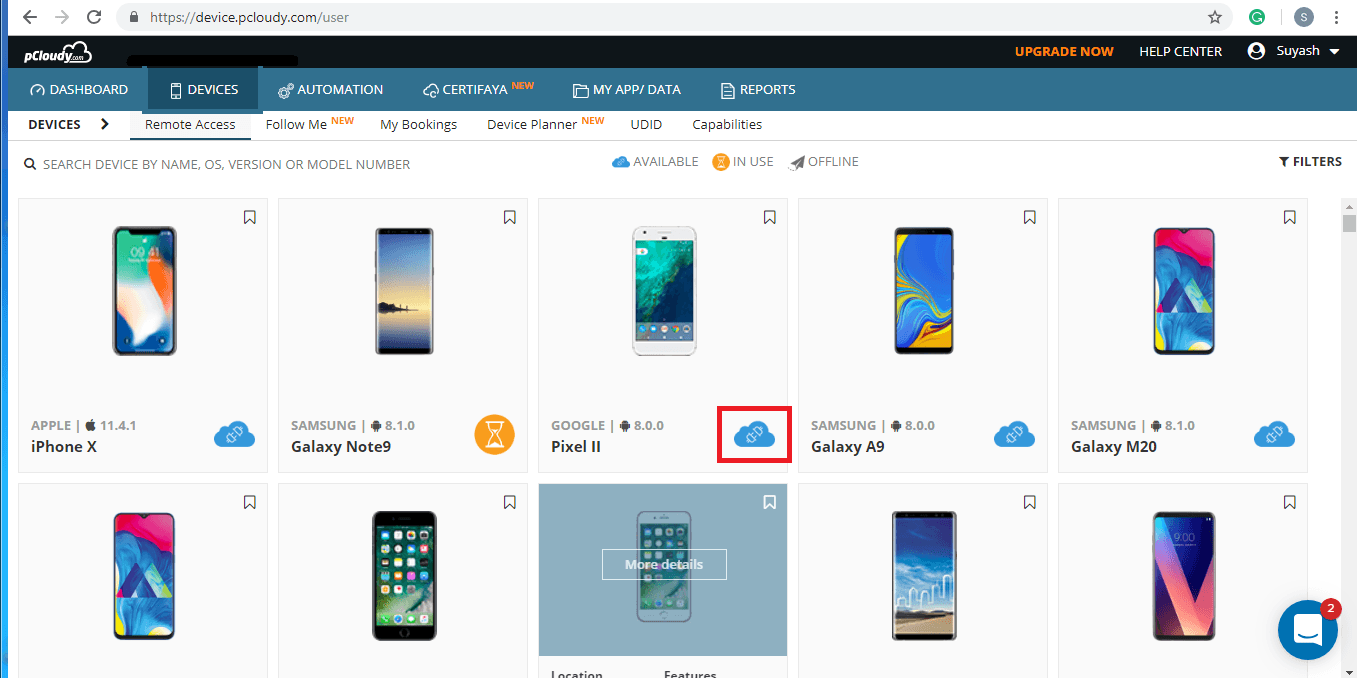
Select your desired device from the list and connect.


Click on “Execute ADB” icon.


While trying to execute ADB Shell command, you just need to follow few simple steps as given below:


1. Select a device from the displayed list


click-on-connect-to-access-the-device


2. Confirm connection of your selected device


pcloudy-select-device


3. The connected device is ready testing


adb shell commands


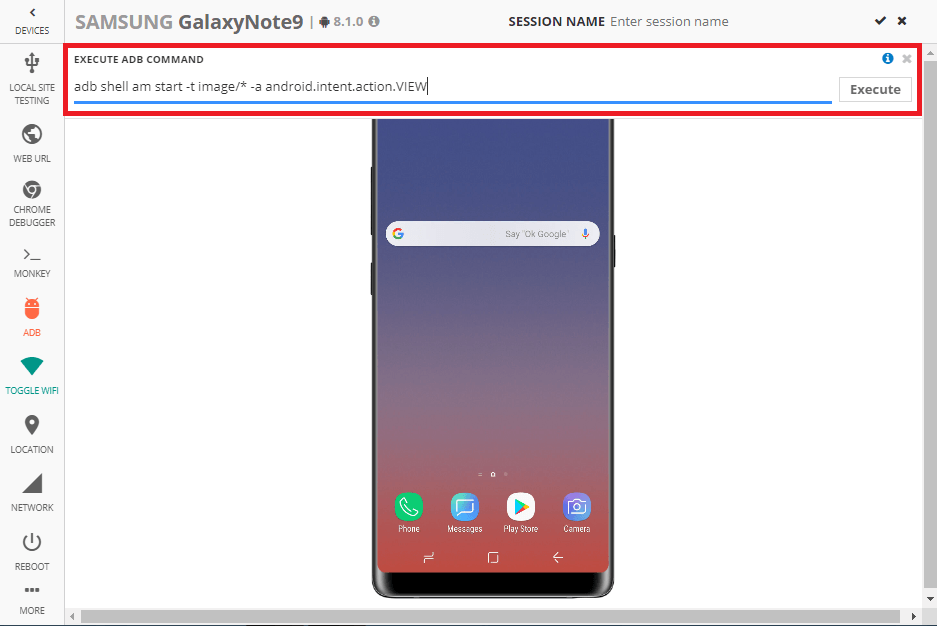
4. Enter ADB shell command to the given text box


enter-adb-shell-command-to-the-given-text-box


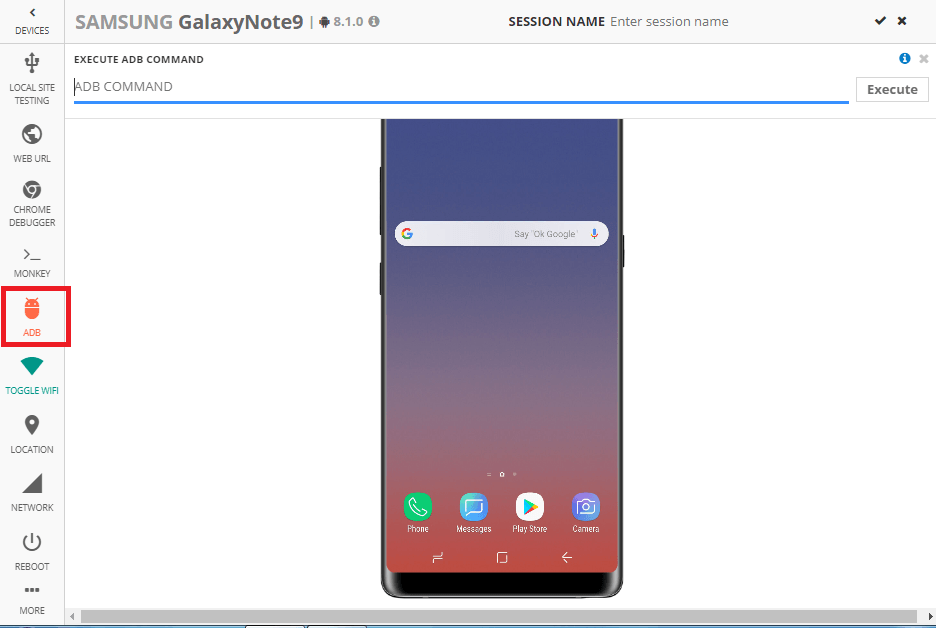
5. Execute given ADB shell command


execute-given-adb-shell-command


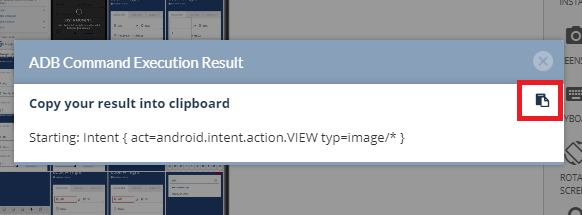
6. Android ADB shell command execution result

adb-shell-command-execution-result


adb-shell-command-execution-result


Useful Android terminal commands:

1. ADB reboot-bootloader and reboot recovery commands:

This command will let you can reboot your device in the bootloader. If due to some malware your device is stuck or if your device is not rebooting then you can connect your device to the computer and run this command to reboot. To run the command just type adb reboot-bootloader in the command line and to boot the device in recovery just type adb reboot recovery.


2. Fastboot device command:

Fastboot is a diagnostic and engineering protocol that you can boot your Android device into. ADB does not work in the bootloader. If you have to boot into Android and the debugging tools are not active to communicate then you can use the fastboot command. Type fastboot devices in the prompt and you get the serial number.


3. Fastboot unlock command

Fastboot flashing unlock command unlocks your bootloader. This command is not supported in many phones that support fastboot but you can check if your phone supports it. Just type fastboot flashing unlock in the command prompt and hit enter.


4. ADB sideload command:

You can download the update zip file in your phone instead of waiting for the update to be pushed into the phone. To do that just download the update to your computer and connect your device to the computer. Now reboot into recovery on your phone and using the volume buttons choose to apply update from ADB. then open command line and type ADB sideload Full-Path-to-the-file.zip and hit enter.


A lot of users create android shell commands root in a device in spite of security. The adb reboot-bootloader command allows you to boot directly to your phone’s bootloader. Once you’re in the bootloader, ADB shell commands won’t work anymore. That’s where Android ADB fastboot command comes into the picture. Fastboot allows you to send commands to your phone while in the boot loader.


ADB Shell Commands for Reference


Adb Shell commands

Action performed by command

  • adb shell dumpsys batterystats


collects battery data from your device

adb shell ls

list directory contents

adb shell ls -a

do not hide entries starting with

adb shell ls -i

print index number of each file

adb shell ls -s

print size of each file, in blocks

adb shell ls -n

list numeric UIDs and GIDs

adb shell ls -R

list subdirectories recursively

adb shell netstat

list tcp connectivity

adb shell pwd

print current working directory location

adb shell dumpstate

dumps state

adb shell ps

print process status

adb shell am start -a
android.intent.action.VIEW -d

opens browser

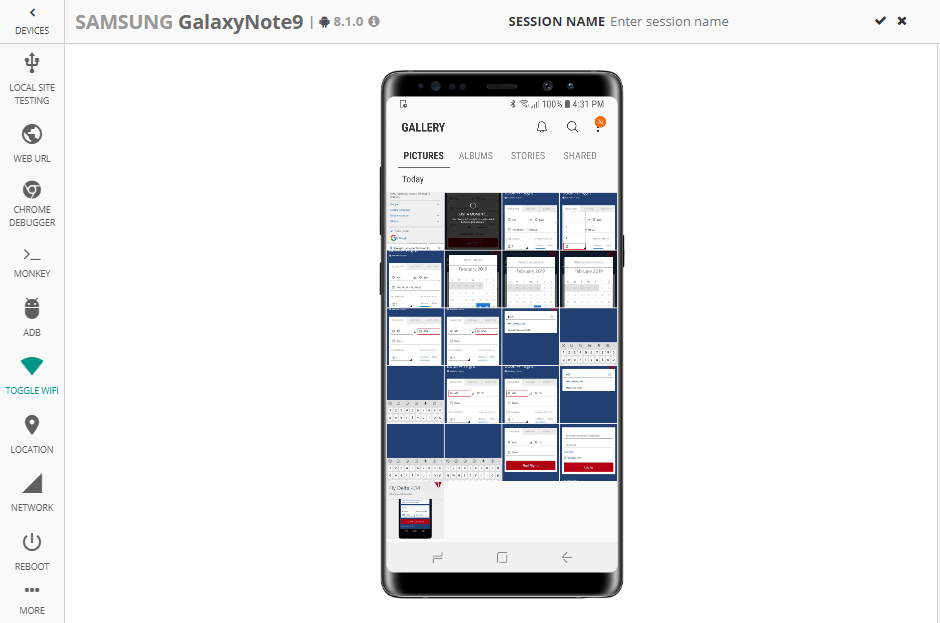
adb shell am start -t image/* -a android.intent.action.VIEW

opened gallery

Want to test your Mobile App?

Join pCloudy Platform!

Signup for Free


Related Articles:

Device Tunnel


In the age of mobile apps, a typical developer’s cubicle can be imagined as place where a series of mobile devices are connected with several long USB cables that run into computers. While some developers furiously keep debugging their apps on their computers, there will be others who frequently keep plugging USB cables in and out of the mobile devices to test their apps on various devices.


That makes some of us wonder, doesn’t it? What’s the connection between mobile app developers and USB cables?


Well, when a developer connects a device to a computer, he will instinctively enable the ‘USB Debugging mode’. When the ‘USB Debugging Mode’ is enabled on an Android device, it opens up a bridge between the Android device and the computer. This bridge grants him a level of access from your computer to your device. What kind of access? This level of access that USB Debugging Mode grants is important when he needs system-level clearance, such as when coding or debugging an app. This mode, also called the Developer Mode, allows newly programmed apps to be copied via USB to the device for testing. Depending on the OS version and the installed utilities, the mode must be turned on to let developers gain access of the device. One such common utility is ADB.


What is ADB?


One of the most commonly used abbreviations in Android blogs and forums is “adb”. So, what is “adb”?


ADB, Android Debug Bridge, is a command-line utility included with Google’s Android SDK. It provides a wide variety of functions for managing your device. As stated in the Android developer site — “Android Debug Bridge (adb) is a versatile tool that lets you manage the state of an emulator instance or Android-powered device.” In simple words, ‘adb’ is a “bridge” through which developers can connect to an Android emulator or a device from a computer to resolve bugs in their applications. The bridge can be accessed via a command line interface from a computer, where the Android SDK is installed. This is done by connecting a device that runs the software through a PC, and feeding it terminal commands. ADB lets you modify your device (or device’s software) via a PC command line.


Using ADB with A locally connected devices


A simple client-server setup using your USB cable will help you establish an adb connection from a computer to an android device. Once this connection is established, you can send adb commands from your computer via USB to control your android device. Using ADB commands you can move content to and from your phone, install an uninstall apps, back-up and restore your software, run shell commands, run automation scripts and more.


But, it certainly raises questions like these:


  • We are moving to cloud-based devices, how will we be able to use adb connection with the devices on cloud?
  • Do I have to switch to local devices to if I have to debug my app?
  • Does this mean I cannot use adb bridge when I’m using devices on cloud?


Well, the answer is you can establish adb connection with cloud-based devices as well, and it is a much easier process compared to connecting your devices locally.


Using ADB with A Remotely connected device


Accessing ADB through pCloudy platform – Device Tunnel


pCloudy has introduced Device Tunnel, a new add-on to our real mobile device cloud. With Device Tunnel, you can connect and take full control of any Android device using Android Debug Bridge. It provides access to the cloud-based devices through the Android Studio or Eclipse IDE and the command-line tool that’s installed on your computer. What’s more? Many test automation frameworks and developer tools used for evaluation of the app and debugging can hold on to cloud-based devices as if locally connected by USB. For such tools, Device Tunnel acts as a “USB cable” connecting cloud-based device(s) to a local laptop or server. From the point of view of such tools, a cloud-based device appears physically attached. In reality, the Device Tunnel communicates with pCloudy’s servers over Ethernet (LAN or WAN) to reach the cloud-based device.


The Device Tunnel allows developers to gain more control over any cloud-based android device. Once a connection is established, the developers can perform the following actions:


  • Issue a number of adb commands for debugging, shell creations, port forwarding, and viewing general information about any cloud-based Android device
  • Copying and pushing files to connected cloud-based devices
  • Installing and uninstalling applications on cloud-based devices
  • Debugging apps during development or testing by adding breakpoints, inspecting variables, analyzing runtime metrics to optimize your app and more


This comes with the added advantage of accessing and performing these actions on any Android device among of hundreds that are hosted on our Cloud. This ability will also help developers to debug apps and determine the causes behind issues or bugs that are device specific.


On the whole, the Device Tunnel will aid developers and testers who need quick access to diverse devices for brisk evaluation of app and debugging. It enables developers and testers to instantly connect to any device hosted on cloud and easily identify problems by running interactive debug sessions.


To know more on how to connect any device on pCloudy using Device Tunnel click here