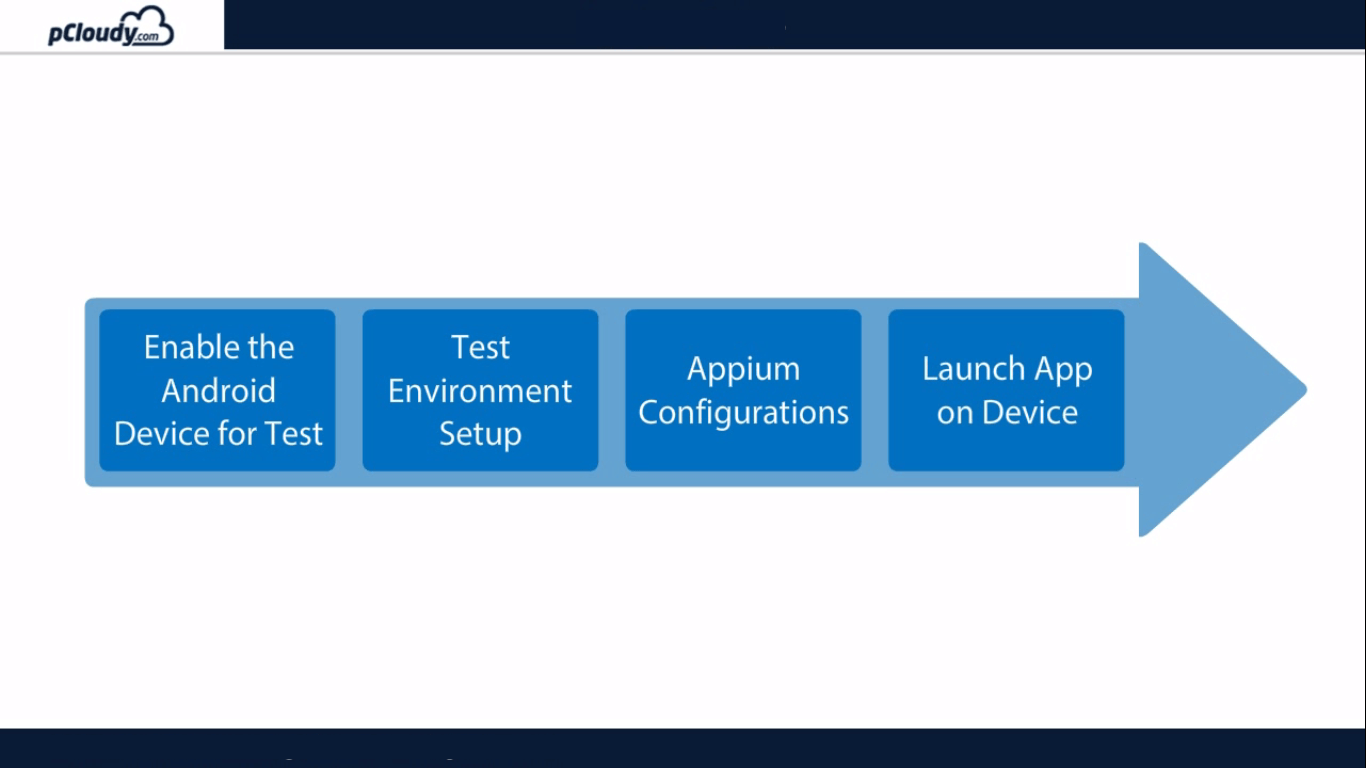
In the previous blog, we informed about the basics of Appium and its architecture. Now let’s understand how to setup Appium. There are four steps required to setup Appium, they are enabling the Android device for test, test environment setup, Appium Configurations, Launch the app on the device.
Pre-requisites for Appium Mobile Testing
1. An Android device with OS 4.2+
2. AUT(Application Under Test) file (.apk)
3. Phone USB Drivers
4. Java (JDK)
5. Android Studio (SDK)
6. Eclipse
7. Selenium Standalone JAR
8. Appium Java Client
9. Appium for Windows
10. .NET Framework 4.5
Android Developer Options in device
Every Android smartphone contains a secret set of Android developer options which are used by app developers who need additional functions to test their apps they are making for Android devices. It allows you to enable debugging over USB, capture bug reports on your Android device and show CPU usage on the screen to measure the impact of your software.
To enable developer option in the phones to go to the settings, click on the about phone options and click on the build number 7 times to enable the developer options.
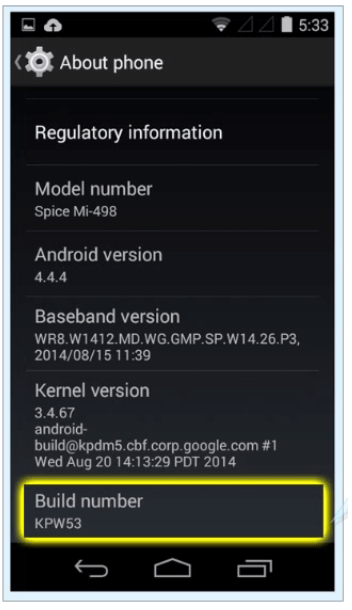
Doing so will display a toast message for enabling the developer option. the current message appears if the developer message is already enabled on the phone.
Phone Drivers
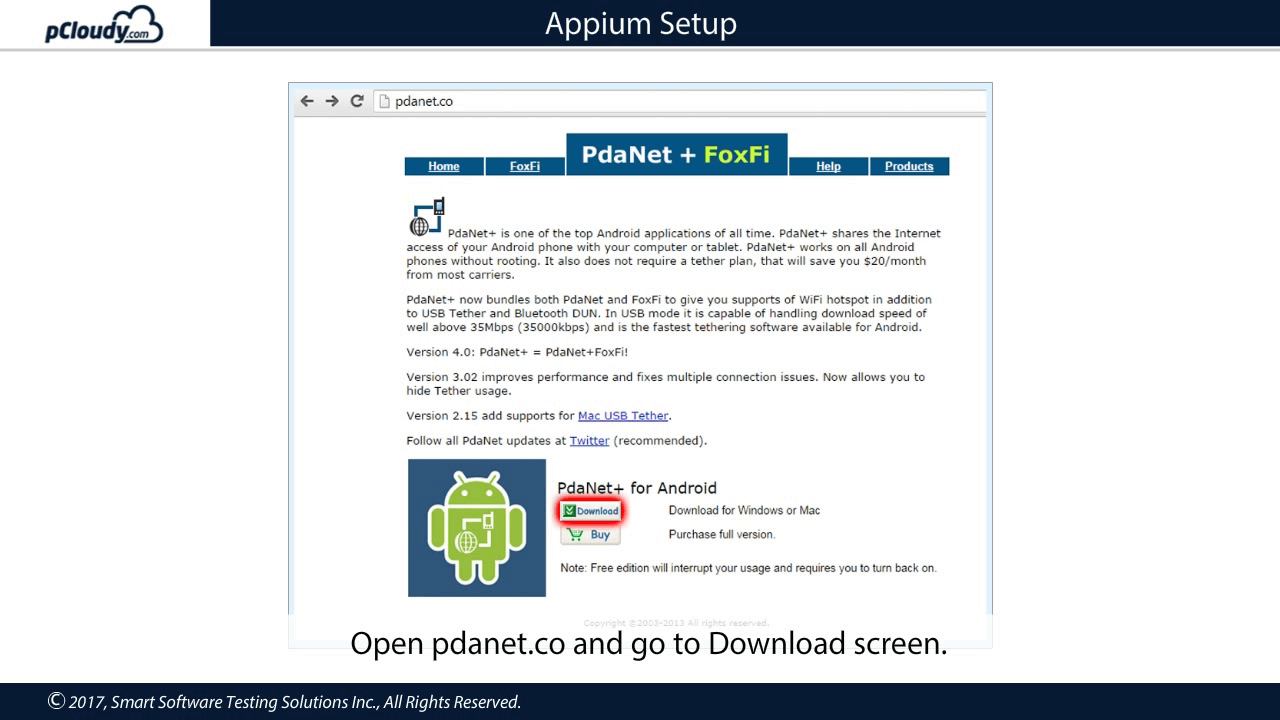
The phone can communicate with the PC only if there are proper drivers installed for the USB cable. Each phone manufacturers provides its own drivers for the phone. PDA net is a driver which works with all the Android devices. It makes sure that your phone is detected in DDMS.
Open pdanet.co and go to download screen and download the latest version to install it on your PC.
Let’s verify if the phone is prepared.
The ddms.bat file is present in the Android SDK tools folder.
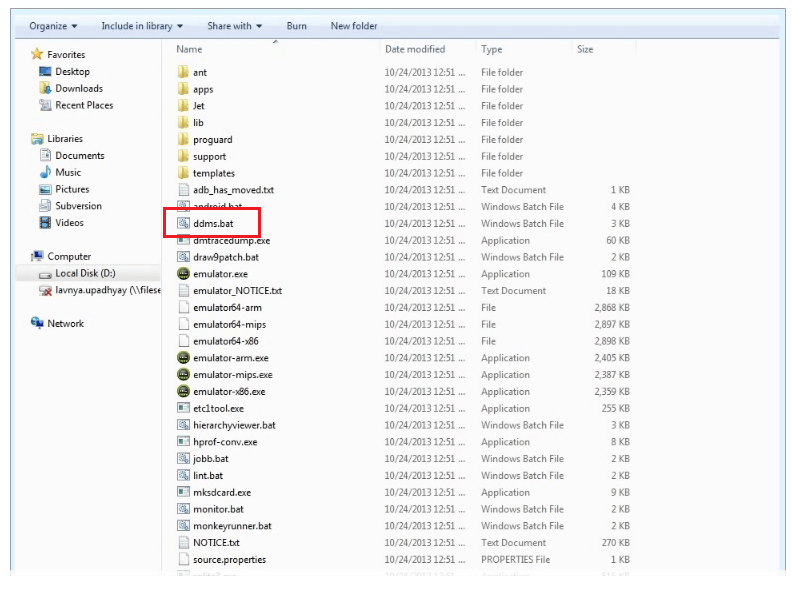
Double click on the file and you will see the Dalvic Debug Monitor window.
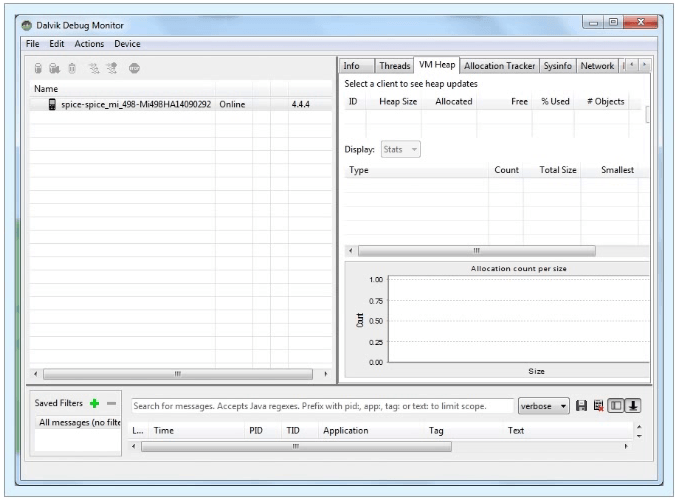
If your DDMS option is enabled i.e. if you have installed the PDA net software and connected the device to the machine, that device should be detected in this monitor. Now let’s move on to the second step.
Test Environment Setup
First, you need to download JDK from the Oracle website.
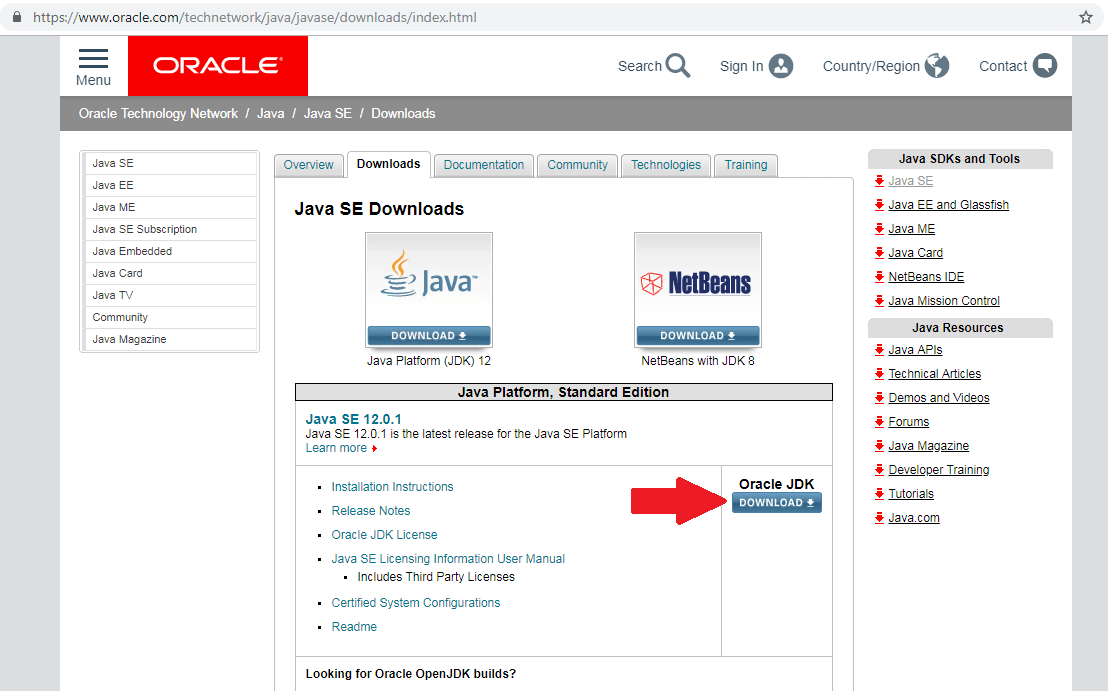
Once downloaded, install it to your machine. Now you need to set the Java installation path in your Environment variable. Right-click on Computer option in the Start menu and select the Properties option. Select Advanced system settings and then select the Environment variables option in the Advanced tab.
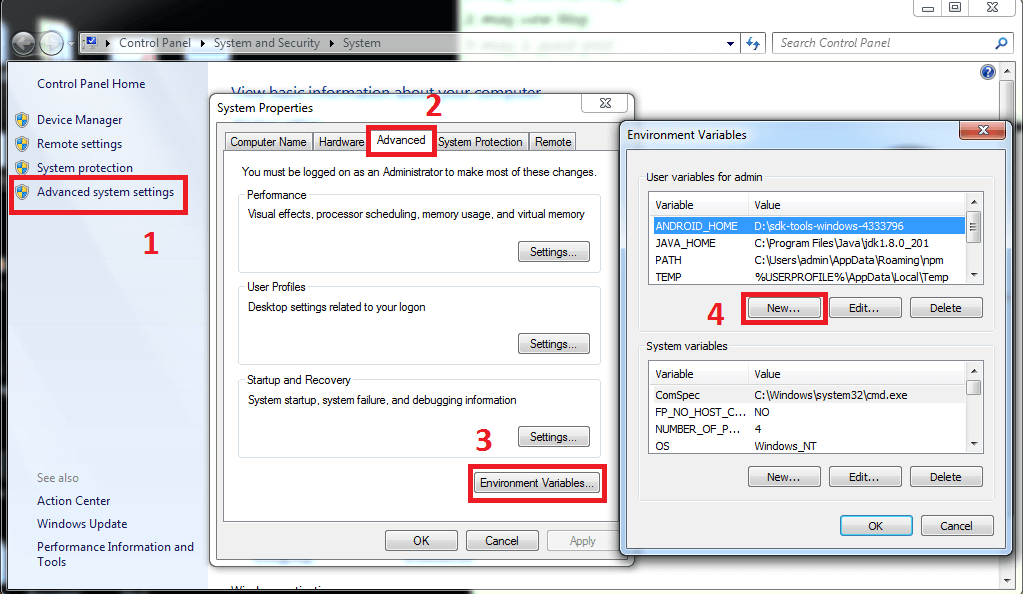
Then select the new option and enter the new variable name as JAVA_HOME.
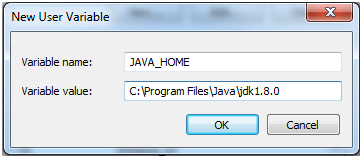
Set the path of JDK to variable value and then click OK.
To get an Android emulator you need to go to www.developer.android.com\studio#downloads and Scroll down to Command-line tools only section to download the zip file of SDK tools package for Windows.
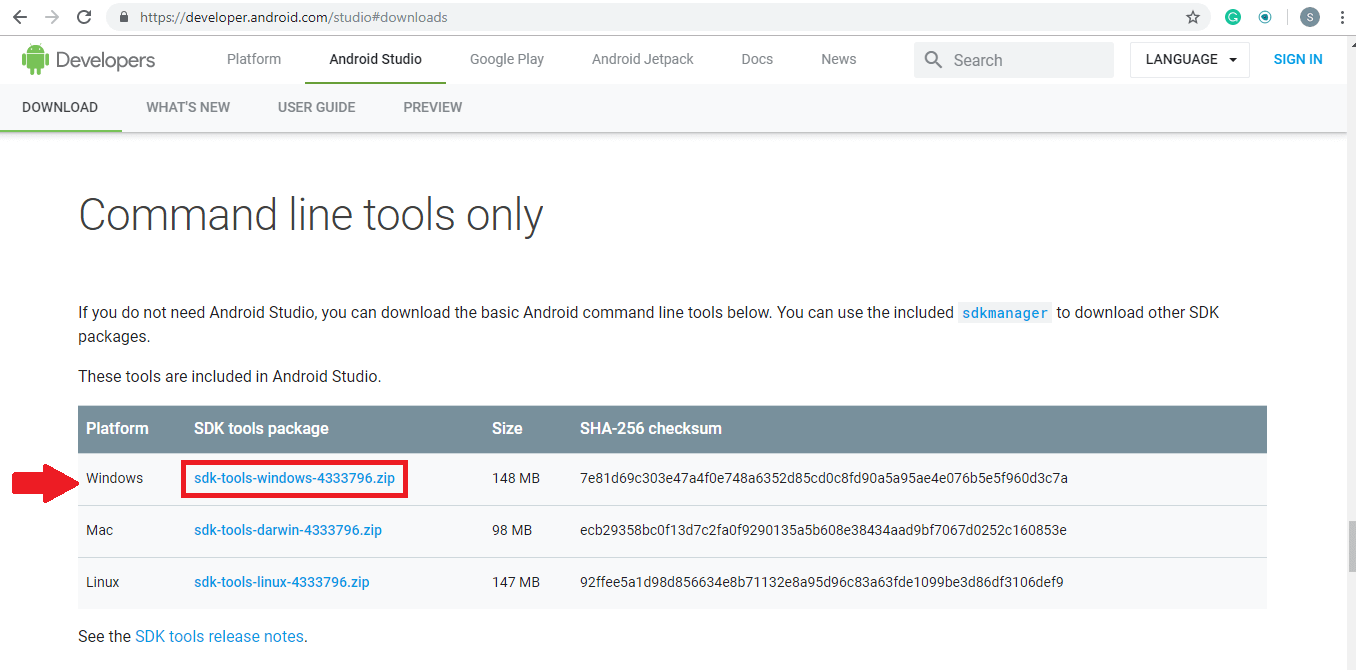
Don’t download the EXE file. Once the SDK file is downloaded, copy it to the C drive, make a new folder and extract the zip file in the new folder.
Now you need to search for SDK manager in the bins folder and open SDK manager. Once the SDK manager window is open, go to tools and then get into the bin folder and in the address bar type cmd and hit enter. Now in the command prompt type SDK manager “platform-tools” “platforms; Android-28 and then hit enter. So now you will be able to see Platform tools and Platform folders in now folder you created for the extracted files.
Click on platform tools and copy the address bar text and then again go to an environment variable. Then go to the path, a new window will pop up, make a new path and enter the copied text there and then click on OK.
To download Appium go to www.appium.io and click on the Download button.
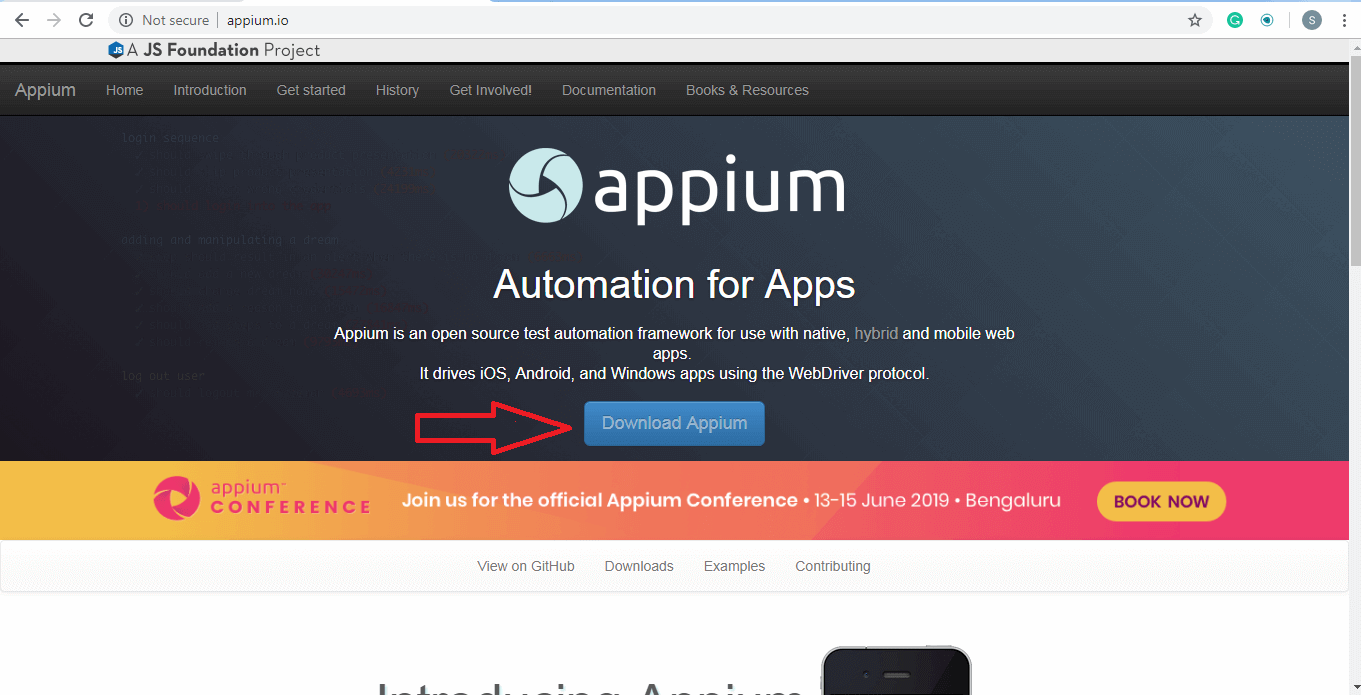
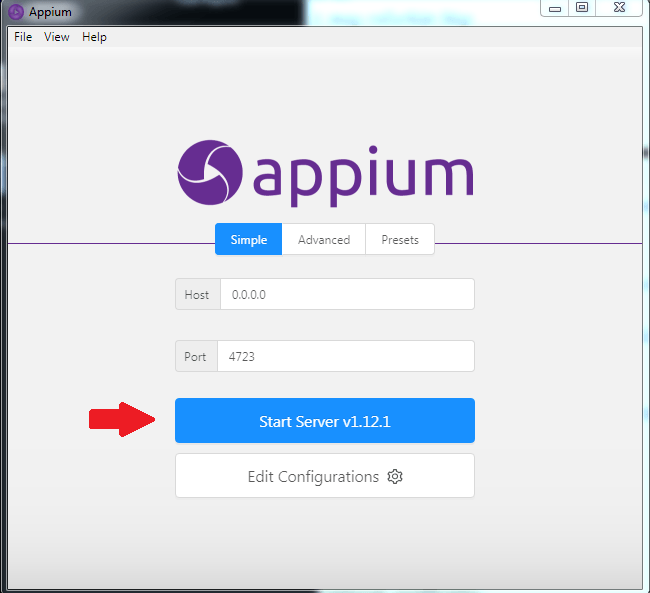
Under the latest version, click on the Appium-windows-1.12.1.exe file. Once the file is downloaded, open the appium.exe file. Click on the Start Server v1.12.1 button.
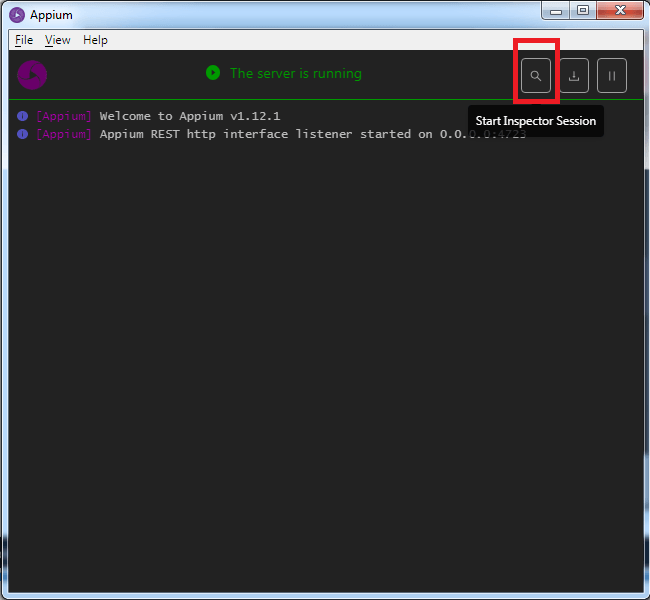
Then in the server window click on the Start inspection session icon at the top right corner.
Now you can get started with Appium automation testing. Do read our next blog to get more information about Appium mobile automation and how to inspect elements using Appium Desktop.
Related Articles:


 September 13, 2023
 March 06, 2023


