Suyash Dubey | Posted on | 2 min Read

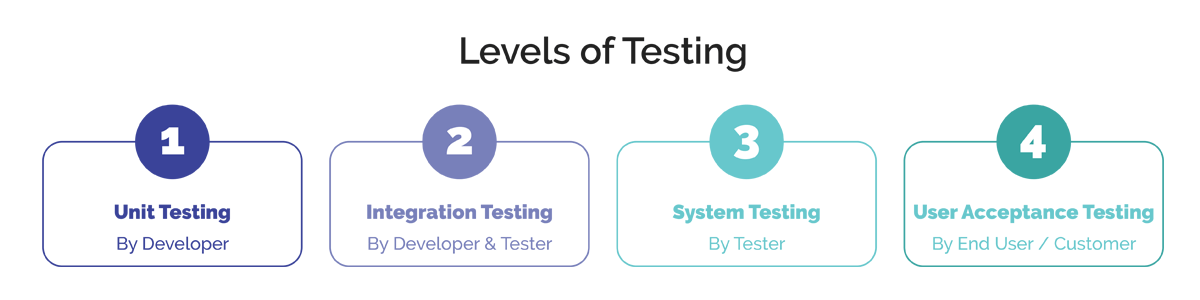
In the dynamic world of software development, ensuring the reliability and stability of your application is of utmost importance. Unit testing stands as a first line of defense against bugs and errors, playing a crucial role in securing the application’s robustness. Let’s delve deeper into the intriguing world of unit testing, beginning with what it is and then exploring its indispensable role in modern app development.


Level of testing


What is Unit testing?

Unit testing, a fundamental practice in app development, is the process of testing individual units or components of a software application. It is generally conducted during the development phase, primarily by developers, to validate that each unit of the software performs as designed.


A “unit” in this context refers to the smallest part of a software system that can be tested in isolation. It might be a function, method, procedure, or an individual module, depending on the complexity of the software. The primary goal is to validate that each unit functions correctly and meets its design specifications.


Importance of Unit Testing

Below, we delve into the importance of unit testing in the realms of web and mobile applications:


1. Early Bug Detection

Unit testing allows developers to identify bugs early in the development cycle, which not only saves time but also significantly reduces the cost of bug fixing. Early bug detection ensures that issues are nipped in the bud before they escalate to more critical stages.


2. Facilitating Changes and Refactoring

With a well-established unit testing practice, developers can make changes to the code or refactor it with confidence. Unit tests act as a safety net, helping to identify unforeseen impacts of the modifications, thus ensuring the consistency of the application.


3. Enhanced Code Quality

When developers write unit tests, it naturally leads to better code quality. Developers are more likely to write testable, modular, and maintainable code, fostering an environment of excellence in code craftsmanship.


4. Improved Developer Productivity


Unit testing can significantly improve developer productivity. Since bugs are caught early, developers spend less time debugging and more time building new features. Moreover, the immediate feedback provided by unit tests helps streamline the development process.


5. Simplified Debugging


When a unit test fails, it is much easier to identify and fix the issue, as you only need to consider the latest changes. This contrasts sharply with higher-level tests where a failure might be the result of a myriad of factors, making debugging a complex and time-consuming task.


6. Seamless Integration


Unit tests facilitate smoother integration processes. When integrating various components or modules, unit tests can quickly pinpoint issues at the unit level, making the integration process more efficient and less error-prone.


7. Robust Security


In web and mobile applications, security is paramount. Unit testing helps in identifying vulnerabilities at the code level, allowing developers to fortify the application against potential security breaches, thus safeguarding user data and privacy.


8. Customer Satisfaction


By ensuring the stability and reliability of web and mobile applications through unit testing, developers can significantly enhance customer satisfaction. A bug-free, smooth-running application is more likely to earn user trust and build a loyal customer base.


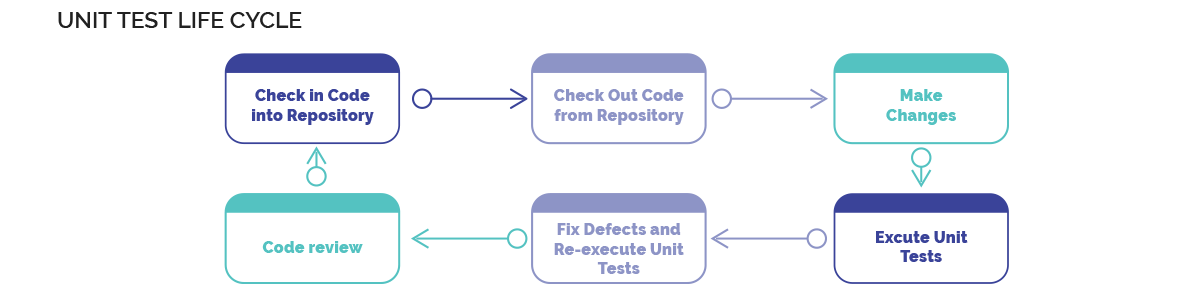
How to Perform Unit Testing


Performing unit testing is an essential practice in ensuring the robustness and reliability of your application. Whether you are working on a mobile or web application, incorporating unit testing into your development process can help you deliver a high-quality product. Here is a step-by-step guide to effectively performing unit testing on apps:


Step 1: Understanding the Codebase


Before you start with unit testing, familiarize yourself with the codebase and understand the functionalities of different units. Having a clear picture will aid in writing more effective and relevant tests.


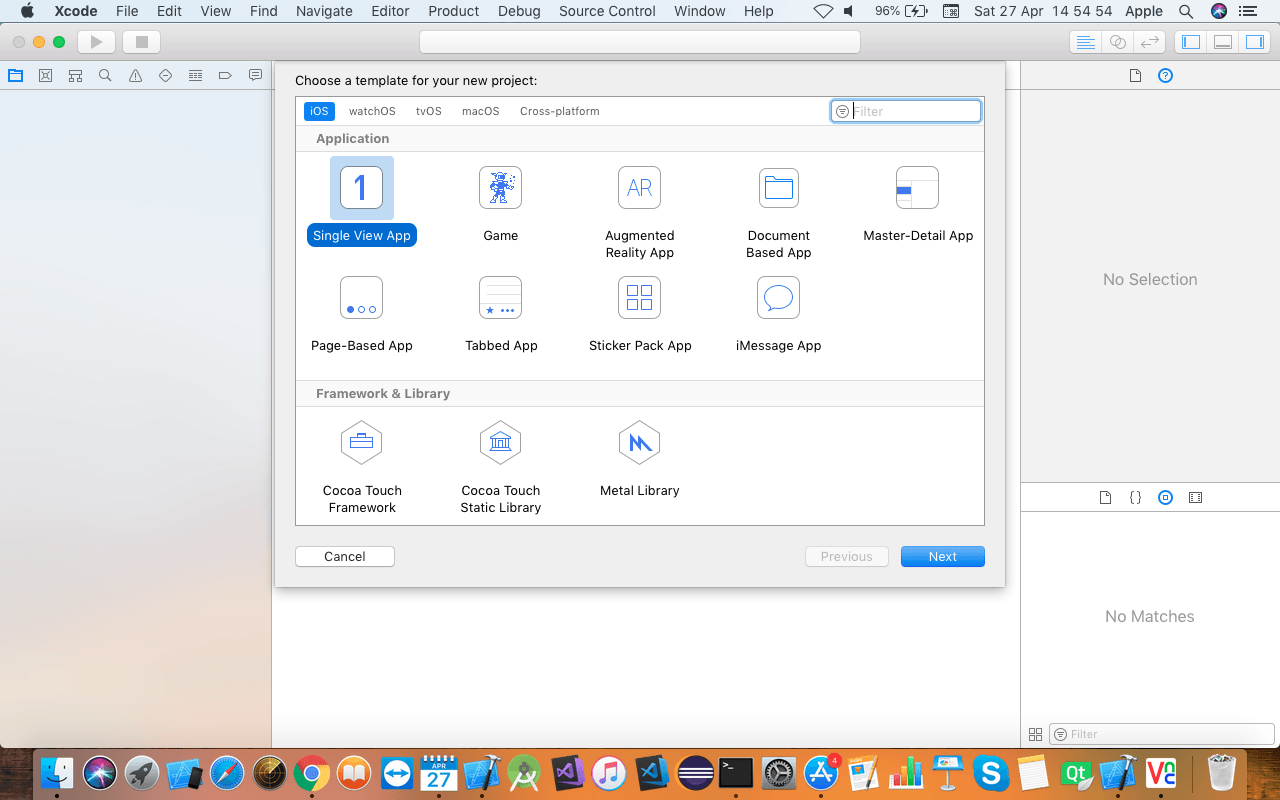
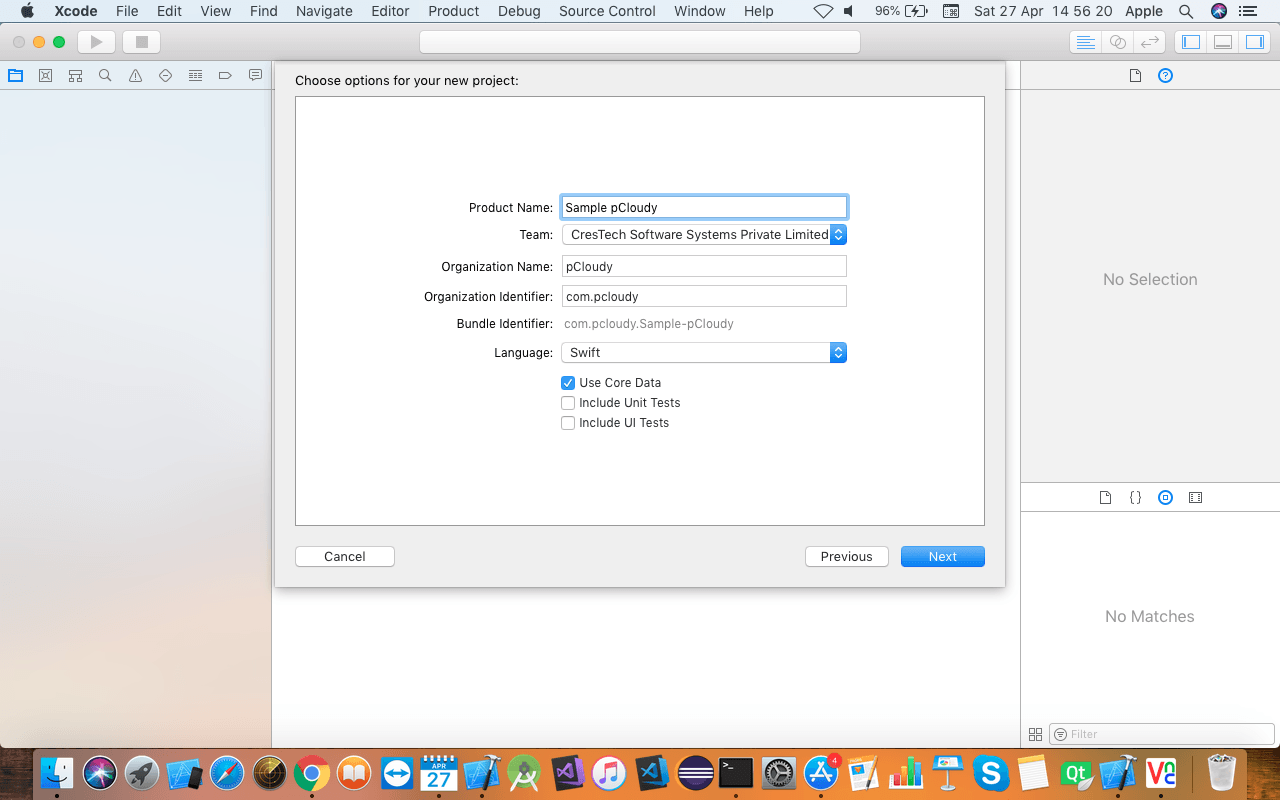
Step 2: Setting Up the Testing Environment

Set up a separate testing environment where the unit tests will be executed. This environment should be isolated from production to avoid any unintended consequences. Utilize unit testing frameworks suitable for your programming language to streamline the process.


Step 3: Writing Unit Tests

3.1 Choose the Units to be Tested


Identify the critical components that need testing. Start with the core functionalities that form the backbone of your application.


3.2 Create Test Cases


For each unit, create test cases that cover various scenarios including edge cases. Each test case should focus on a single functionality.


3.3 Mock External Dependencies


Use mocking frameworks to simulate external dependencies, ensuring the unit is tested in isolation. This helps in pinpointing the issues more accurately.


Step 4: Executing the Tests


Run the tests using the testing framework. Ensure to cover different cases including:


Positive Cases: Where the input meets the expected criteria.


Negative Cases: Testing with inputs that are supposed to fail, to ensure proper error handling.


Edge Cases: Testing the limits of the input parameters.


Step 5: Analyzing the Results

After execution, analyze the results thoroughly. If a test fails, investigate the cause and fix the issue before proceeding.


Step 6: Integrating with Continuous Integration (CI) Systems


Integrate the unit tests into a Continuous Integration system to automate the testing process. The CI system should be configured to run the unit tests automatically each time code is pushed to the repository.


Step 7: Maintenance of Test Cases

As the application evolves, continually update the test cases to mirror the changes in the application. Remove obsolete tests and add new ones for the newly added functionalities.


Step 8: Documentation

Maintain a well-documented record of all the test cases, including the input parameters and expected outcomes. This documentation will serve as a reference and aid in understanding the expected behavior of the application units.


Step 9: Team Collaboration


Encourage collaboration in the team where code and test cases are reviewed by peers to ensure the quality and effectiveness of the unit tests.


Step 10: Training and Learning

Continuously improve your unit testing skills through training and learning. Stay updated with the latest trends and best practices in unit testing to enhance the quality of your tests.


Unit Test Life Cycle


Best Practices in Unit Testing


The process of unit testing can be substantially improved by adhering to a set of best practices and methodologies. These practices not only streamline the testing process but also enhance the overall quality and reliability of the software product. Here are several strategies to consider for optimizing your unit testing efforts:


1. Adopt Consistent Naming Conventions


Implement a coherent and descriptive naming convention for your test cases. This facilitates easier identification and understanding of the tests, fostering smoother collaboration and maintenance.


2. Test Singular Units of Code Independently


Focus on testing individual units of code separately to isolate potential issues effectively. This strategy ensures that each component functions correctly in isolation, paving the way for a more robust application.


3. Develop Corresponding Test Cases During Code Changes


Whenever there is a modification in the code, ensure to create or update the corresponding unit test cases. This practice helps maintain the relevance and effectiveness of your test suite, allowing for the timely detection of issues introduced by the changes.


4. Prompt Bug Resolution


Prioritize the immediate resolution of identified bugs before progressing to the next development phase. Quick bug resolution minimizes the potential for escalating issues and maintains the stability of the codebase.


5. Integrate Testing with the Code Commit Cycle


Integrate unit testing into your code commit cycle to foster a test-driven development environment. Conducting tests as you commit code helps in the early detection of issues, reducing the chances of errors proliferating through the codebase.


6. Focus on Behavior-Driven Testing


Concentrate your testing efforts on scenarios that significantly influence the system’s behavior. Adopt a behavior-driven testing approach to ensure that the application behaves as expected under various conditions, enhancing reliability and user satisfaction.


7. Utilize Virtualized Environments for Testing


Leverage virtualized environments, such as online Android emulators, to conduct unit tests in scenarios that closely resemble real-world conditions. These environments offer a convenient platform to test the application under different settings without the need for physical devices.


8. Implement Continuous Integration


Incorporate unit testing into a continuous integration (CI) pipeline to automate the testing process. CI allows for the regular and systematic execution of unit tests, ensuring that the codebase remains stable and bug-free as it evolves.


9. Encourage Peer Reviews


Promote the practice of peer reviews for both code and test cases. Reviews foster collaboration and knowledge sharing, enhancing the overall quality and robustness of the application.


Disadvantages of Unit Testing


1. Limited Scope of Testing


A notable limitation of unit testing is its inability to verify all execution paths and detect broader system or integration errors. Since unit tests focus on individual components, they might overlook issues that only emerge during the interaction between different units or systems.


2. Potential for Missing Complex Errors


Unit testing might not be comprehensive enough to identify complex errors that are generally captured during integration or system testing. It is, therefore, essential to complement unit tests with other testing methodologies for a well-rounded verification of the software.


Conclusion


In light of the above discussion, it becomes unequivocally clear that unit testing stands as a cornerstone in safeguarding the integrity and reliability of software development. Steering clear of it is not only detrimental to the code quality but could potentially escalate the costs and efforts involved in the later stages of development.


Adopting a Test-Driven Development (TDD) approach further amplifies the benefits of unit testing. In this paradigm, developers construct tests before writing the corresponding code, thereby ensuring that the codebase develops with testing at its core. This not only engrains a quality-first mindset but also facilitates a workflow that is more organized and less prone to errors.


Moreover, the utilization of appropriate tools and frameworks can streamline the unit testing process substantially, making it less cumbersome and more efficient. These tools can automate various aspects of testing, helping to detect issues swiftly and reducing manual effort considerably.


As we navigate through an era where software forms the backbone of many critical systems, the role of unit testing in fostering robust, secure, and reliable applications cannot be understated. It emerges not as an option but a necessity, carving pathways for innovations that are both groundbreaking and resilient.


By embracing unit testing as an integral part of the development cycle, developers are not only upholding the quality and reliability of their applications but are also taking a step towards crafting products that stand the test of time, offering optimal performance and user satisfaction.

Suyash Dubey | Posted on | 2 min Read

[xyz-ihs snippet=”quickLinks-Appium”]
 
In our previous chapter on Android, we learned about UI Automator Viewer, Which is available on Android SDK, to get the properties of the application object. In the case of iOS, Appium itself provides an Inspector which helps users to locate those elements in the application.
 
First, open the simulator by clicking on the dock option.
 
Open the simulator

Now in the Device/Simulators window, select the simulator. Open the Appium Desktop and keep the simulator side by side.
 
Device-Simulators

Once the inspector is started, select any of the objects on the screen. It will show you the complete hierarchy and properties of that object.
 
Appium-Test-Automation

At the top of the window, you can see the Record button which is used to record all the actions taken and record the script.
 
Appium-Test-Automation

To select any object, click on the Select Element button and then you can use Tap button to click on an object, Send Keys to enter text and clear to undo the action.
 
Appium-Test-Automation5

As soon as you perform an action on an object, it is recorded in the form of a script.
 
Appium-Test-Automation
Once you are done with the recording you can copy the script and paste in eclipse editor.
 
Appium-Test-Automation
In the next blog, we will learn how to write the first appium script for iOS.
 
Related Articles:

  • Appium vs Espresso: The Most Popular Automation Testing Framework in 2019
  • How To Install Appium On A Mac Machine
  • Writing The First Appium Test Automation Script (Android)
  • Basics of Appium Mobile Testing
  • 8 Common Appium Mobile Test Automation Mistakes and How to Avoid Them
  • Mallikharjun | Posted on | 2 min Read

    In the last blog in this series we learned how to start the Appium server and launch app from the code. In this blog we will understand how to setup Appium on a Mac machine.

    Pre-requisite

    • Mac Book
    • Xcode
    • Simulator or real device
    • Appium
    • Eclipse
    • Java

    The first step is to install Xcode in the Mac Book. To do that, open app store and search for Xcode and click on the Get button to download Xcode.

    download Xcode
    Then click on the Install App option. This will install Xcode on your Mac machine. Now click on the Agree button if you agree with the terms and conditions and it will start installing components.

    Once the Xcode is installed, you need to select “Create a new Xcode project” and you will be redirected to the template selection option.

    template selection
    You may select any of the templates or leave default settings as they are. Click on the next button to navigate to the next screen.

    Now you will be asked to provide a product name and other product-related settings.

    settings
    Enter the required details and click on the next button. In the last seen of product settings, you will be asked to give the location in which to save your project.
    Select the location anywhere as per your requirements and click on the create button.

    create button
    Once the project is loaded go to the Product menu option and click on the Run option.

    Run option
    Once you click on the run option, it will launch iOS simulator.

    iOS simulator
    Now right click on the simulator icon on the doc panel and select the keep in doc panel. In this way, you don’t need to start Xcode to launch the simulator. Thus you don’t need to open the Xcode project each time to launch iPhone simulator. If you want to see the list of simulators, got to the Window menu and select the Devices option. You will get a list of all the simulators available with this version of Xcode.

    Installing JDK and setting the path

    Download JDK for Mac OS and once the file is downloaded, double click on the file and install Java.

    install Java
    Now you need to set the Java installation path in your environment variable. Open a terminal and write “open.bash_profile”.

    Open a terminal
    If “.bash_profile” does not exist then execute the command “touch~/.bash_profile”. This will create the file. So when you execute the command, it opens the “.bash_profile” file.

    execute the command
    Copy the path to JDK home, write export JAVA_Home= and then save this file. Open command prompt and execute the java – version command. Open Appium.io and click on Download Appium button.

    Appium button
    Now download the latest .dmg file and once downloaded, double click on the .dmg file.

    dmg file
    It will open a new window where you need to drag and drop Appium into the application folder.

    application folder
    Search for Appium and double click on the Appium icon. This will launch the Appium server on your Mac machine.

    Appium icon
    To Launch Appium on a simulator click on the Start Server button.

    Now click on the Start Inspector Session button in the Appium server.

    Start Inspector Session
    Once you select pCloudy as the cloud provider from the list you can click on Done.

    cloud provider
    Then you need to enter the Hostname, User name, API Key, Desired Capabilities and then click on Start Session.

    Start Session
    Your simulator is now connected.

    17
    Now you know how to setup Appium on Mac and in the previous blogs in this series we explained how to write the test script and start Appium server. In the next blog we will learn how to use Appium inspector to identify elements in an app.

    Related Articles:

    Suyash Dubey | Posted on | 2 min Read

    In the previous blog in this series, we learned how to write the first Appium script for Android devices. Now in this blog, we will understand how to start the Appium server.

    The code structure is segregated into three parts, the first part of the code starts the Appium server, the second part stops the Appium server.

    The Code Structure

    The third part is the main method which is necessary to execute the class and from this main method, all the above method are called.

    Starting Appium from code requires a path of two files which are kept inside the Appium folder.

    • node.exe
    • js


    Starting Appium Server

    In the code highlighted in red, we have called process class which is a Java class and declared it static.

    Starting Appium Server

    We then created a start server variable and pass the path to node.exe and main.js, highlighted in yellow. In the code highlighted in green, we added both paths into the same variable with spaces and created a method called startAppiumServer() which takes care of the Appium server startup process. Next step is to create an object of Runtime class which is again a java class and call the method getRuntime(), highlighted in blue. We will pass the variable “STARTSERVER” into runtime.exec() method. It will start the Appium Server.

    Once the process is started, we have to store the current state of the process into this variable. We will give a sleep time of 5 seconds as it takes time to start the process. what we are trying to validate here is, if the process is not null; it means that the process is started as highlighted in the gray box.

    Stop Appium Server

    Here we need to create another method named stopAppiumServer(). We again verify the state of the process and if it is not null, call a method of process class destroy().

    Stop Appium Server

    So now we know how to start and stop the Appium server from code. Let’s try to install and launch an app on a mobile device. Let’s see how we can install a .apk file on an Android device and launch it automatically without providing the path in Appium Server.

    Installing and launching the application

    To begin with, we call the stopAppiumServer() method to verify if any instance of Appium Server is already running and if so, then it closes that instance, as highlighted in red. The method highlighted in yellow starts the Appium Server.

    Installing and launching the application

    Then store the apk path file into a variable of File class, which is a Java class as highlighted in blue. Create another variable of File class app. It takes two parameters:

    • The absolute path of the apk file.
    • Name of the apk file.

    Now the absolute path is stored into appDir variable and the name of apk file in the second part as highlighted in the green box. The rest of the things are the same as discussed in the earlier sessions.

    The complete code is shown here.

    Package QA campus

    Appium server installation

    Appium server installation

    Now that you have learned how to launch app from code, let’s move on to the next blog where we will learn how to set up Appium on a Mac machine.

    Suyash Dubey | Posted on | 2 min Read

    In the last blog in this series, we learned how to set up Appium for test automation on a Windows machine. Now we will handle the application by writing the Java code. We will require the following software:

    Eclipse

    Selenium standalone Jar

    Appium Java Client
     

    This process consists of five steps as depicted in the picture below.

    Test Automation

    First, we need to collect the Selenium Standalone JAR and Appium Java Client Libraries. To download the Selenium standalone JAR file, go to seleniumhq.org/download then click on the Download version.

    Test Automation SeleniumHQ

    For Appium Java client you need to go to appium.io/downloads and download the libraries for the selected language.

    Test Automation Downloads

    Now to create a java project download Eclipse from eclipse.org/downloads. Launch Eclipse and select the workspace location.

    Test Automation Eclipse

    To set the Android SDK path into Eclipse, click on the Windows tab in the menu bar and select Preferences in the drop-down list.

    Test Automation

    Then select the Android option and browse your Android SDK location and click on Apply.

    Test Automation Preference

    Launch Eclipse and right-click on Package Explorer. Then select a new Java Project.

    Test Automation Java ADT

    Enter a project name and click finish.

    Once the project is created, add a folder to the project, for the project dependency files [Selenium Standalone] and [Appium Client Library] which you have downloaded.

    Test Automation Package Explorer

    Copy the downloaded file into the newly created project dependencies folder. Select both files and right-click. Then select the add to Build path option and then Add to Build Path. Thus both classes have been added to your project reference libraries.

    Test Automation Package Exp

    Create a class and import the required packages. Now right click on the src folder, hover the mouse over the new option and select the Class option.

    Test Automation Class

    Provide a package name, the name of class then select the main method checkbox.

    Test Automation Java Class

    A .java file within the package is created in Package Explorer panel. An auto-generated the main method is generated on the right panel.

    Test Automation Lauchapp

    You need to define a public class variable of AndroidDriver as your first line of code. You will now see an error for an android driver. Now hover your mouse over the error, you will get a list of quick fixes. Select Import ‘AndroidDriver’. Once you select the import package option, the android driver package will be imported and the error will be removed.Test Automation Android Driver

    Create an object of DesiredCapabilities. Again you will get an error for DesiredCapabilities. Hover the mouse over DesiredCapabilities and then select Import ‘DesiredCapabilities’ from the quick fix list.

    Test Automation Emulator

    Once you select the import package option, the DesiredCapabilities package will be imported and the error will be removed.

    Now set the DesiredCapabilities and also provide the package of an application and the name of application launcher activity.

    Now you need to instantiate the Android driver.

    To do this we need to have two parameters, the first is the Appium server address with the port number which it is running and the Capabilities.

    Test Automation capabilities

    Hover mouse on URL and import URL from Java.net. You will get an error for complete new URL section, hover mouse on the error and select Add throws declaration. By doing so exception has been added into your main method.

    Test Automation Driver

    Now start the Appium server and connect a device to the system. Now return to Eclipse and execute the code. This will launch the app in the device.

    In the code, we have declared the class as public so that we can access it anywhere inside out test.

    Test Automation Diving Deep

    The java main method is highlighted in yellow. We created an object of desired capabilities class which you can see in the green box. In method setCapability, there are two parameters. First is the capability name and second is the capability value as highlighted in blue. Then we created an object of AndroidDriver class highlighted in the black box. The code highlighted in gray is the findElement(By) method which can locate an element on the screen.

    Now that you have learned how to write a mobile test automation script using Appium test automation framework, we can move on to the next blog where we will learn how to start the Appium server and launch the app from code.

     
    Related Articles:

  • How to use Appium Inspector for Test Automation
  • Basics of Appium Mobile Testing
  • Inspecting Element on pCloudy Devices Using Appium Desktop
  • Help Guide for pCloudy-java-Connector for Appium
  • Appium vs Espresso: The Most Popular Automation Testing Framework in 2019
  • Suyash Dubey | Posted on | 2 min Read

    In the previous blog, we informed about the basics of Appium and its architecture. Now let’s understand how to setup Appium. There are four steps required to setup Appium, they are enabling the Android device for test, test environment setup, Appium Configurations, Launch the app on the device.
     
    Appium Mobile Testing

    Pre-requisites for Appium Mobile Testing

     
    1. An Android device with OS 4.2+
    2. AUT(Application Under Test) file (.apk)
    3. Phone USB Drivers
    4. Java (JDK)
    5. Android Studio (SDK)
    6. Eclipse
    7. Selenium Standalone JAR
    8. Appium Java Client
    9. Appium for Windows
    10. .NET Framework 4.5
     

    Want to test your Mobile App?

    Join pCloudy Platform!

    Android Developer Options in device

     
    Every Android smartphone contains a secret set of Android developer options which are used by app developers who need additional functions to test their apps they are making for Android devices. It allows you to enable debugging over USB, capture bug reports on your Android device and show CPU usage on the screen to measure the impact of your software.
     
    To enable developer option in the phones to go to the settings, click on the about phone options and click on the build number 7 times to enable the developer options.
     
    About Phone

    Doing so will display a toast message for enabling the developer option. the current message appears if the developer message is already enabled on the phone.
     

    Phone Drivers

     
    The phone can communicate with the PC only if there are proper drivers installed for the USB cable. Each phone manufacturers provides its own drivers for the phone. PDA net is a driver which works with all the Android devices. It makes sure that your phone is detected in DDMS.
     
    Open pdanet.co and go to download screen and download the latest version to install it on your PC.
     
    Appium Setup

    Let’s verify if the phone is prepared.
     
    The ddms.bat file is present in the Android SDK tools folder.
     
    Dalvic Debug Monitor

    Double click on the file and you will see the Dalvic Debug Monitor window.
     
    DDMS

    If your DDMS option is enabled i.e. if you have installed the PDA net software and connected the device to the machine, that device should be detected in this monitor. Now let’s move on to the second step.
     

    Test Environment Setup

     
    First, you need to download JDK from the Oracle website.
    Oracle download

    Once downloaded, install it to your machine. Now you need to set the Java installation path in your Environment variable. Right-click on Computer option in the Start menu and select the Properties option. Select Advanced system settings and then select the Environment variables option in the Advanced tab.
     
    Advanced system setting

    Then select the new option and enter the new variable name as JAVA_HOME.
     
    Java Home

    Set the path of JDK to variable value and then click OK.
     
    To get an Android emulator you need to go to www.developer.android.com\studio#downloads and Scroll down to Command-line tools only section to download the zip file of SDK tools package for Windows.
     
    Command line tools only

    Don’t download the EXE file. Once the SDK file is downloaded, copy it to the C drive, make a new folder and extract the zip file in the new folder.
     
    Now you need to search for SDK manager in the bins folder and open SDK manager. Once the SDK manager window is open, go to tools and then get into the bin folder and in the address bar type cmd and hit enter. Now in the command prompt type SDK manager “platform-tools” “platforms; Android-28 and then hit enter. So now you will be able to see Platform tools and Platform folders in now folder you created for the extracted files.
    Click on platform tools and copy the address bar text and then again go to an environment variable. Then go to the path, a new window will pop up, make a new path and enter the copied text there and then click on OK.
     
    To download Appium go to www.appium.io and click on the Download button.
     
    Download Appium
     
    Under the latest version, click on the Appium-windows-1.12.1.exe file. Once the file is downloaded, open the appium.exe file. Click on the Start Server v1.12.1 button.
     
    ApAppium Start Server v1.12.1

    Then in the server window click on the Start inspection session icon at the top right corner.
     
    Appium server

    Now you can get started with Appium automation testing. Do read our next blog to get more information about Appium mobile automation and how to inspect elements using Appium Desktop.

    Want to test your Mobile App?

    Join pCloudy Platform!

     
    Related Articles:

  • Writing The First Appium Test Automation Script (Android)
  • How To Install Appium On A Mac Machine
  • Basics of Appium Mobile Testing
  • Inspecting Element on pCloudy Devices Using Appium Desktop
  • Cross Platform Mobile Test Automation Using Appium
  • Suyash Dubey | Posted on | 2 min Read

    [xyz-ihs snippet=”quickLinks-Appium”]
     
    Appium is an open source mobile app UI testing framework. You can test all types of mobile apps and perform automation test on physical devices as well as on emulators and simulators. Appium mobile testing does not have a dependency on mobile device OS and it supports cross-platform app testing as a single API works for both Android and iOS. Appium supports many popular languages like C, PHP, Python, C#, Java, Ruby, JavaScript, etc.
     

    What is Appium Mobile Testing?

     
    When Appium is installed then a server is set up on your machine that exposes the REST API. It receives a command request from the client and executes that command on Android or iOS mobile devices. Then it responds back with an HTTP response. It uses mobile test automation frameworks like Apple instruments or UIAutomator2 to drive the UI of apps.
     

    Approaches to Test Automation

     
    There is two approaches for mobile test automation, Image-based and Object-based approach. Let’s understand both in detail.
     

    Image-Based Approach for Test Automation

     
    This technique of object identification is based on the image processing attributes of the objects in the Application Under Test (AUT). Example: Automate user options like “click, type, drag-drop, mouse actions, etc.”
     

    Visual verification of the expected output

     
    • Not dependent on the platform underneath
    • Can be used to automate emulators as well as a real device.
     
    Image based approach

    The object-based approach of test automation

     
    This technique of test automation is based on recognizing the nativity of the objects in AUT. This nativity reorganization process for each individual object in the application is carried out using different attributes that are assigned to the object.
     
    It is used to extract the application object identifier with its properties from the actual native operating system source code, just like the developer used. This is an accurate and fast method to recognize the buttons, lists and other objects used by the application.
     
    One drawback of the object-based approach is that the recognition of the individual attributes of the object involved restricts these techniques ability to function in test scenarios that require third-party application access. This reduces the automation coverage of utilizing this technique.
     
    Object based approach

    Which approach should we choose?

     
    As we have seen, both approaches have their pros and cons. To get better results, you can merge both approaches and think about devising a hybrid test automation solution.
     
    The combination of OCR (image based) and native (object-based) approach allows users to build a single script that will be portable across different devices. It will make your automation robust and efficient and allows the users to confidently detect the relevant native and GUI defect within the mobile application.
     

    Appium Overview and Architecture

     
    Appium is an HTTP server that manages WebDriver sessions. On iOS devices, Appium proxies command to a UI automation script running on Mac Instruments environment. Apple provides an application called instruments which are used to do a lot of activities like profiling, controlling and building iOS apps. It also provides an automation component where you can write some commands in JavaScript which uses UIAutomation APIs which interact with the app user interface. Appium mobile automation uses these same libraries to automate iOS apps.

    Appium Overview and Architecture

    The Webdriver Script sends a command in the form of HTTP (JSWP) to the Appium Server. Then the Appium Server will then decide as per the request which driver should be initiated. So, in this case, the Appium Server will initiate the XCUITest driver and it will pass the request to the WebdriverAgent which is an IPA (WebdriverAgent.xcproj) developed by Facebook. WebdriverAgent is responsible to send the command to the Application Under Test (AUT) to carry out the actions in the app. Then the response will be sent to the Webdriver Script through the Appium server.
     
    Only iOS 9.3 and above version are supported by the XCUITest Driver. You can find all the capabilities for XCUITest Driver in the link mentioned below.

    https://github.com/appium/appium-xcuitest-driver

    UI Automation Server flow diagram

    The situation is very similar in the case of Android where Appium proxies command to a UIAutomator2 test case running on the device. UIAutomator2 is Android’s UI automation framework which supports running JUnit test cases directly into the device into the command line. It uses Java as the programing language but Appium will make it run from any of the web drivers supported languages.
     
    To answer the question “what is Appium automation?”, let’s have a look at the Appium philosophy.
     
    Appium philosophy
    Appium mobile testing is required for proper execution of continuous integration as it speeds up the overall testing process. Appium mobile testing helps to run the repetitive test which would take more time to perform manually. This is why appium mobile testing is the preferred choice for the developers when it comes to test automation.
     
    In the next blog, we will learn more about Appium mobile testing and how to install/configure the Appium setup on a windows machine.

     
    Related Articles:

  • How to use Appium Inspector for Test Automation
  • Appium Setup for Windows
  • Starting Appium Server and launching the app from code
  • How To Install Appium On A Mac Machine
  • Appium vs Espresso: The Most Popular Automation Testing Framework in 2019