In our previous chapter on Android, we learned about UI Automator Viewer, Which is available on Android SDK, to get the properties of the application object. In the case of iOS, Appium itself provides an Inspector which helps users to locate those elements in the application.
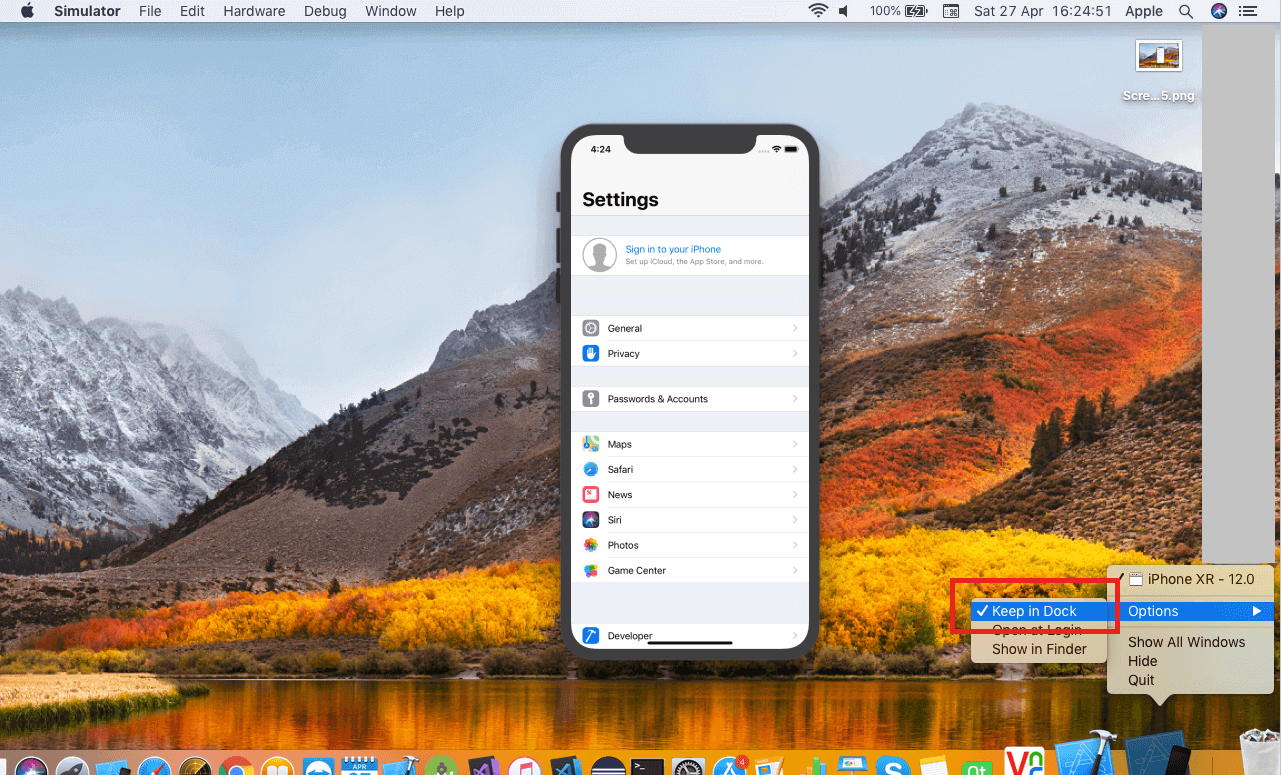
First, open the simulator by clicking on the dock option.
Now in the Device/Simulators window, select the simulator. Open the Appium Desktop and keep the simulator side by side.
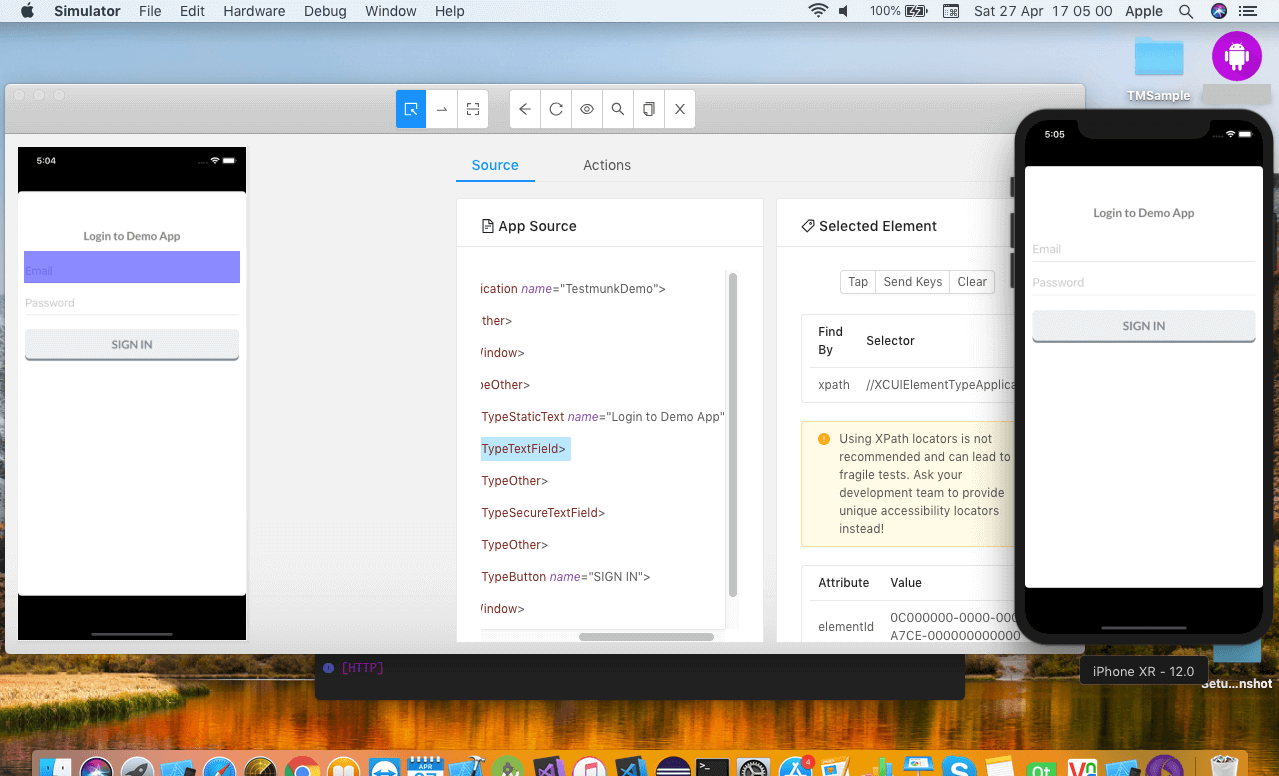
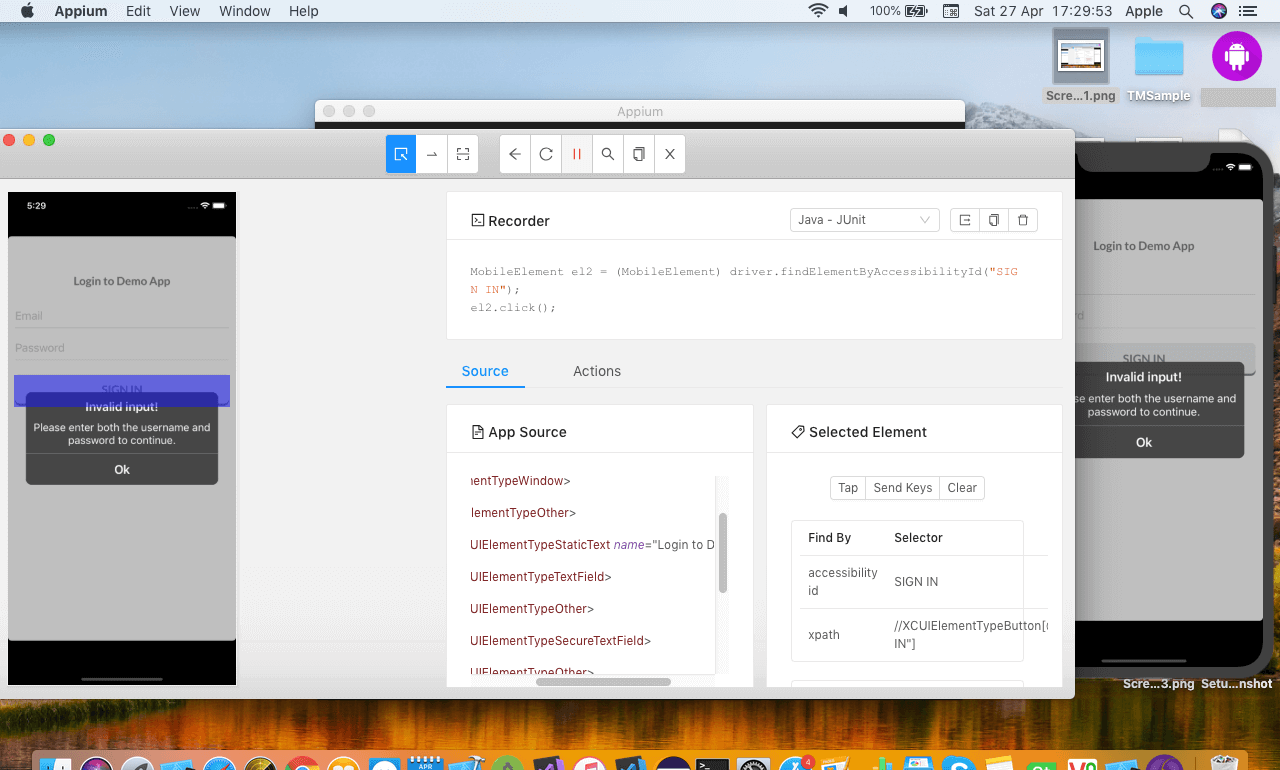
Once the inspector is started, select any of the objects on the screen. It will show you the complete hierarchy and properties of that object.
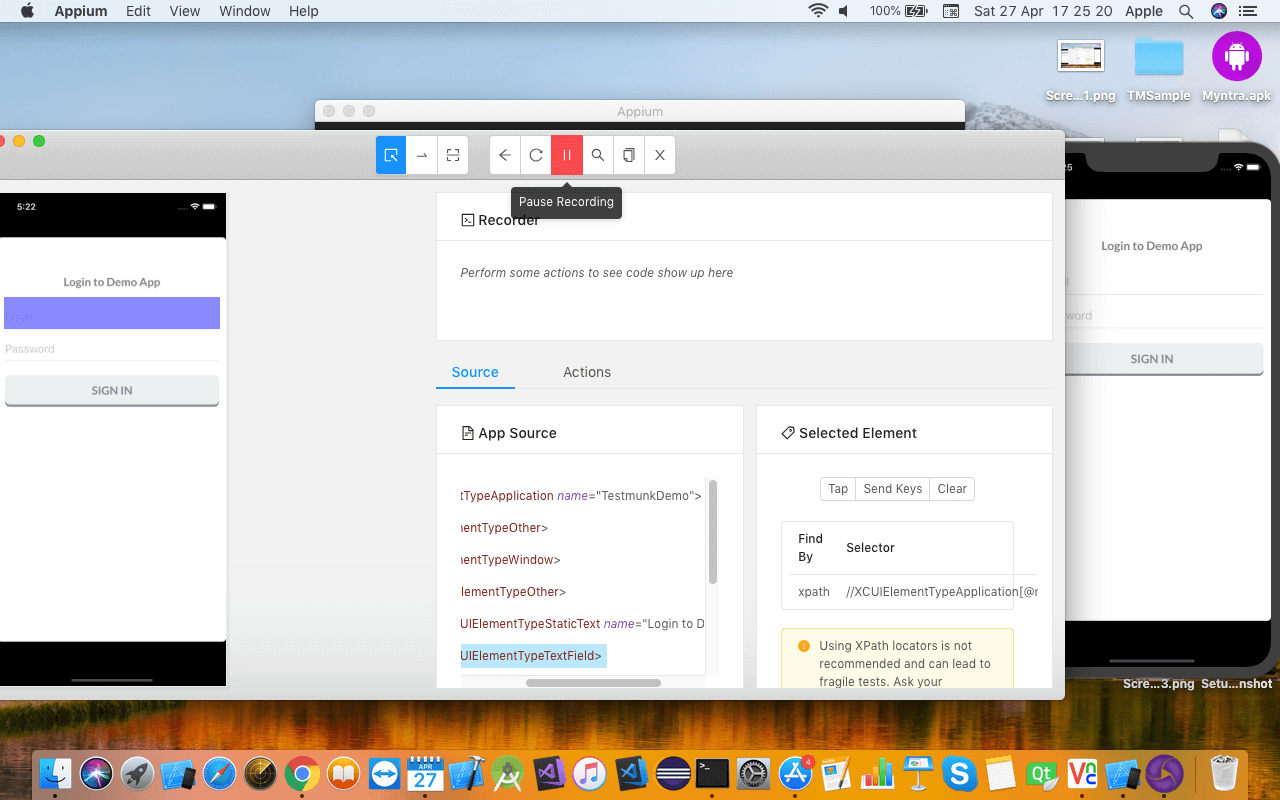
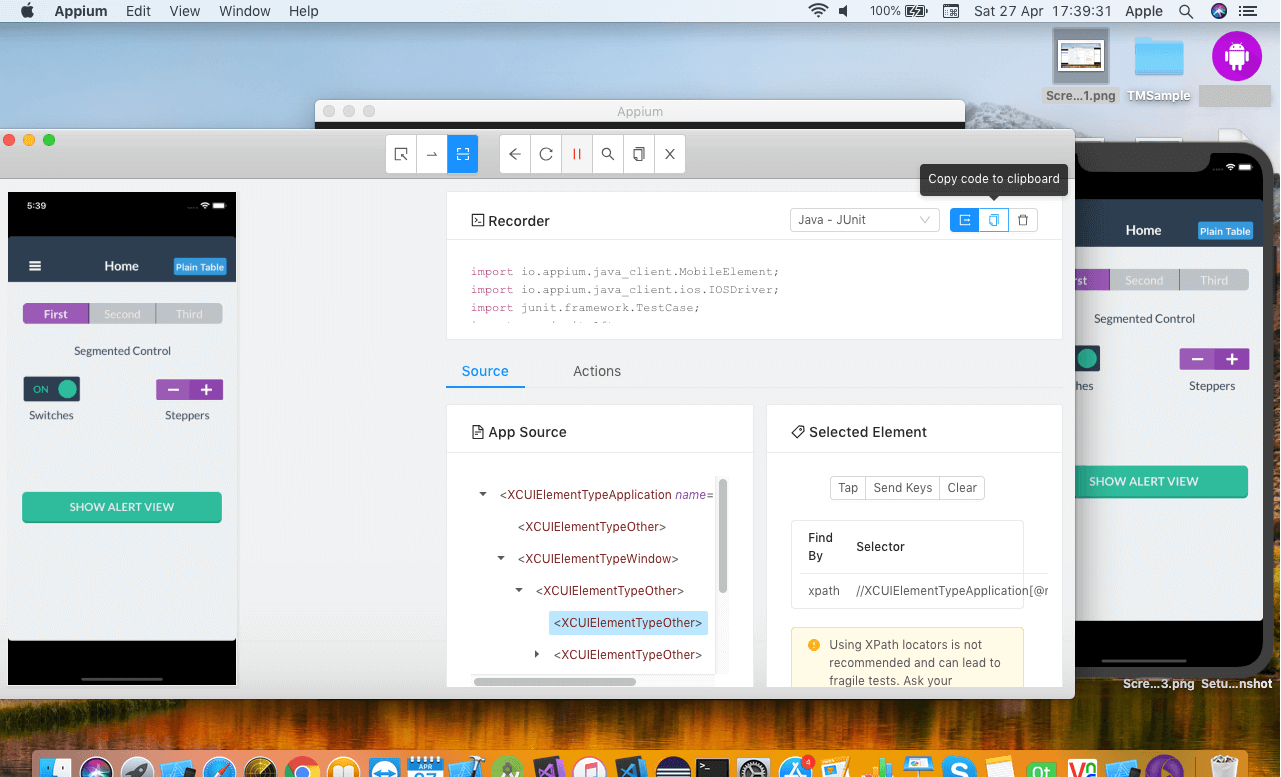
At the top of the window, you can see the Record button which is used to record all the actions taken and record the script.
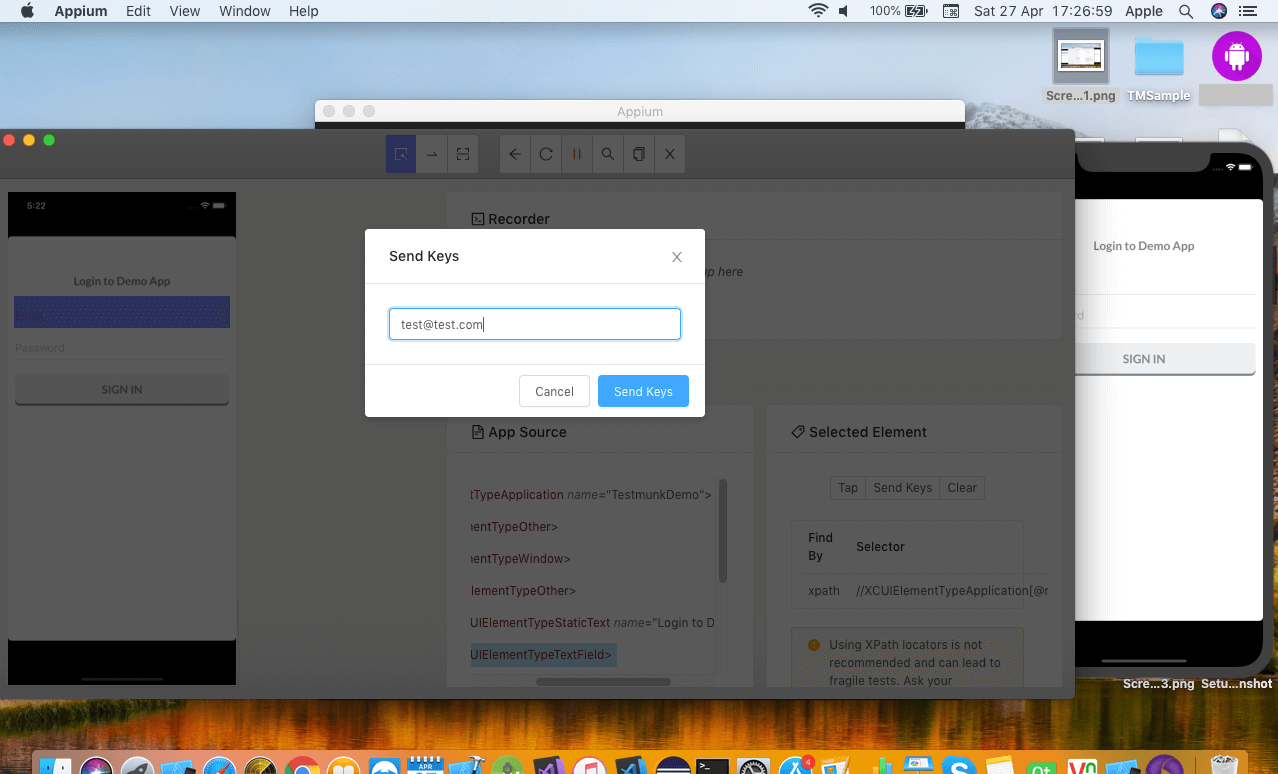
To select any object, click on the Select Element button and then you can use Tap button to click on an object, Send Keys to enter text and clear to undo the action.
As soon as you perform an action on an object, it is recorded in the form of a script.
Once you are done with the recording you can copy the script and paste in eclipse editor.
In the next blog, we will learn how to write the first appium script for iOS.
In the previous blog in this series, we learned how to write the first Appium script for Android devices. Now in this blog, we will understand how to start the Appium server.
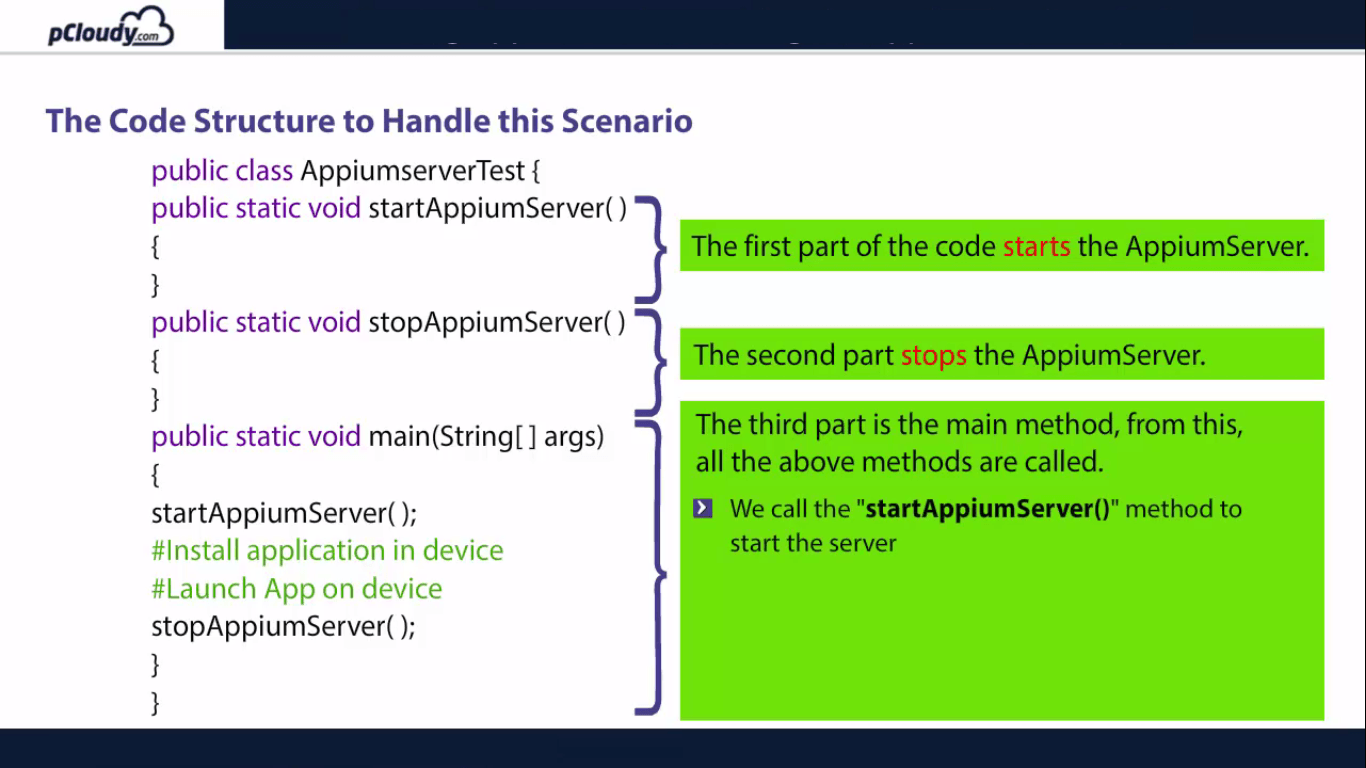
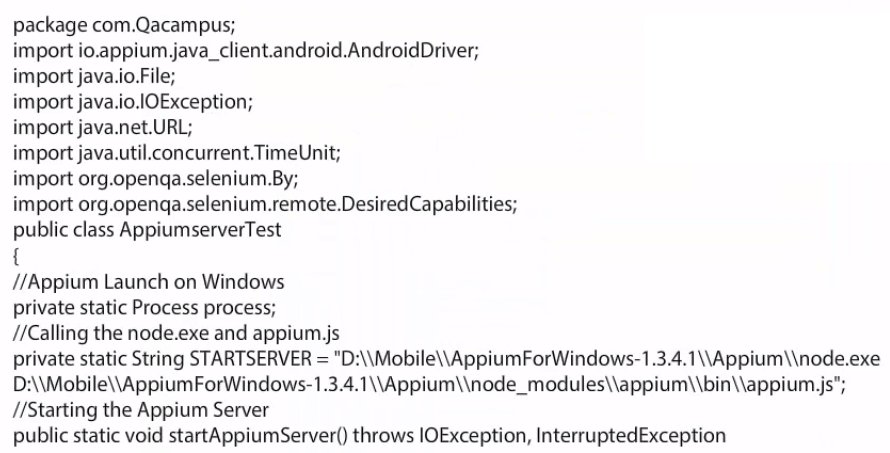
The code structure is segregated into three parts, the first part of the code starts the Appium server, the second part stops the Appium server.
The third part is the main method which is necessary to execute the class and from this main method, all the above method are called.
Starting Appium from code requires a path of two files which are kept inside the Appium folder.
node.exe
js
Starting Appium Server
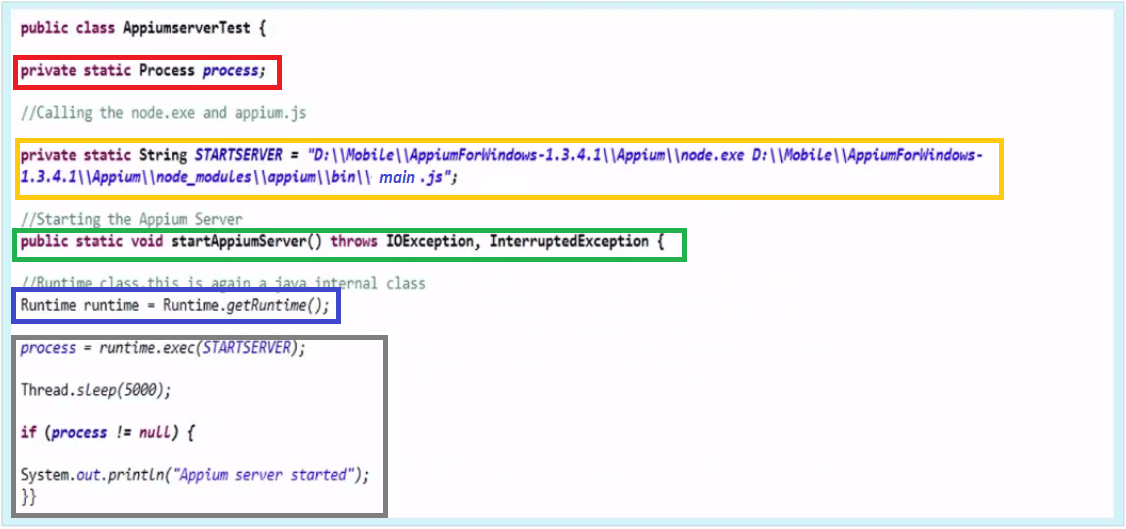
In the code highlighted in red, we have called process class which is a Java class and declared it static.
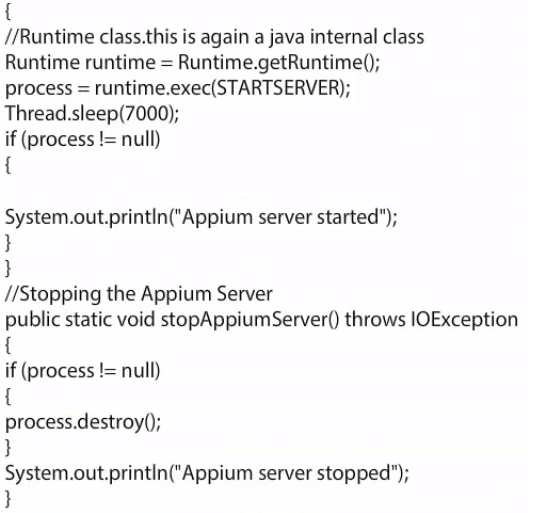
We then created a start server variable and pass the path to node.exe and main.js, highlighted in yellow. In the code highlighted in green, we added both paths into the same variable with spaces and created a method called startAppiumServer() which takes care of the Appium server startup process. Next step is to create an object of Runtime class which is again a java class and call the method getRuntime(), highlighted in blue. We will pass the variable “STARTSERVER” into runtime.exec() method. It will start the Appium Server.
Once the process is started, we have to store the current state of the process into this variable. We will give a sleep time of 5 seconds as it takes time to start the process. what we are trying to validate here is, if the process is not null; it means that the process is started as highlighted in the gray box.
Stop Appium Server
Here we need to create another method named stopAppiumServer(). We again verify the state of the process and if it is not null, call a method of process class destroy().
So now we know how to start and stop the Appium server from code. Let’s try to install and launch an app on a mobile device. Let’s see how we can install a .apk file on an Android device and launch it automatically without providing the path in Appium Server.
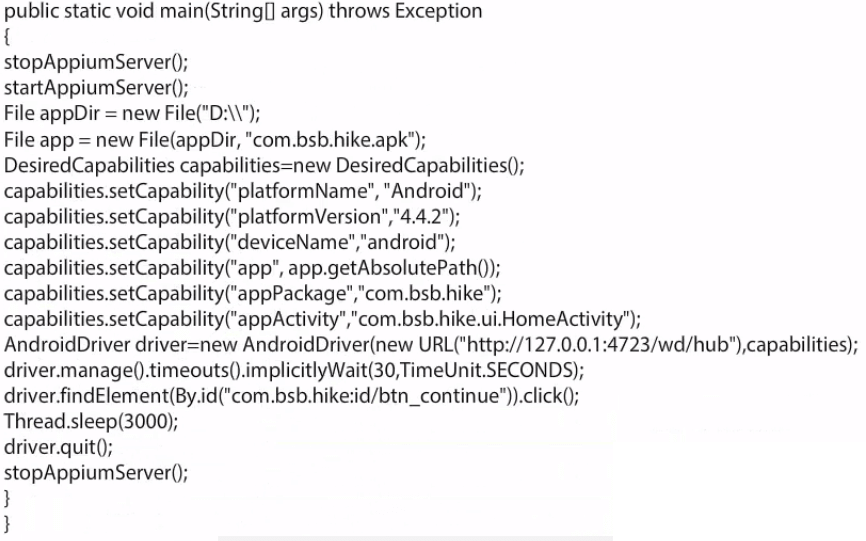
Installing and launching the application
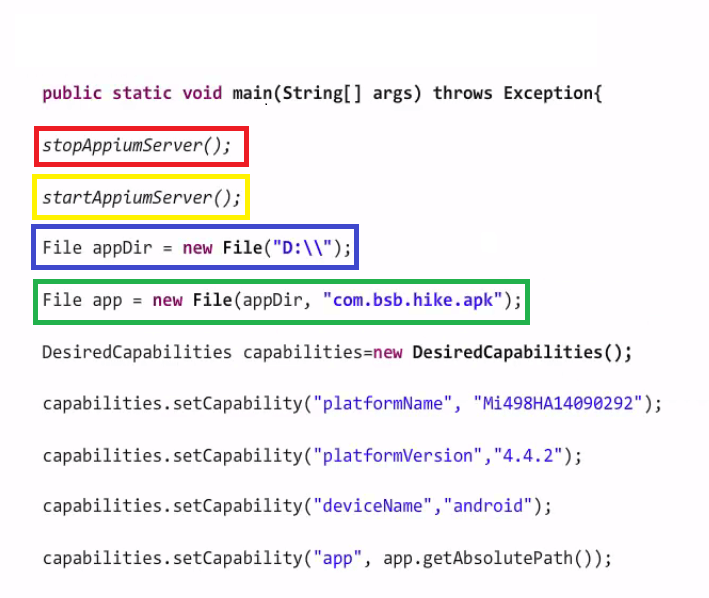
To begin with, we call the stopAppiumServer() method to verify if any instance of Appium Server is already running and if so, then it closes that instance, as highlighted in red. The method highlighted in yellow starts the Appium Server.
Then store the apk path file into a variable of File class, which is a Java class as highlighted in blue. Create another variable of File class app. It takes two parameters:
The absolute path of the apk file.
Name of the apk file.
Now the absolute path is stored into appDir variable and the name of apk file in the second part as highlighted in the green box. The rest of the things are the same as discussed in the earlier sessions.
The complete code is shown here.
Now that you have learned how to launch app from code, let’s move on to the next blog where we will learn how to set up Appium on a Mac machine.
In the last blog in this series, we learned how to set up Appium for test automation on a Windows machine. Now we will handle the application by writing the Java code. We will require the following software:
This process consists of five steps as depicted in the picture below.
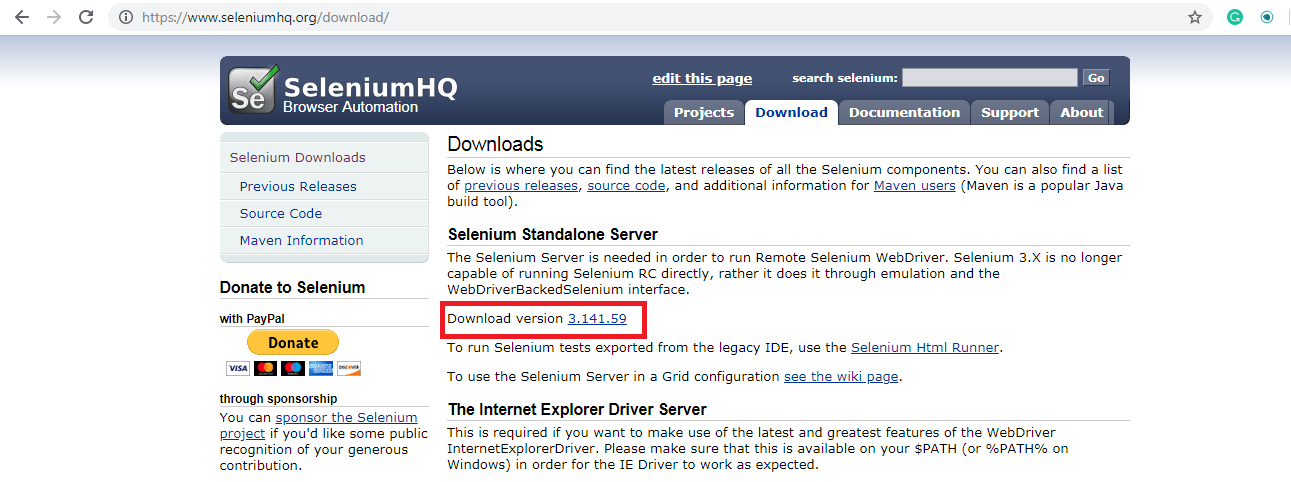
First, we need to collect the Selenium Standalone JAR and Appium Java Client Libraries. To download the Selenium standalone JAR file, go to seleniumhq.org/download then click on the Download version.
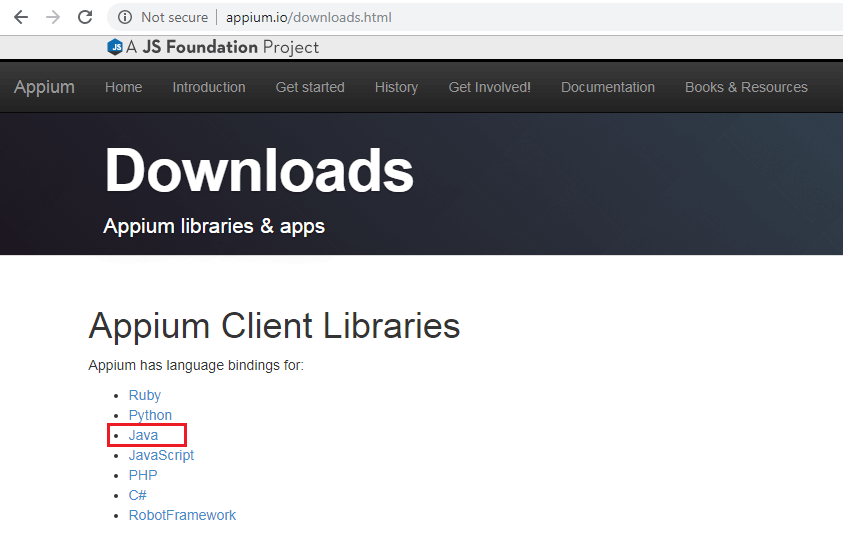
For Appium Java client you need to go to appium.io/downloads and download the libraries for the selected language.
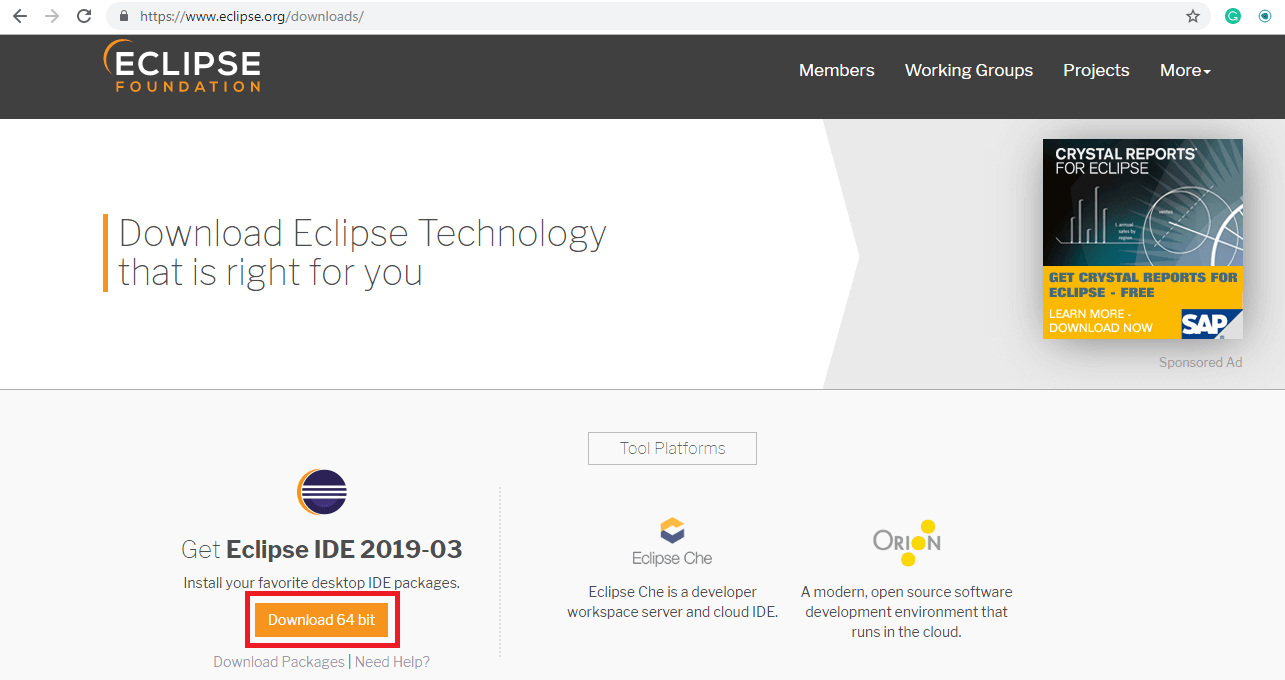
Now to create a java project download Eclipse from eclipse.org/downloads. Launch Eclipse and select the workspace location.
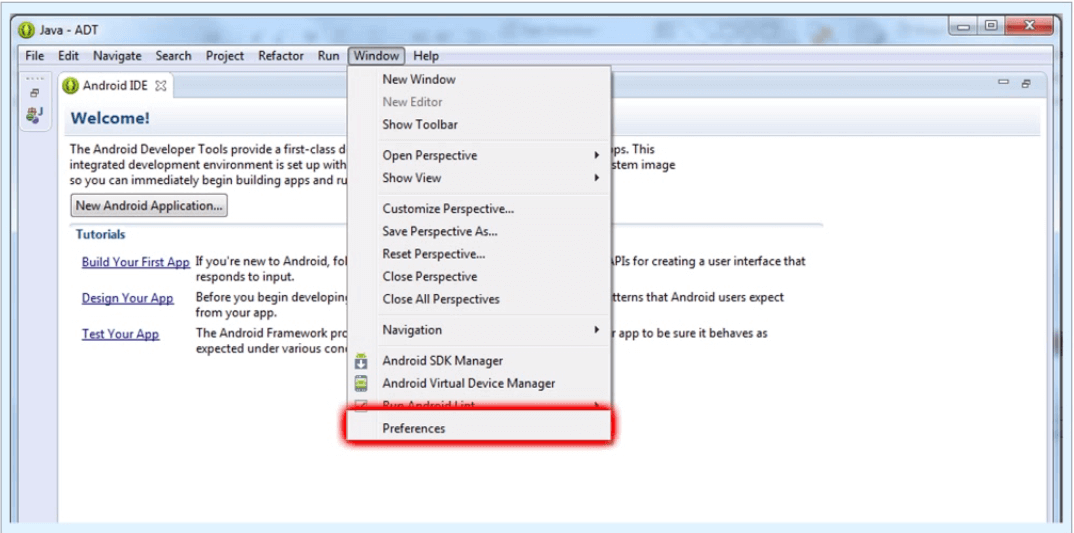
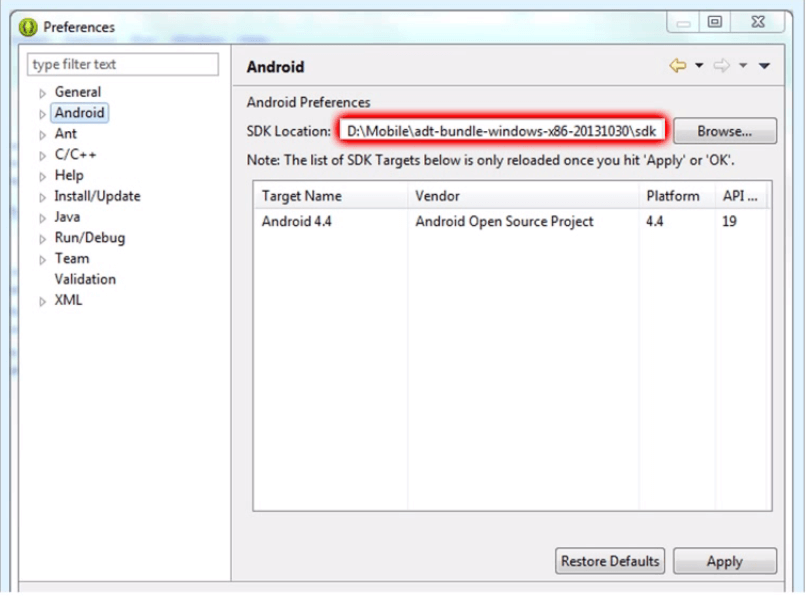
To set the Android SDK path into Eclipse, click on the Windows tab in the menu bar and select Preferences in the drop-down list.
Then select the Android option and browse your Android SDK location and click on Apply.
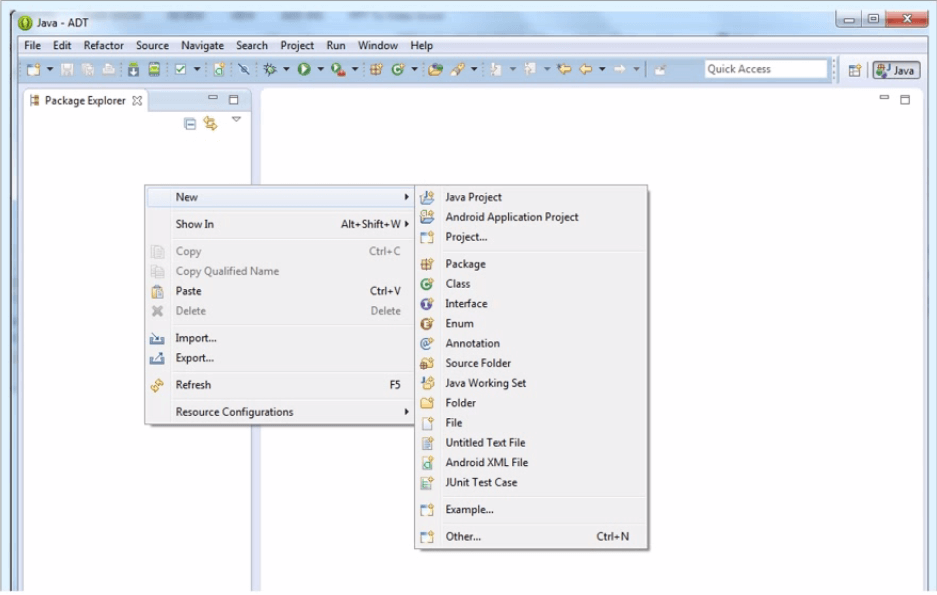
Launch Eclipse and right-click on Package Explorer. Then select a new Java Project.
Enter a project name and click finish.
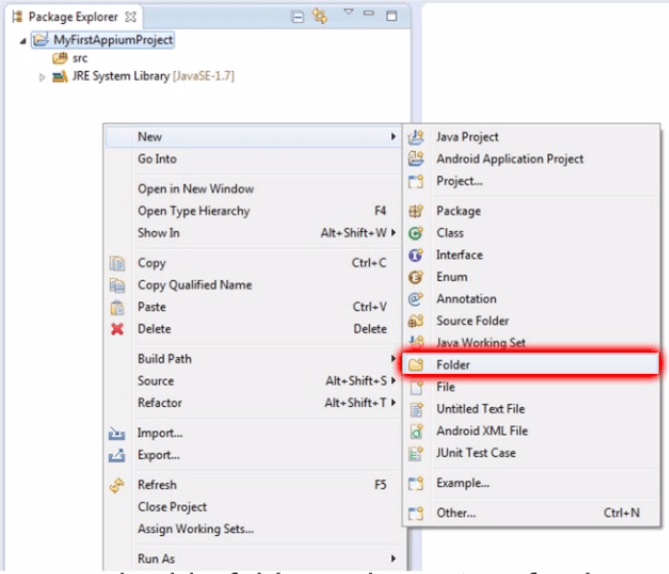
Once the project is created, add a folder to the project, for the project dependency files [Selenium Standalone] and [Appium Client Library] which you have downloaded.
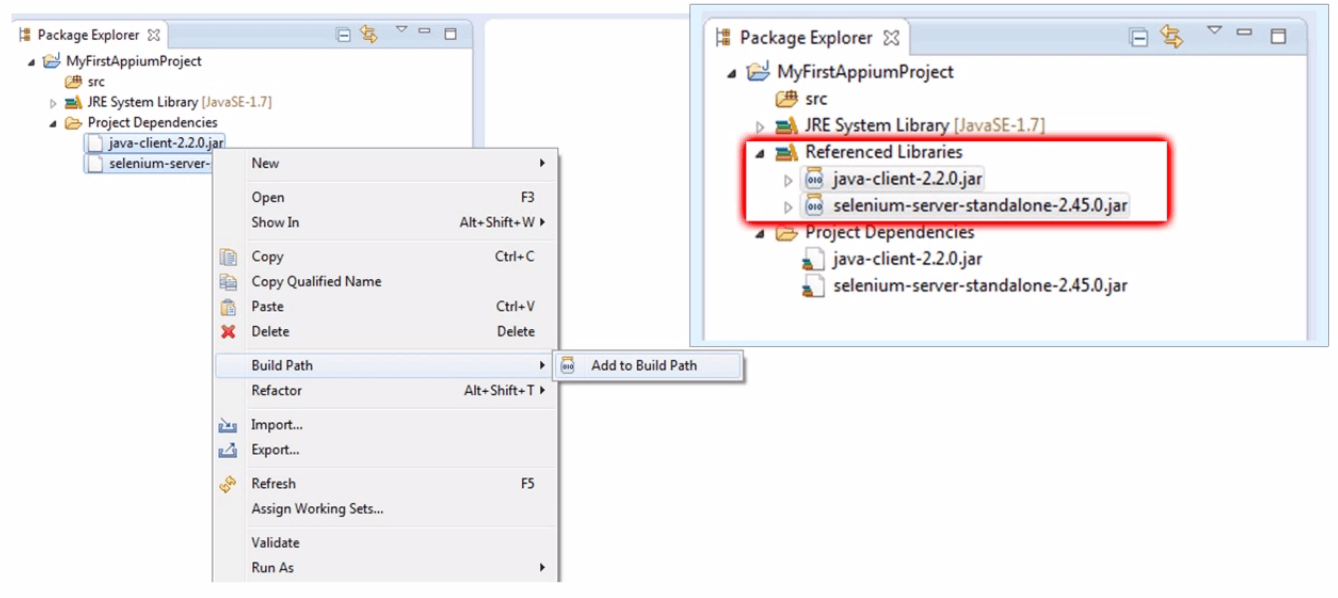
Copy the downloaded file into the newly created project dependencies folder. Select both files and right-click. Then select the add to Build path option and then Add to Build Path. Thus both classes have been added to your project reference libraries.
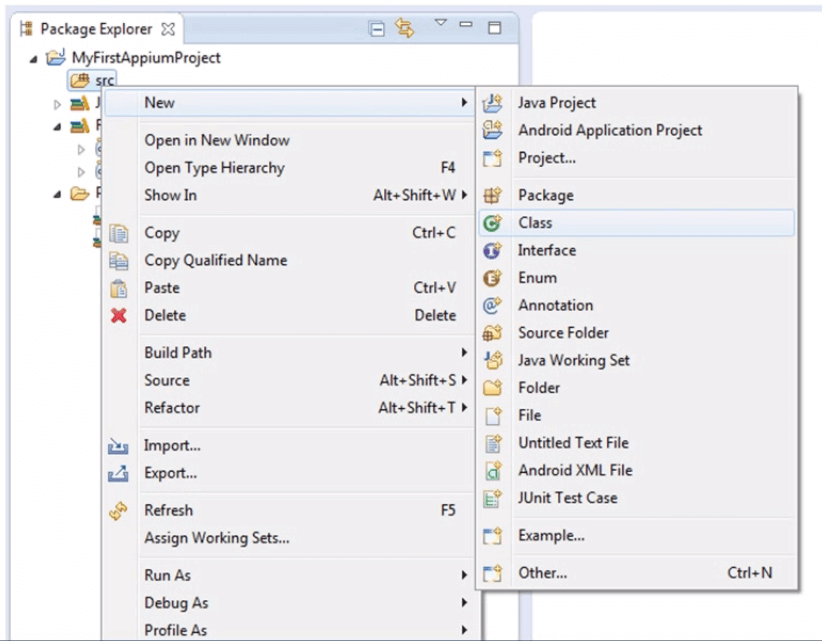
Create a class and import the required packages. Now right click on the src folder, hover the mouse over the new option and select the Class option.
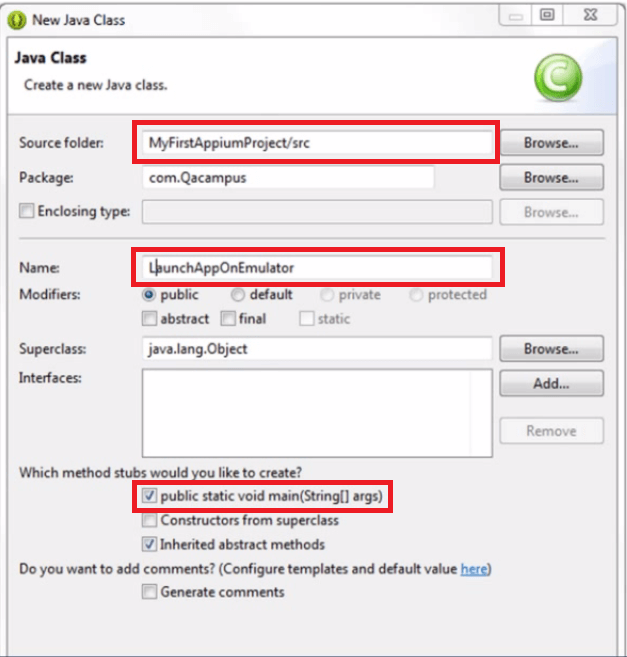
Provide a package name, the name of class then select the main method checkbox.
A .java file within the package is created in Package Explorer panel. An auto-generated the main method is generated on the right panel.
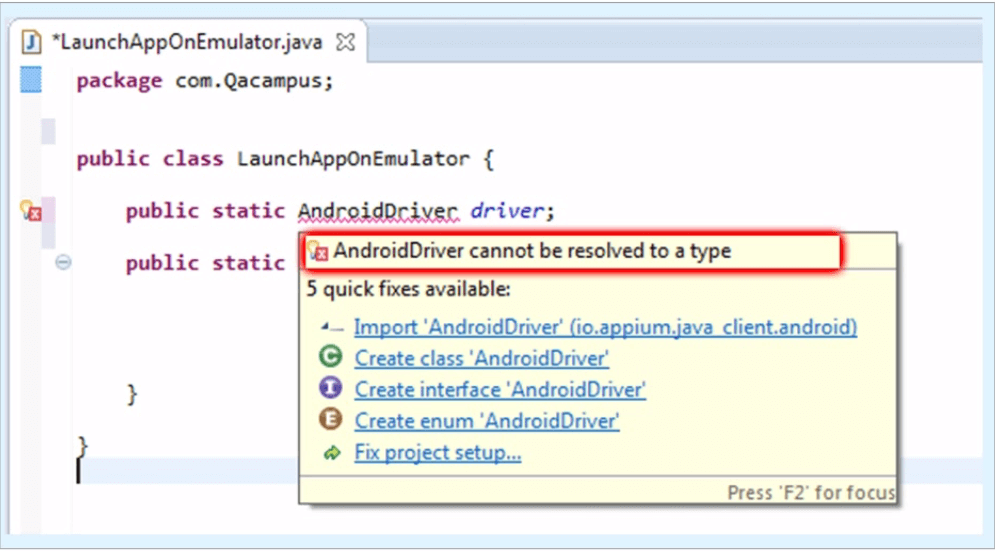
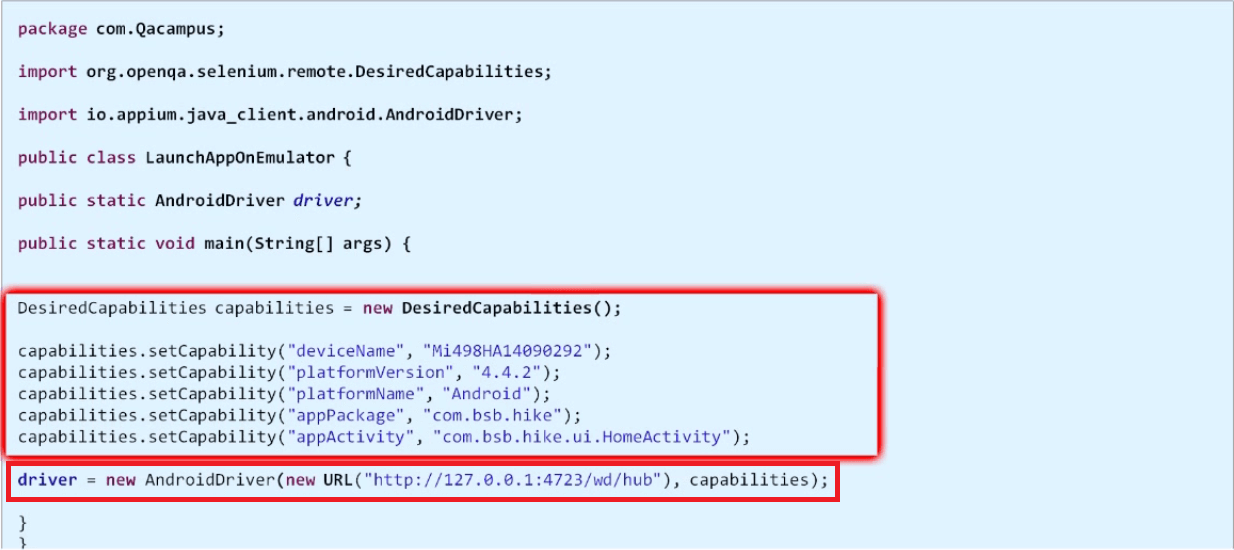
You need to define a public class variable of AndroidDriver as your first line of code. You will now see an error for an android driver. Now hover your mouse over the error, you will get a list of quick fixes. Select Import ‘AndroidDriver’. Once you select the import package option, the android driver package will be imported and the error will be removed.
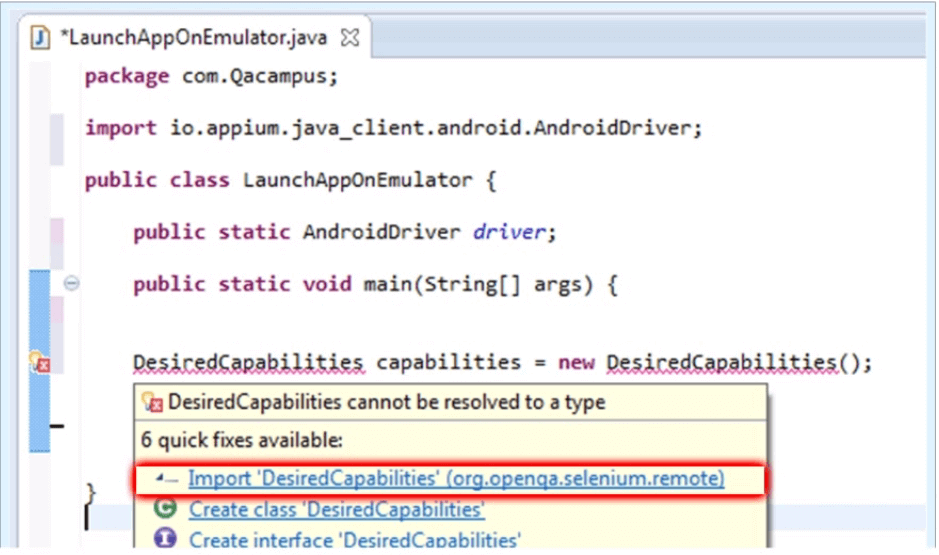
Create an object of DesiredCapabilities. Again you will get an error for DesiredCapabilities. Hover the mouse over DesiredCapabilities and then select Import ‘DesiredCapabilities’ from the quick fix list.
Once you select the import package option, the DesiredCapabilities package will be imported and the error will be removed.
Now set the DesiredCapabilities and also provide the package of an application and the name of application launcher activity.
Now you need to instantiate the Android driver.
To do this we need to have two parameters, the first is the Appium server address with the port number which it is running and the Capabilities.
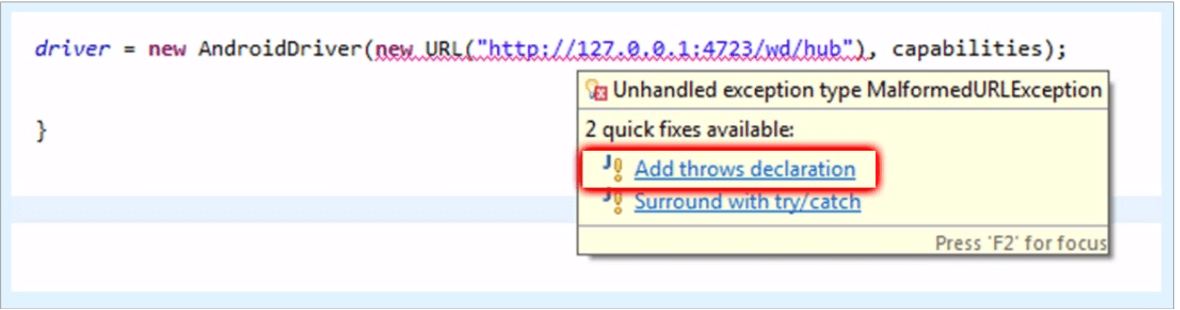
Hover mouse on URL and import URL from Java.net. You will get an error for complete new URL section, hover mouse on the error and select Add throws declaration. By doing so exception has been added into your main method.
Now start the Appium server and connect a device to the system. Now return to Eclipse and execute the code. This will launch the app in the device.
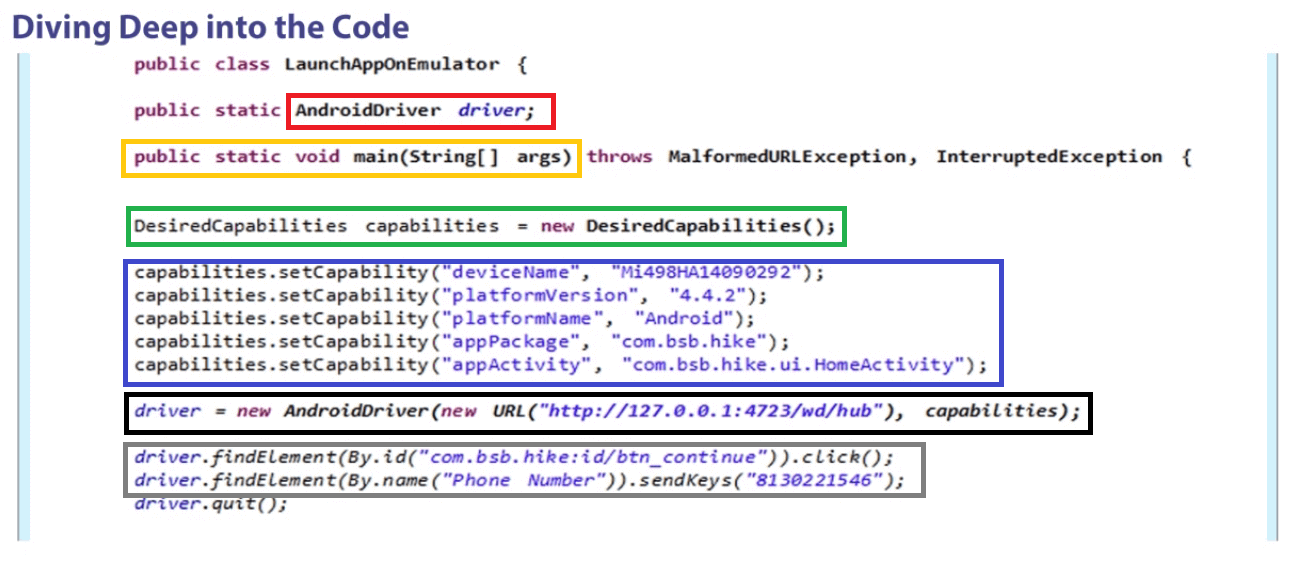
In the code, we have declared the class as public so that we can access it anywhere inside out test.
The java main method is highlighted in yellow. We created an object of desired capabilities class which you can see in the green box. In method setCapability, there are two parameters. First is the capability name and second is the capability value as highlighted in blue. Then we created an object of AndroidDriver class highlighted in the black box. The code highlighted in gray is the findElement(By) method which can locate an element on the screen.
Now that you have learned how to write a mobile test automation script using Appium test automation framework, we can move on to the next blog where we will learn how to start the Appium server and launch the app from code.
Appium is an open source mobile app UI testing framework. You can test all types of mobile apps and perform automation test on physical devices as well as on emulators and simulators. Appium mobile testing does not have a dependency on mobile device OS and it supports cross-platform app testing as a single API works for both Android and iOS. Appium supports many popular languages like C, PHP, Python, C#, Java, Ruby, JavaScript, etc.
What is Appium Mobile Testing?
When Appium is installed then a server is set up on your machine that exposes the REST API. It receives a command request from the client and executes that command on Android or iOS mobile devices. Then it responds back with an HTTP response. It uses mobile test automation frameworks like Apple instruments or UIAutomator2 to drive the UI of apps.
Approaches to Test Automation
There is two approaches for mobile test automation, Image-based and Object-based approach. Let’s understand both in detail.
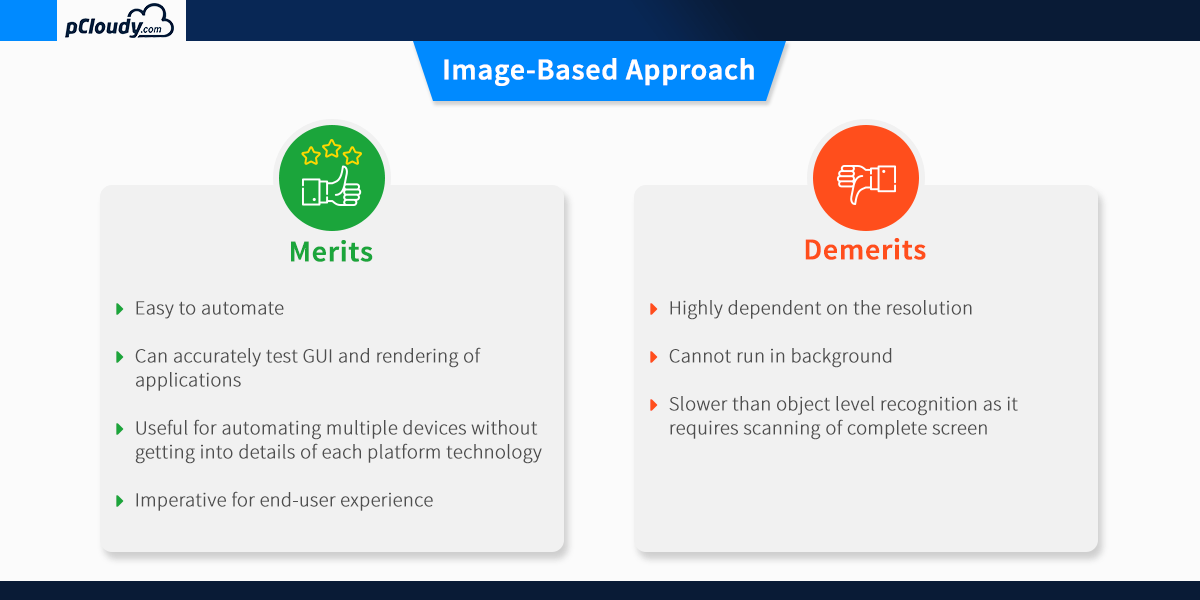
Image-Based Approach for Test Automation
This technique of object identification is based on the image processing attributes of the objects in the Application Under Test (AUT). Example: Automate user options like “click, type, drag-drop, mouse actions, etc.”
Visual verification of the expected output
• Not dependent on the platform underneath
• Can be used to automate emulators as well as a real device.
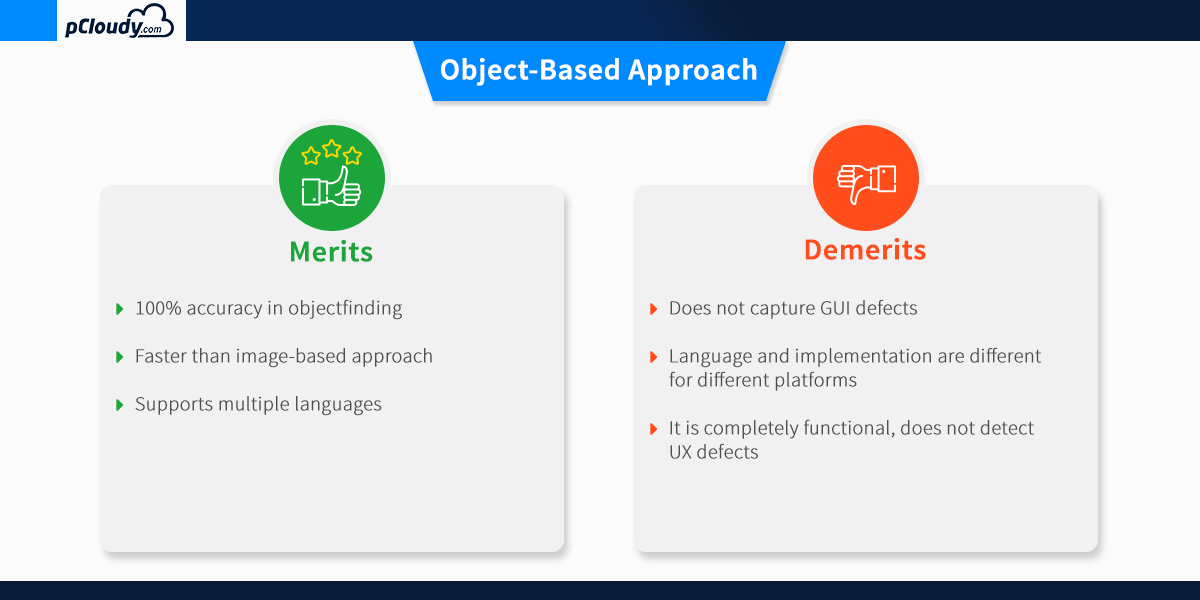
The object-based approach of test automation
This technique of test automation is based on recognizing the nativity of the objects in AUT. This nativity reorganization process for each individual object in the application is carried out using different attributes that are assigned to the object.
It is used to extract the application object identifier with its properties from the actual native operating system source code, just like the developer used. This is an accurate and fast method to recognize the buttons, lists and other objects used by the application.
One drawback of the object-based approach is that the recognition of the individual attributes of the object involved restricts these techniques ability to function in test scenarios that require third-party application access. This reduces the automation coverage of utilizing this technique.
Which approach should we choose?
As we have seen, both approaches have their pros and cons. To get better results, you can merge both approaches and think about devising a hybrid test automation solution.
The combination of OCR (image based) and native (object-based) approach allows users to build a single script that will be portable across different devices. It will make your automation robust and efficient and allows the users to confidently detect the relevant native and GUI defect within the mobile application.
Appium Overview and Architecture
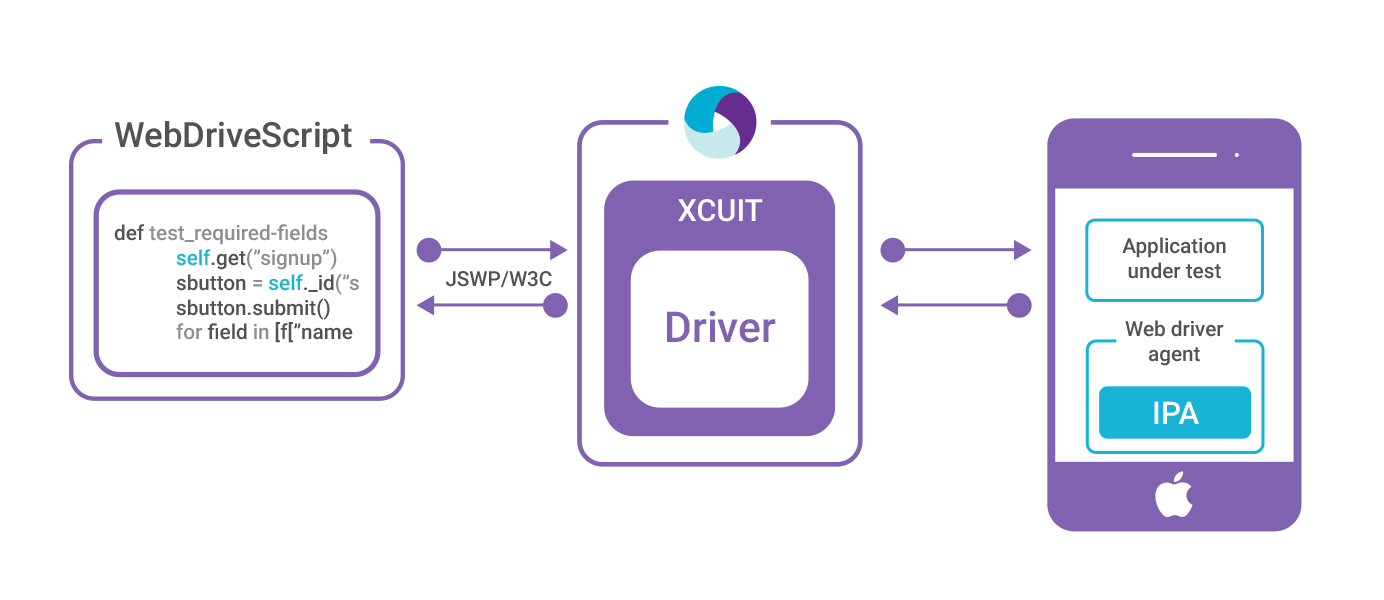
Appium is an HTTP server that manages WebDriver sessions. On iOS devices, Appium proxies command to a UI automation script running on Mac Instruments environment. Apple provides an application called instruments which are used to do a lot of activities like profiling, controlling and building iOS apps. It also provides an automation component where you can write some commands in JavaScript which uses UIAutomation APIs which interact with the app user interface. Appium mobile automation uses these same libraries to automate iOS apps.
The Webdriver Script sends a command in the form of HTTP (JSWP) to the Appium Server. Then the Appium Server will then decide as per the request which driver should be initiated. So, in this case, the Appium Server will initiate the XCUITest driver and it will pass the request to the WebdriverAgent which is an IPA (WebdriverAgent.xcproj) developed by Facebook. WebdriverAgent is responsible to send the command to the Application Under Test (AUT) to carry out the actions in the app. Then the response will be sent to the Webdriver Script through the Appium server.
Only iOS 9.3 and above version are supported by the XCUITest Driver. You can find all the capabilities for XCUITest Driver in the link mentioned below.
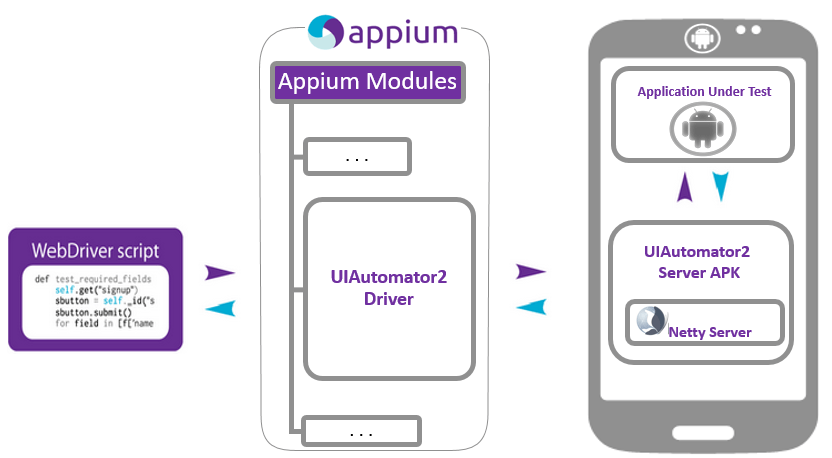
The situation is very similar in the case of Android where Appium proxies command to a UIAutomator2 test case running on the device. UIAutomator2 is Android’s UI automation framework which supports running JUnit test cases directly into the device into the command line. It uses Java as the programing language but Appium will make it run from any of the web drivers supported languages.
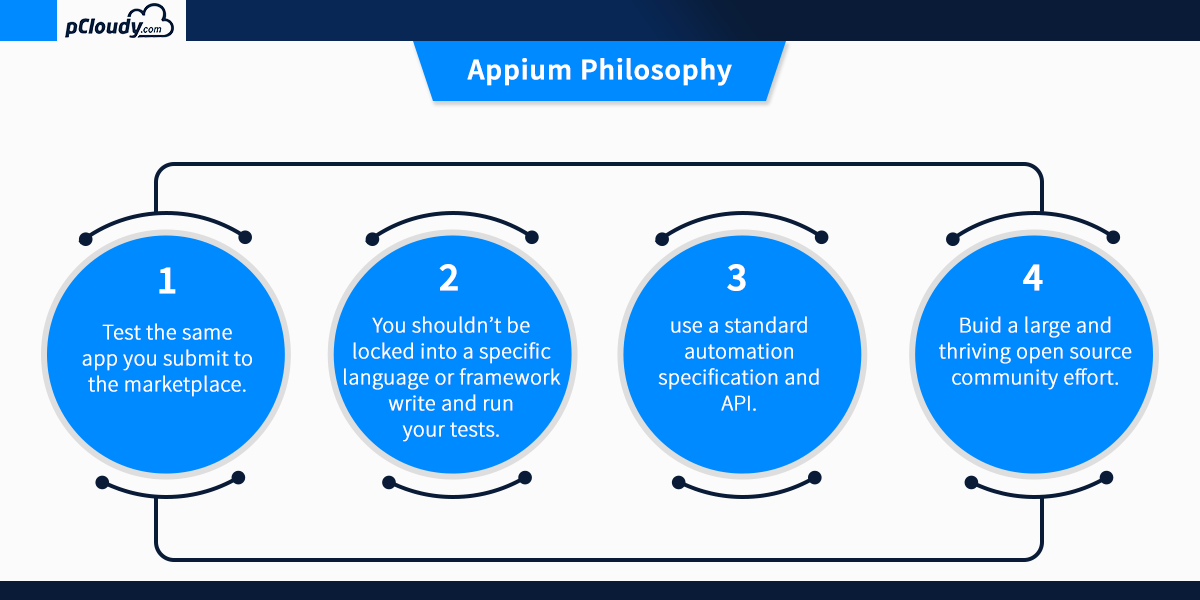
To answer the question “what is Appium automation?”, let’s have a look at the Appium philosophy.
Appium mobile testing is required for proper execution of continuous integration as it speeds up the overall testing process. Appium mobile testing helps to run the repetitive test which would take more time to perform manually. This is why appium mobile testing is the preferred choice for the developers when it comes to test automation.
In the next blog, we will learn more about Appium mobile testing and how to install/configure the Appium setup on a windows machine.