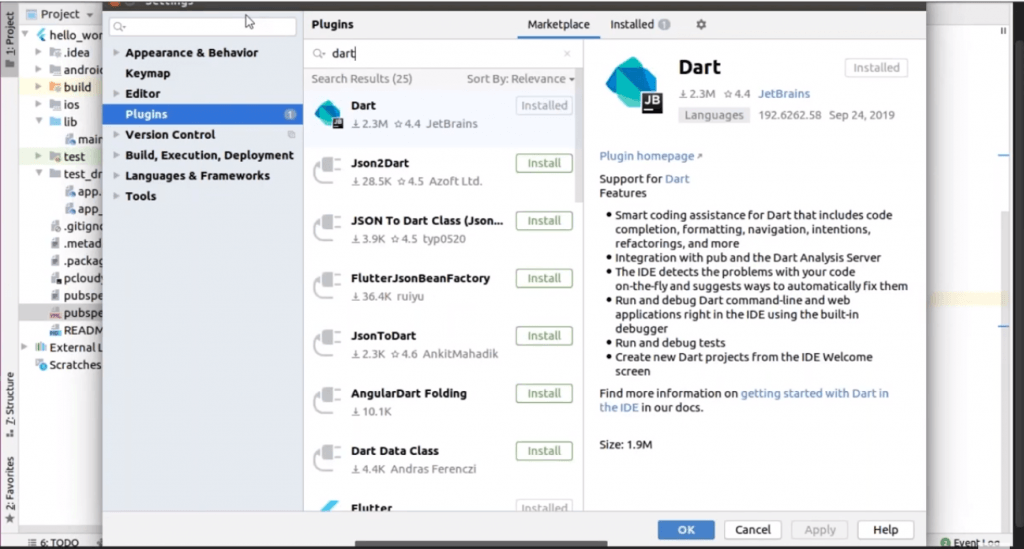

Appium Mobile Test Automation
As we all know that Appium is the most preferred test automation tool for mobile applications. It is the first choice of the testers because of its flexibility i.e. it is open source, it has the best supported and highly active community of experts, Appium works across different platforms and works well with different scripting languages. Even after gaining such popularity and having a strong community base, surprisingly, the users still make mistakes while running the mobile test automation with Appium.
Here are a few common mistakes that Appium users encounter while using Appium Mobile Test Automation Tool:
1.Unrestricted X Path Usage:
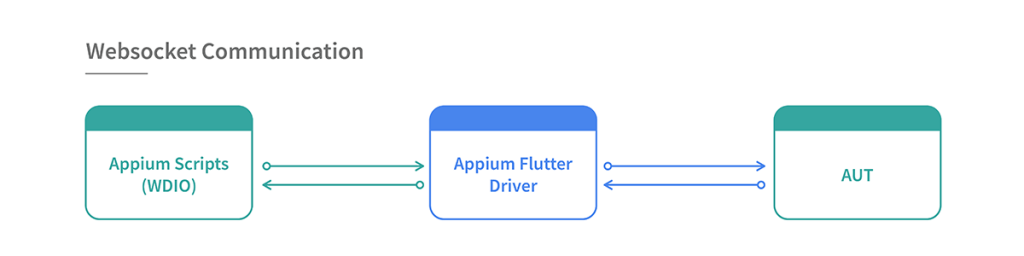
Over usage of X Path could be found in case of Selenium as well but when it comes to Appium world, it has more outrageous effects because X Path is a more dynamic way to unearth the elements. But the biggest stumbling block in this scenario is its huge performance cost due to which it becomes elusive an area. This is because Google and Apple do not provide XML or XPath related queries in a way we would need them to be. All of this hospitalizes an unmanageable cost finding elements using X Path. Undoubtedly, X Path is the most trusted method but there are several other better locator methods like ‘Accessibility IDs’ that can be used in this sitch.
2. Neglected usage of Accessibility IDs:
The accessibility ID locator strategy is formulated to read a unique identifier for a UI element. For both iOS and Android, getting an element by their accessibility ID is the best method. Most importantly, it is preferable because it is quicker. It should be noted that semantically accessible IDs are different than the Web IDs. However, the two shouldn’t be combined. In many cases, the accessibility IDs are used only for the purpose of testing even though they have a larger purpose. So, in order not to spoil the accessibility of the applications just for the sake of testing, the bigger purpose of the accessibility IDs should be known. If the accessible IDs are set up on the elements to make the apps testable, the app accessibility also increases, provided that the accessibility labels are sensible to the users using them. But the foremost criteria not to make automation efforts a failure is to make the application testable in the first place.
3. Not making a testable App:
Developing an app should be a forecasted move where in the developers, even before writing the first line of code, plan to develop an app keeping the automation in mind. This they can achieve by keeping in mind the hooks and the unique IDs for the elements in order to make the app more testable. This strategic approach would be a reason for a successful mobile app test automation. Apart from this, there should also be a concentration on the different testing scenarios in order to elude the chances of overlapping before even getting into Appium coding. An open discussion forum with the development teams to discuss the plotting of right accessibility IDs, labels or Unique IDs for the application’s elements would reduce many test automation reliability concerns.
4. Disregarding Application View States:
One of the challenge faced in Mobile Test Automation is not setting up the application. Most of the developers do not set up the application in order to access specific views and user states rapidly. To quote an example given by Jonathan Lipps,one of the key contributors to the Appium project.
A shopping cart functionality of the app might have ten different tests, and ninety percent of the tests might go through the same steps of logging in and searching items to be put in the cart which is a huge waste of time.
So, your team should be able to set up an app’s state and start the test in that apposite state, straightaway. This is highlighted in Appium scenario due to the fact that the mobile simulators and emulators are slow and take longer than usual to reach to the right position on the test.
5. Query for every element visibility:
Not querying for the visibility of every element is another way to speed up the run-time of the Appium test scripts. This leads to an additional load of calls and waiting time for Appium while in the every activity of retrieving an element. The lag can be reduced by only requesting the element attributes which are important in perspective of the test code.
6. Native Testing tools – Always better?
According to some developers, usage of the native testing tools is the best way to get unfailing mobile tests. For example- Espresso in case of Android and XCUITest in case of iOS. This is not good advice as neither of Google or Apple are going to release and new automation technology. When the question is of stability, the stability of code should be chosen rather than technology and in this scenario, Appium is the best choice!
As an exception, if the development team writes the tests and it’s most comfortable in mobile SDK language, using Google and Apple providers to build development environments. Also, when the constricted test-app or test code-app code integration is needed, then Appium might not be of much help. The utmost value is that Appium provides the WebDriver layer on top of the technology, which means the code can be written in any language and acts as a stable interface to that specific automation technology. Also, being a cross-platform tool, Appium allows to saves a lot of code and architecture in case of testing both iOS and Android devices.
7. Appium is slow:
Appium might be slower in some circumstances and also there are points in Appium codes where it does not seem efficient. Appium backs upon technologies that are slower than Appium and the curators of Appium have strategically chosen to utilize slower strategies for specific instances. For eg: Appium will certainly be slower if you are relying on XPath. The efficiency of the tool depends on how it is being used. Mostly, Appium is favored because of stability than the speed.
8. Not Using Appium Documentation:
The earlier Appium docs were not very user friendly. As a result, they weren’t used as much as they needed to be but the new Appium documents have been completely redesigned and reorganized. Information about the API reference to Appium, client libraries, supported drivers and Appium commands, code examples which was not provided before is all documented in the updated version. It deserves a revisit due to its newness and can be accessed at Appium.io.
9. Not creating reusable code
Repetitive or duplicate code can cause several issues for Appium mobile testing process. When the same code is repeated in several test scripts, any updates or modifications must be copied across all instances. This increases the chance of failures and complicates the debugging procedure. It also increases the maintenance cost for the organization.
Duplicate code makes identifying the primary reason for a test failure challenging. It can be difficult to pinpoint which occurrence of the code caused a test to fail if the same code is used repeatedly throughout several test scripts. This could increase the duration required for debugging the software and expand the market time.
Therefore, it’s crucial to use appropriate coding principles to prevent these issues. This includes creating simple reusable code, utilizing libraries and frameworks, and modifying code to remove redundancies.
10. Ignoring the Test-driven Deployment
Test-driven deployment is an Appium mobile test automation approach that stresses developing automated test cases before writing application code.
It lets the developer test all the application features before being deployed. This way, they can detect and resolve any bug in the early stage. This saves not only the organization’s time but also valuable resources.
Not just this, Test-driven deployment also helps developers in developing more reliable and enduring codes. By allowing them to understand the needs and provide a solution accordingly. Which lets them create more modular, maintainable, and error-free codes.
11. Choosing the right tool for API testing
APIs may have several endpoints, each with a unique set of parameters, methods, and authentication requirements. Writing and maintaining tests that accurately reflect the behavior of the API can be challenging due to this complexity.
Another difficulty is the requirement to simulate various scenarios and inputs. Testing for different response codes, error messages, and payloads might be part of this. To ensure the API can manage a high volume of queries, developers might also need to simulate load and stress testing.
Developers use a testing framework or library like RestAssured and Postman, which provides integrated support for API testing. These tools streamline and simplify the testing process by providing pre-build methods for common API testing scenarios, these tools streamline and simplifies the testing process. Alternatively, they can mimic various scenarios and inputs using mock data or a staging environment.
Developers can test their API in a safe setting before releasing it for production. Moreover, they can evaluate the API’s capacity by simulating heavy requests using load-testing tools like JMeter or LoadRunner.
12. Need to follow a good design pattern.
In Appium mobile test automation, the Page Object Model (POM) and the Page Automation Layer Model (PALM) are popular architectural patterns. Both techniques increase automated tests’ maintainability, scalability, and reusability.
POM is a design pattern that emphasizes the creation of reusable and modular code by isolating the application’s user interface from the test automation code, making it simpler to update tests when UI changes are made. POM builds an object repository that holds all the web elements and methods.
PALM is another design pattern that builds upon the principles of POM. But unlike POM, which focuses on UI elements, PALM emphasizes creating an abstraction layer between the test automation code and the application’s business logic. This approach distinguishes the test automation code from the underlying implementation. Thus making it easier to modify the test code without affecting the business logic.