
Espresso is a testing framework for Android which automatically synchronizes your test actions with the UI of your app. It also lets the test wait until all the background activities have finished.
The pCloudy utility uploads your Application APK, test APK and other APK files to pCloudy. It will then acquire a device to run your test on, execute those tests and report back the status and test report.
In pCloudy you don’t have to set up the environment. Just follow these simple steps.
After the test cases are run you can see the detailed reports. Once automation ends, the device under test will be released automatically so that you or other users can use it later.
There are two ways you can execute espresso test cases. Here are the steps for both
1. pCloudy UI Dashboard
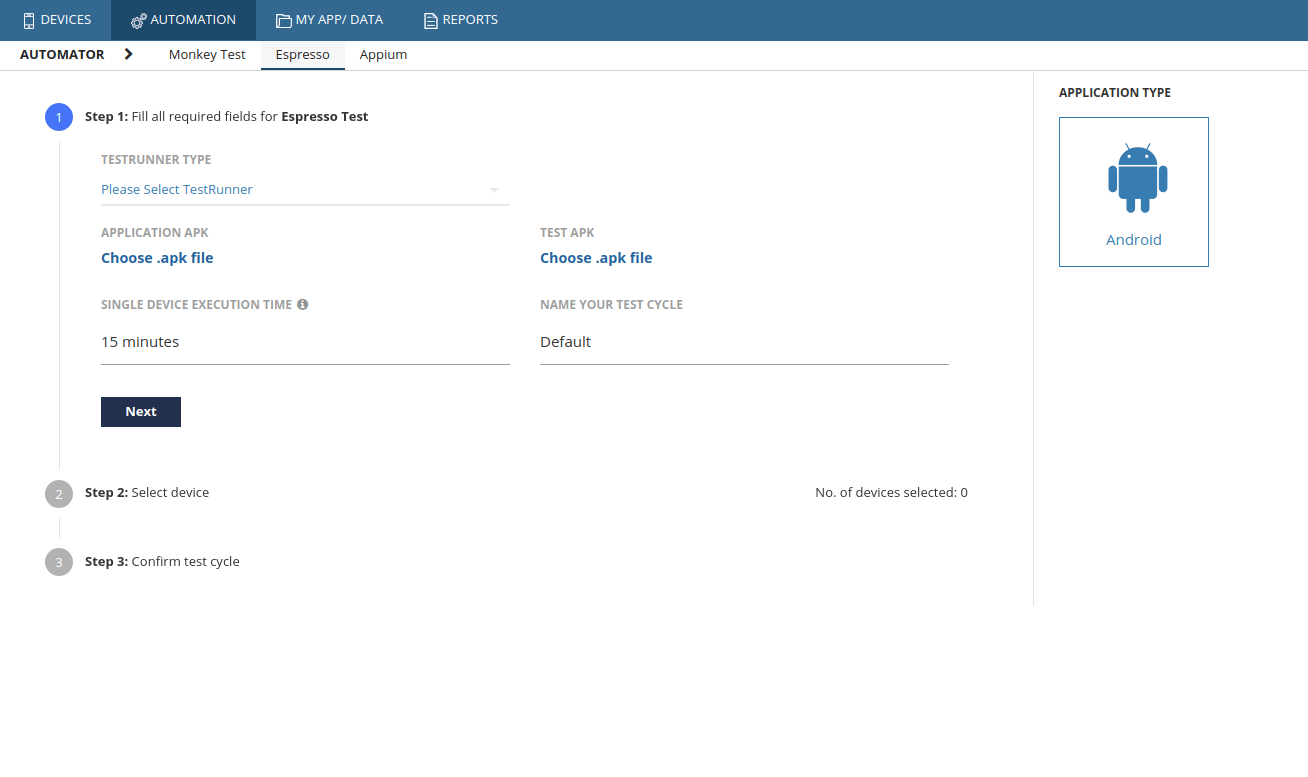
a. In pCloudy UI there is a section called Automation where you will find multiple automation frameworks integrated to the platform.
b.Select the Espresso automation and to fill in the required details.
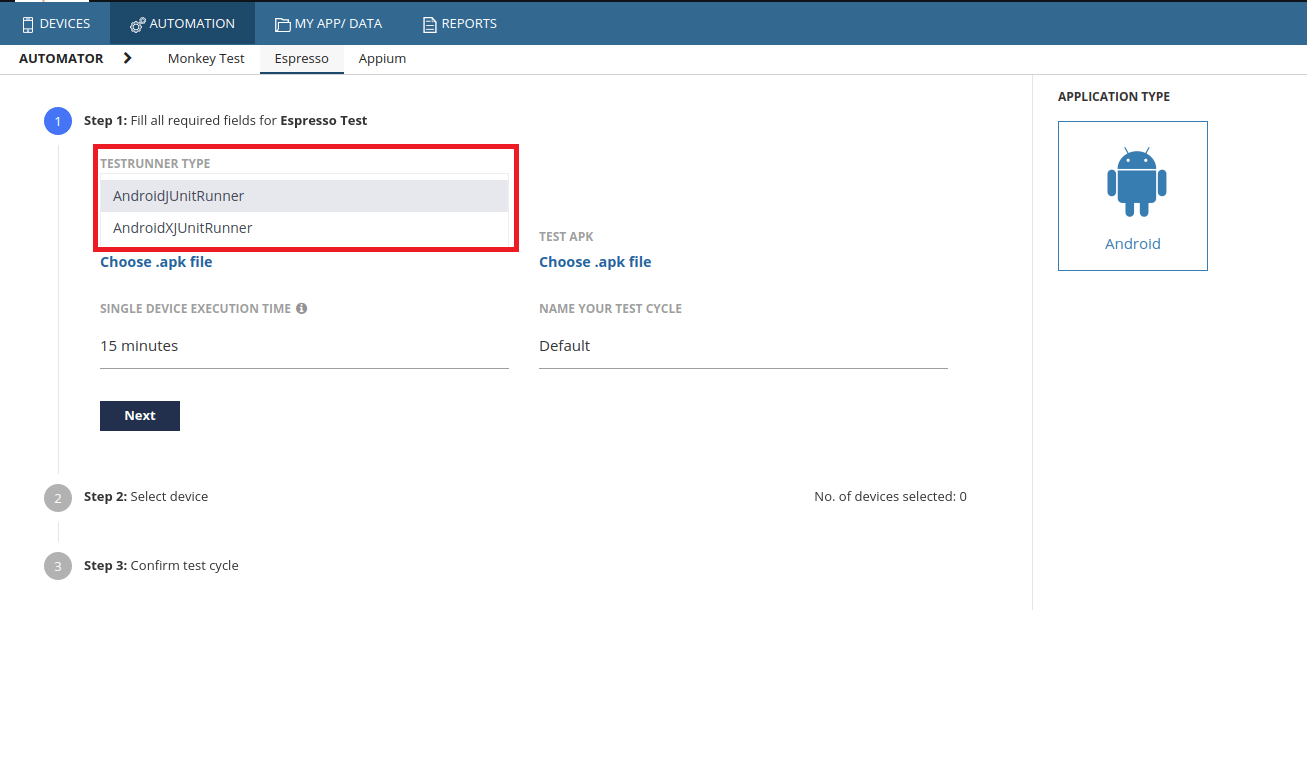
c. pCloudy Support two TestRunners.
i. AndroidJUnitRunner (android.support.test.runner.AndroidJUnitRunner)
ii. AndroidXJUnitRunner (androidx.test.runner.AndroidJUnitRunner)
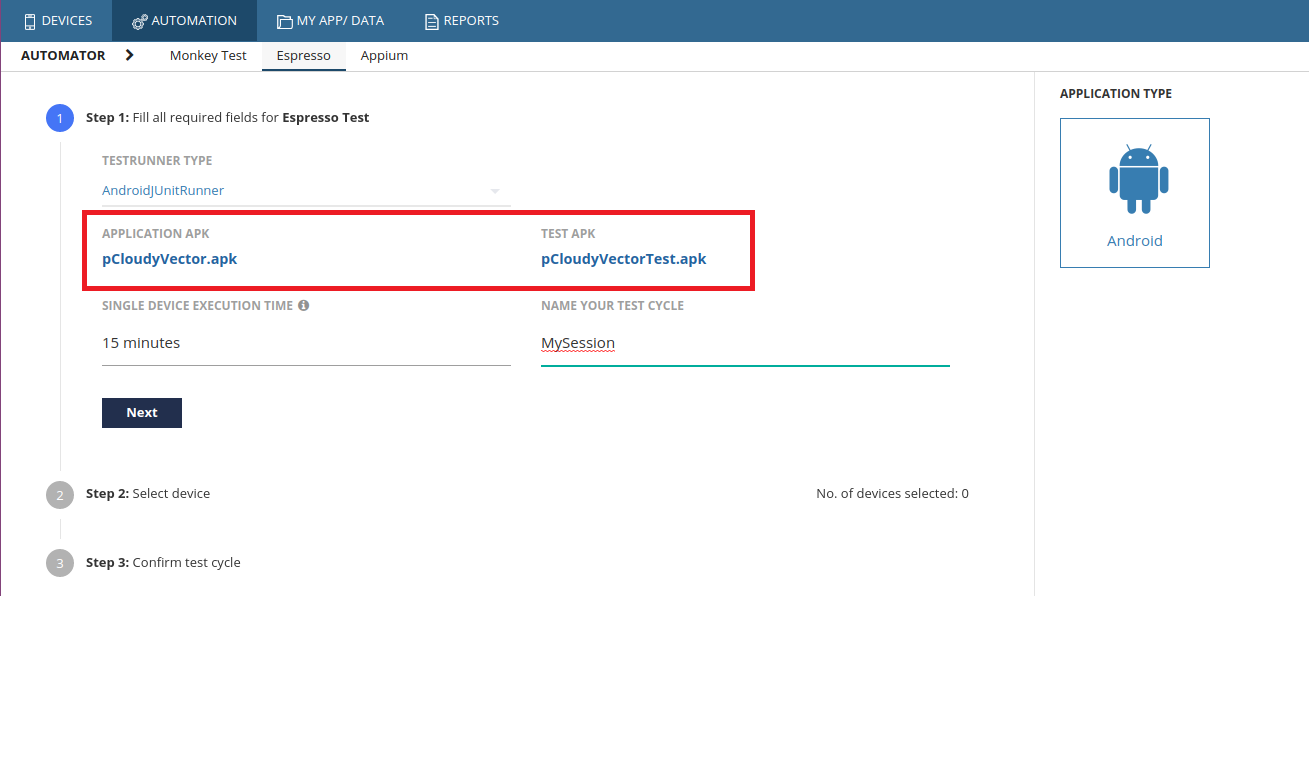
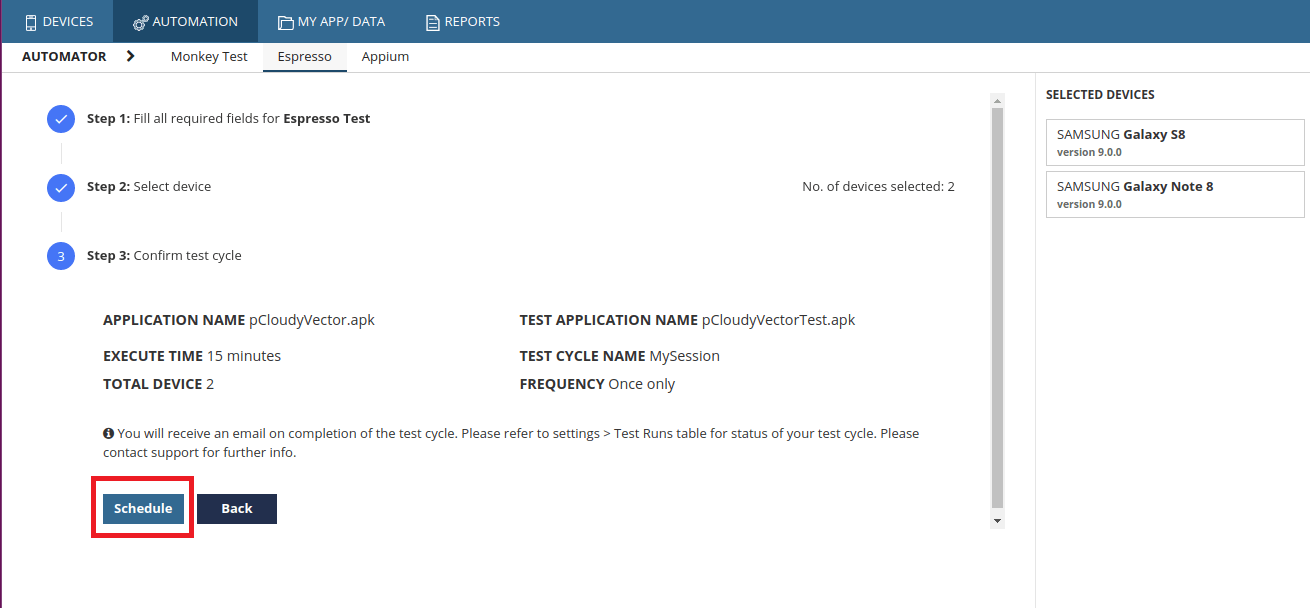
d. Select your Application and Test Application.
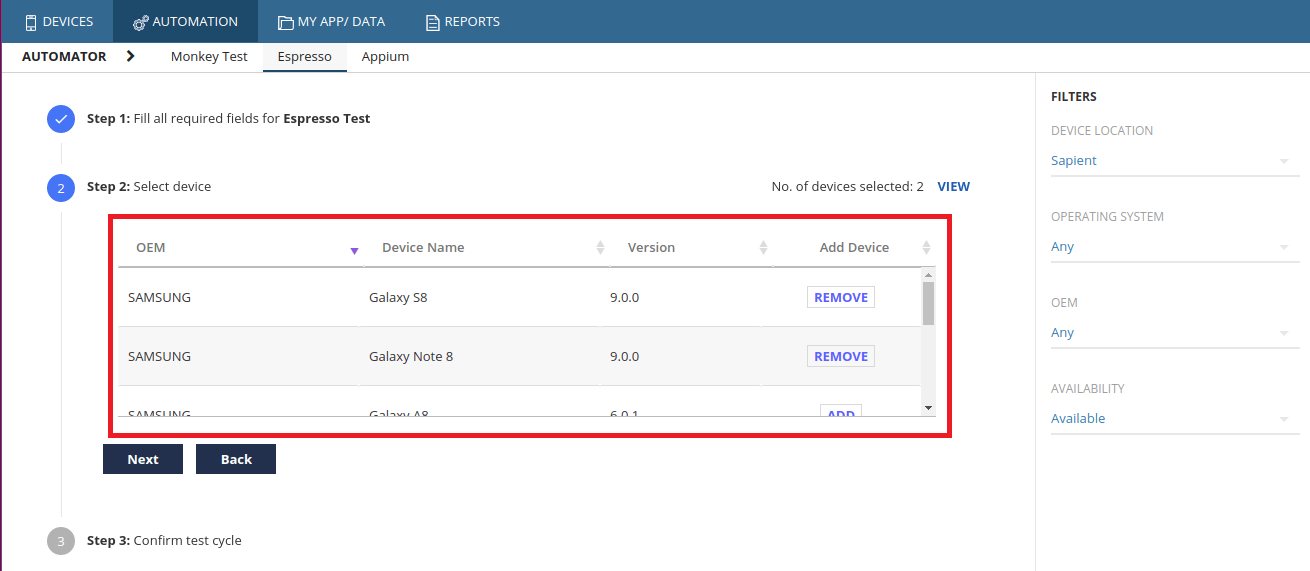
e. Select the required devices.
f. Click on Next button and Schedule the automation by clicking on the Schedule button.
g. You will get a dialog box. Click on Ok.


h. You will get the active session details on the Dashboard and you will also be able to see the Live view.
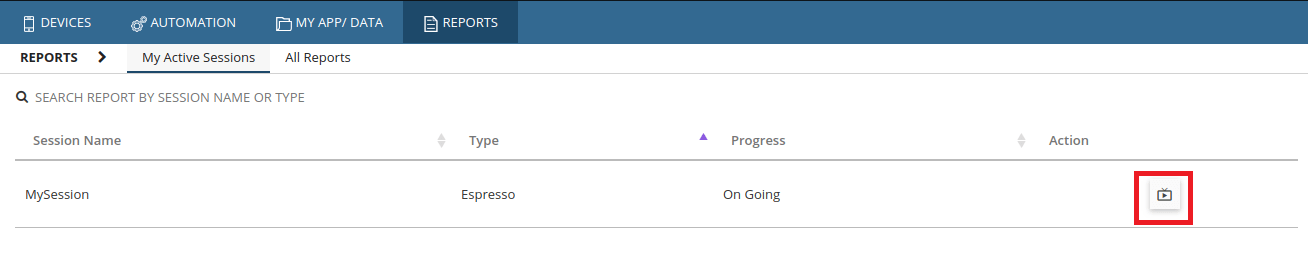
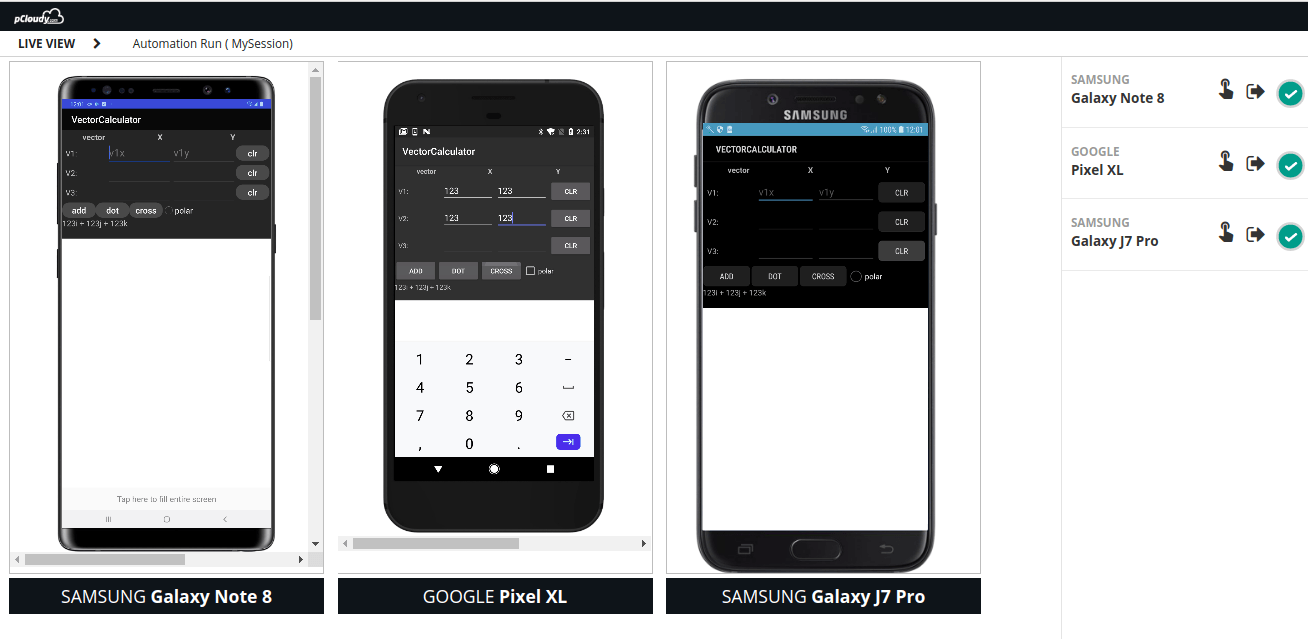
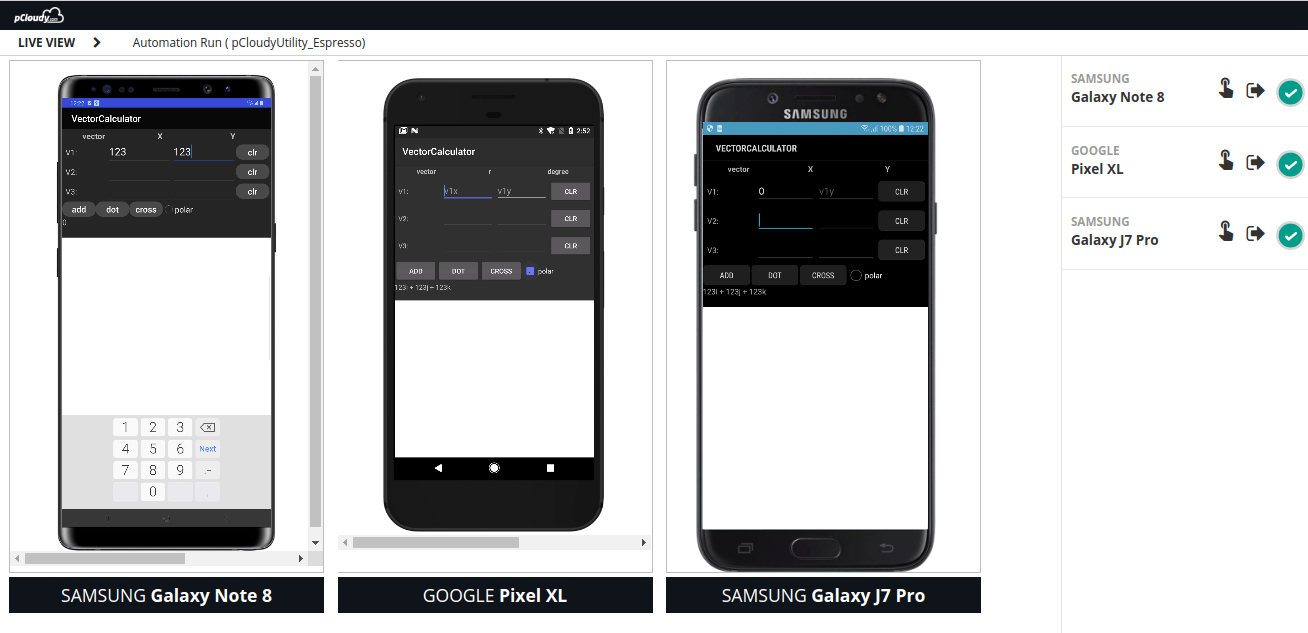
i. Liveview will help you to see the live execution on your test cases. Click on the Liveview icon
2.pCloudy Utility
a. Download the espresso starter pack from here and Unzip it
b. You will find two files,
i. pCloudy_Espresso.jar
ii.Config.properties
c. Place the config.properties file and pCloudy_Espresso.js file into the same directory.
d. Update the config.properties file as guided in the comments in the file.
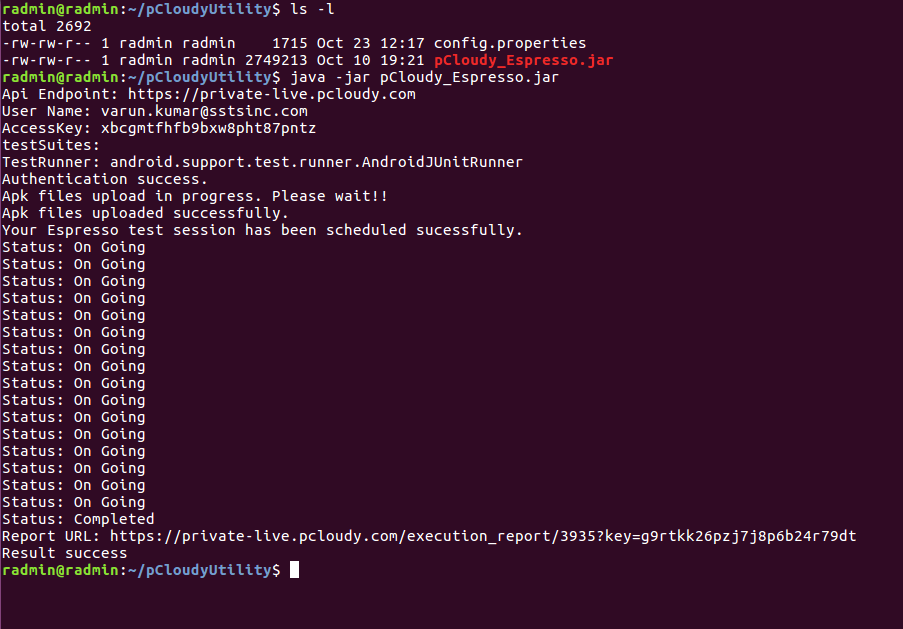
e. In your workspace, run the command by typing the java -jar pCloudy_Espresso.jar
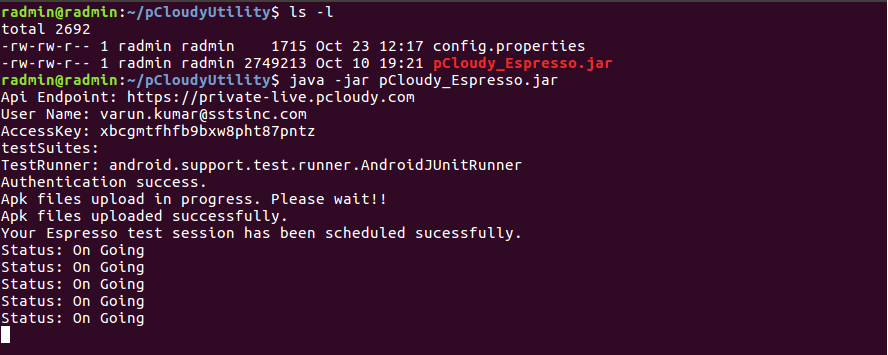
f. This will upload the required files which you have mentioned inside the config.properties files.
g. You will get the status of the Automation in pCloudy Dashboard ActiveSession.
h. Even on the pCloudy dashboard, you can use the Liveview by which you can see the running test cases.
i. Once the test execution is over, You will get a URL of the test execution report on the terminal.
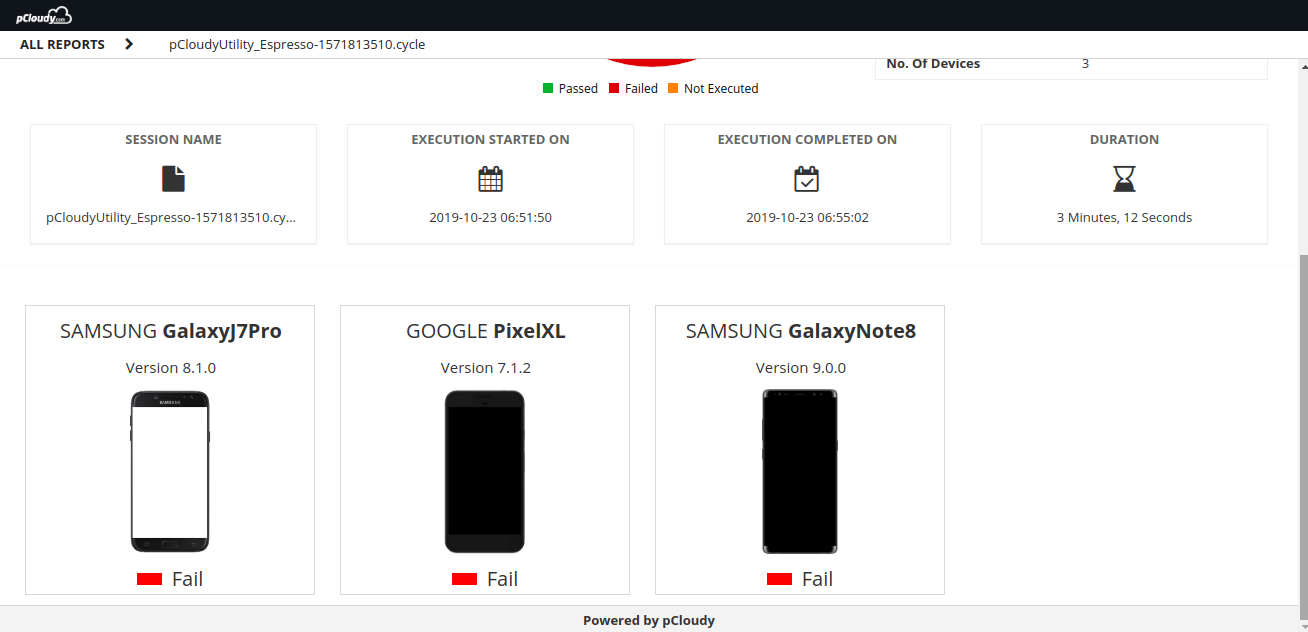
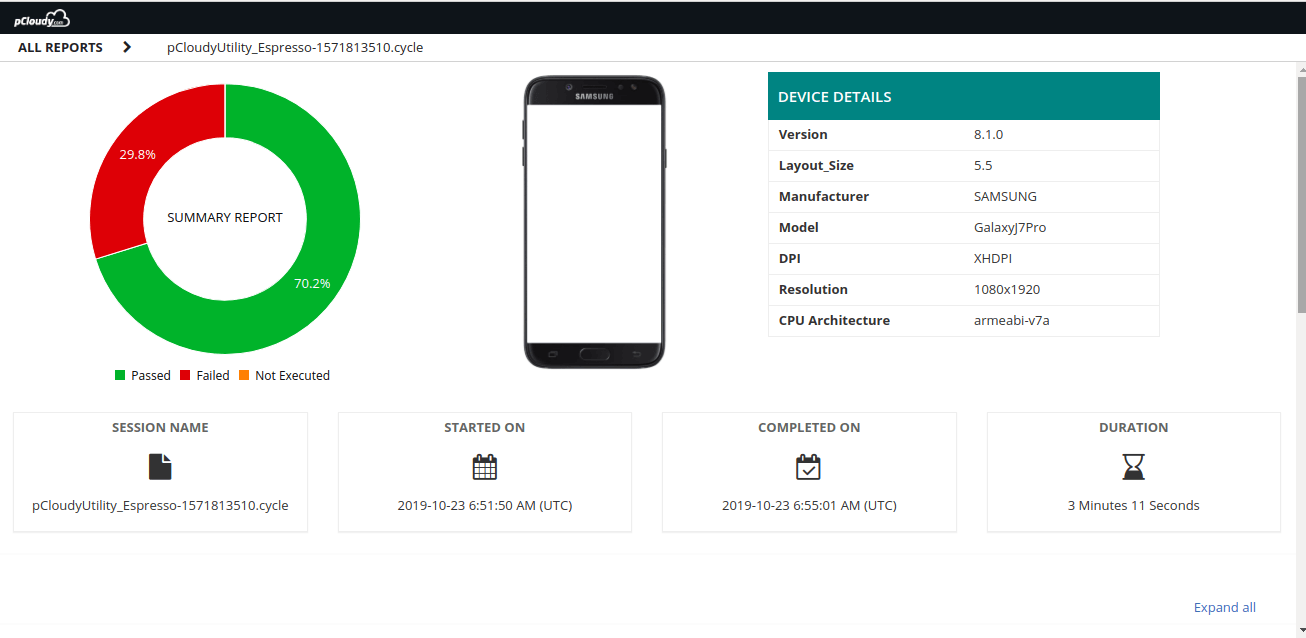
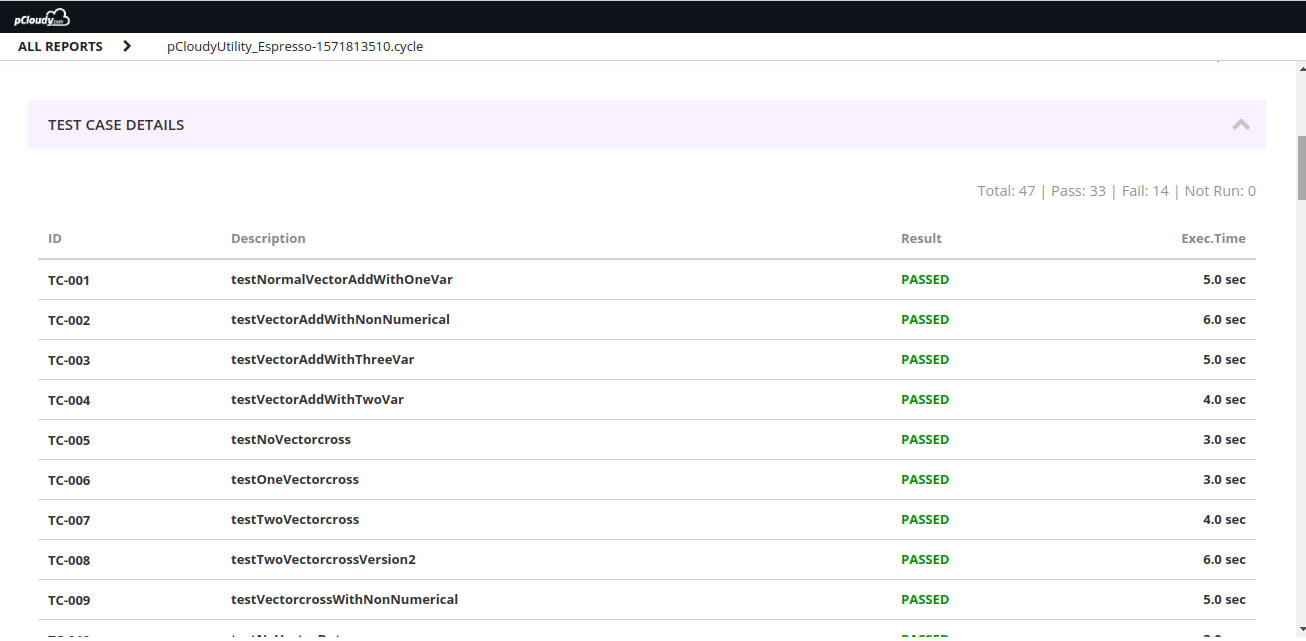
j. You can open the report from the dashboard Report section also. In the report, all the test details will be there as shown in the screenshots below.
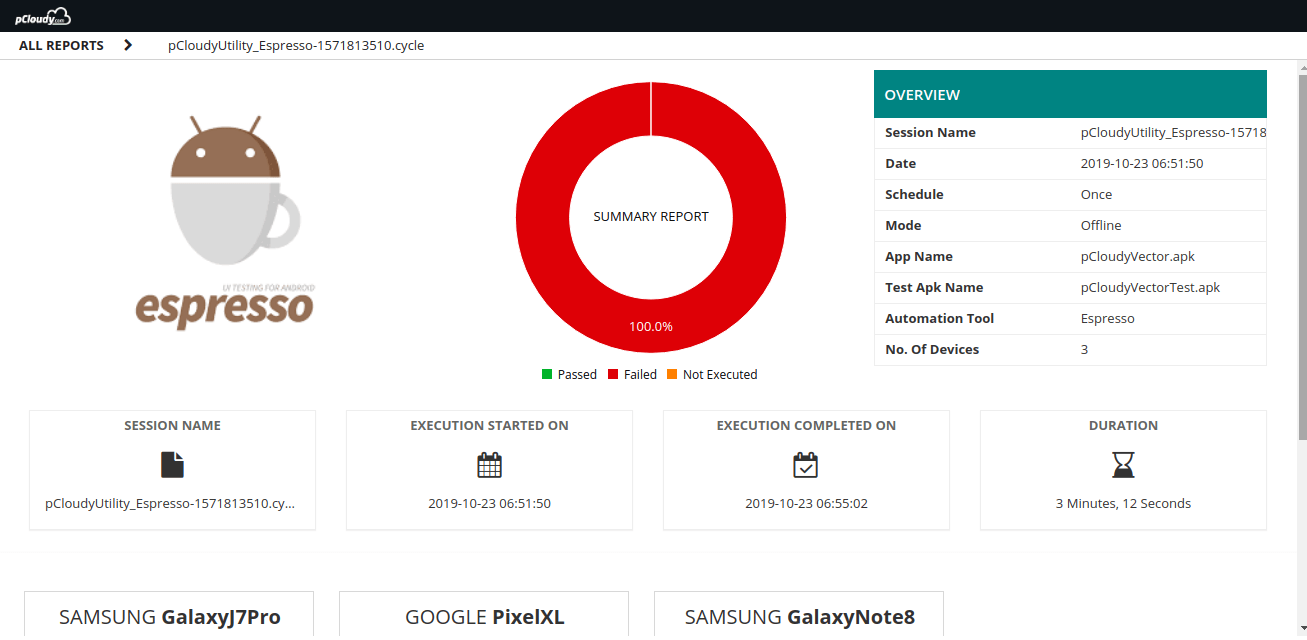
k. You will also get individual device reports. Inside the test case level details, you will find performance details, test case logs, device logs, and video files.
 January 17, 2025
 December 30, 2024