pCloudy Platform

 
This article explains the options available on device page. These options will help you use the devices effectively on pCloudy platform. pCloudy is a feature rich platform and supports whole lot of features to ease your device interaction. There are many single click options to speed up your testing on devices. On connecting to a device, You will see many icons in the top pane.

Lets understand what each of these icons/features does for you.


Device icons


1.
Camera

Capture high resolution screen shots with the skin of the device

2.
landscape and portrait devices

Change the orientation of the device to Landscape and portrait

3.
Cross Browser Testing

Open the browser from the list of preinstalled browsers

4.
Keyboard

Use the extended keyboard if you want to enter some text on the device. However, for Android ver 5.0 and above you can directly enter the text from your system keyboard

5.
Battery

Check the stack trace (crash logs) if the application is crashed

6.
Cursor
Navigate the application with the buttons
7.
zoom in zoom out

Zoom in/out the device shown on the screen

8.
zoom default icon
Reset the zoom level to bring the device to default size
9.
re-connect to a device

Click to Re-connect if the device shows black screen

10.
Extend Device Session

Extend the session if the device is available

11.
Wake Up

Wake up the device from sleep mode or push the device to sleep mode

12.
Stop Device Session
Release the device back to the cloud


pCloudy’s Device Settings tab has lot of commonly used features and device interactions. Some of the key features to test are Network, Location and Audio.

Lets see those in details.


mobile device settings

1.
Reboot Device
Reboot the device remotely
2.
Toggle Wifi

Switch ON/OFF wifi

3.
Adjust Volume
Adjust the device volume
4.
Manage Apps

Manage your apps on the device

5.
Network Profile

Throttle network to simulate different network conditions

6.
add google account
Add Google account
7.
Set Phone Location

Teleport the device – Set any location of the earth on the device

8.
Settings

Open Device settings on the device

9.
Open play store on mobile device

Open play store on the device

10.
open developer options on website

Open developer options on the device

11.
Inject Audio

Send audio commands to the device for testing applications which supports audio commands


Anshuman Chatterjee | Posted on | 2 min Read

Mobile App Testing Tools to Improve App Quality


Mobile is the key to the digital world in today’s era. The rise of Mobile Internet has ensured that we all are going to make most of our digital decisions on a Mobile device (primarily using an App). Mobile Apps are going to be everywhere.

One of the biggest challenges for App Development teams is to ensure that their Apps works on the variety of devices. They need their apps tested on multiple devices before it is released to the market, simply because of the plethora of devices available in the market.

Each mobile from each OEM (Original Equipment Manufacturer) with different specifications is a unique device where the application should be tested.

Practically it is not possible to test the application on each and every mobile device available in the market. But the app must be tested on a large set of the devices depending on the market segment of App under test.


Introduction:


pCloudy is a cloud-based remote mobile app testing platform which allows testing of Android and iOS mobile applications on remote REAL devices. It allows the user to do Manual testing and also facilitate to run test automation on multiple devices in parallel.

It provides a whole lot of statistics like session video, device logs, Screenshots, data usage, memory usage, CPU usage, battery consumption and frame rendering count. The devices are also equipped with Real Operator SIM’s to make MO/MT calls and can receive and send SMS.

Preparing for Manual Test

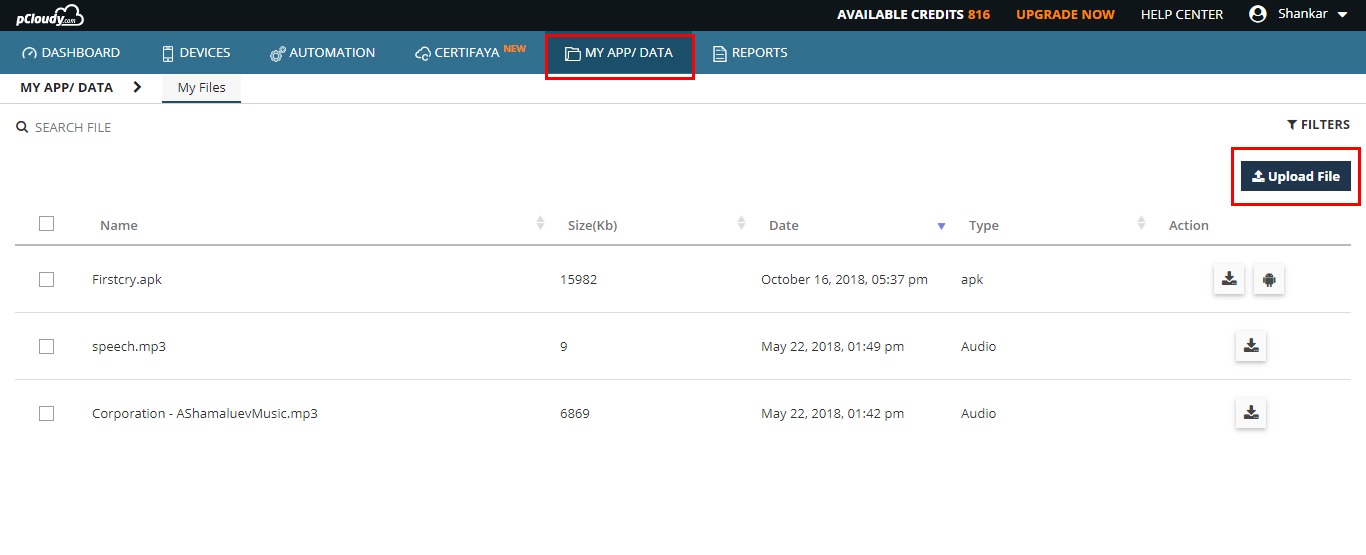
Before we start the test on pCloudy, we recommend uploading the test application, test data or even test suites to the cloud drive provided by pCloudy. This is the secured location for each user.

Click on the Upload button and select the file from your local system through file explorer. After selecting the file select upload and the file will be uploaded to your cloud drive.
MyApp Data
You can also manage the cloud drive by download. These applications can be installed on the devices as explained below.

Performing Manual Test remotely

Based on test requirement, you can search for any specific device by using the filters provided at pCloudy.

(Note: Click on any image for enlarged view)
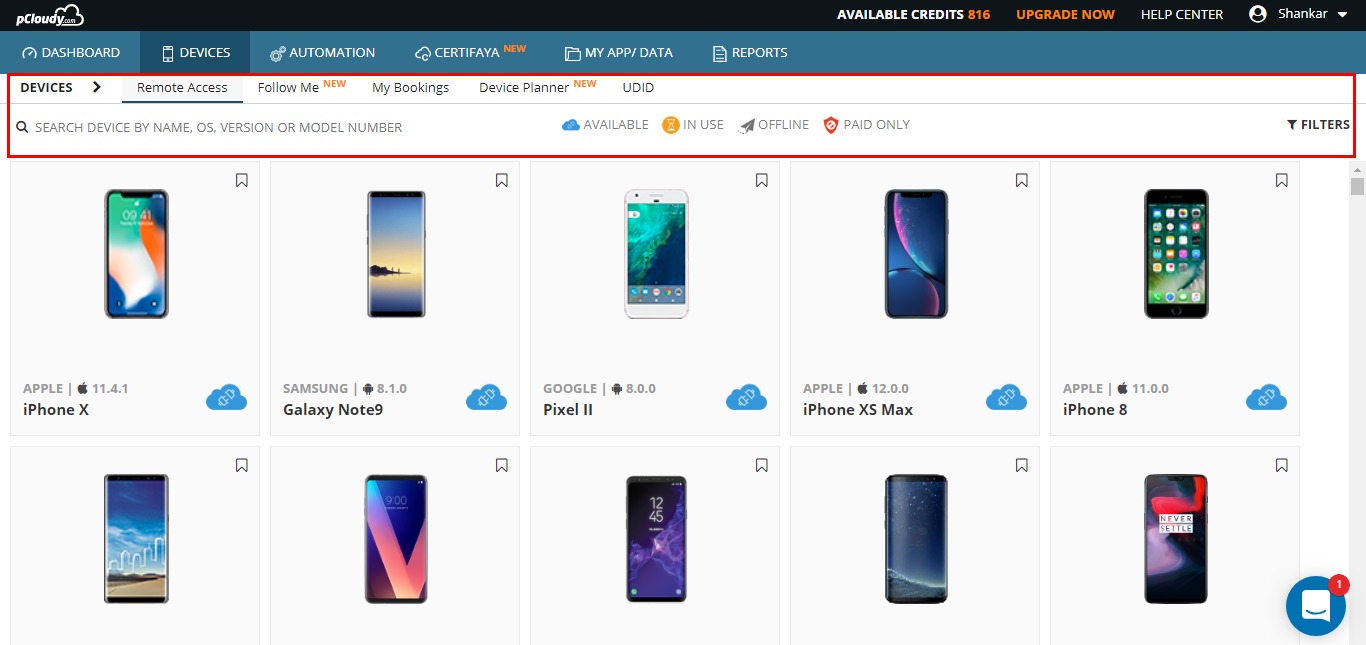
Search device using filters


You can access any device for Instant Access. Also, you can book the device for a longer duration for your planned testing using “Book your Device” link.

After selecting the device just click on the “Connect to a device” button to connect to the device. The below device page will be displayed with all the supported features.
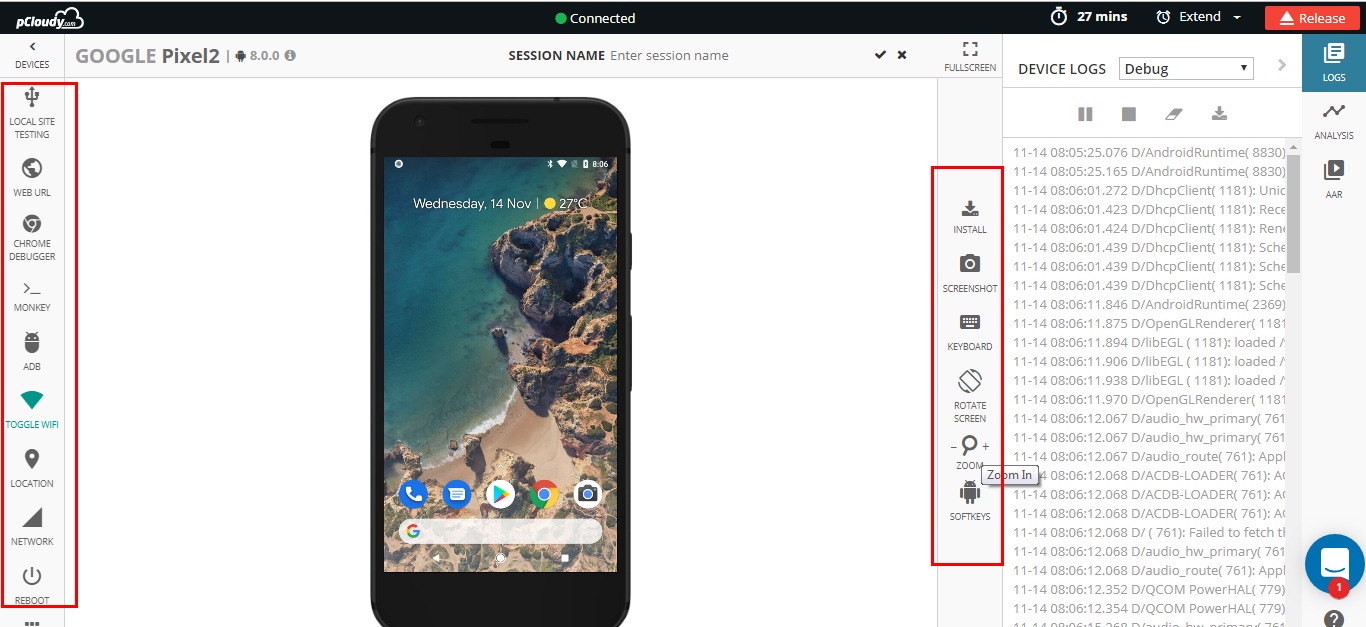
Device Information


The device is displayed in the middle pane with some features on the right, left and top pane.

  • The Left pane where the device information is displayed, followed by other tabs like App/Data, Device Settings, Debug and Automation
  • The top pane with handy features & a timer to show the remaining time & wake up the device and release the device back to the cloud.
  • The right pane to view the device logs and Performance vitals for application under test.

How to Install the application on the Remote Mobile device?

  • Install from my App data – enables user to upload app on device.
  • Push to Device – This feature allows you to transfer your test data to the device.
  • Upload App – Upload and install an app from your local system.
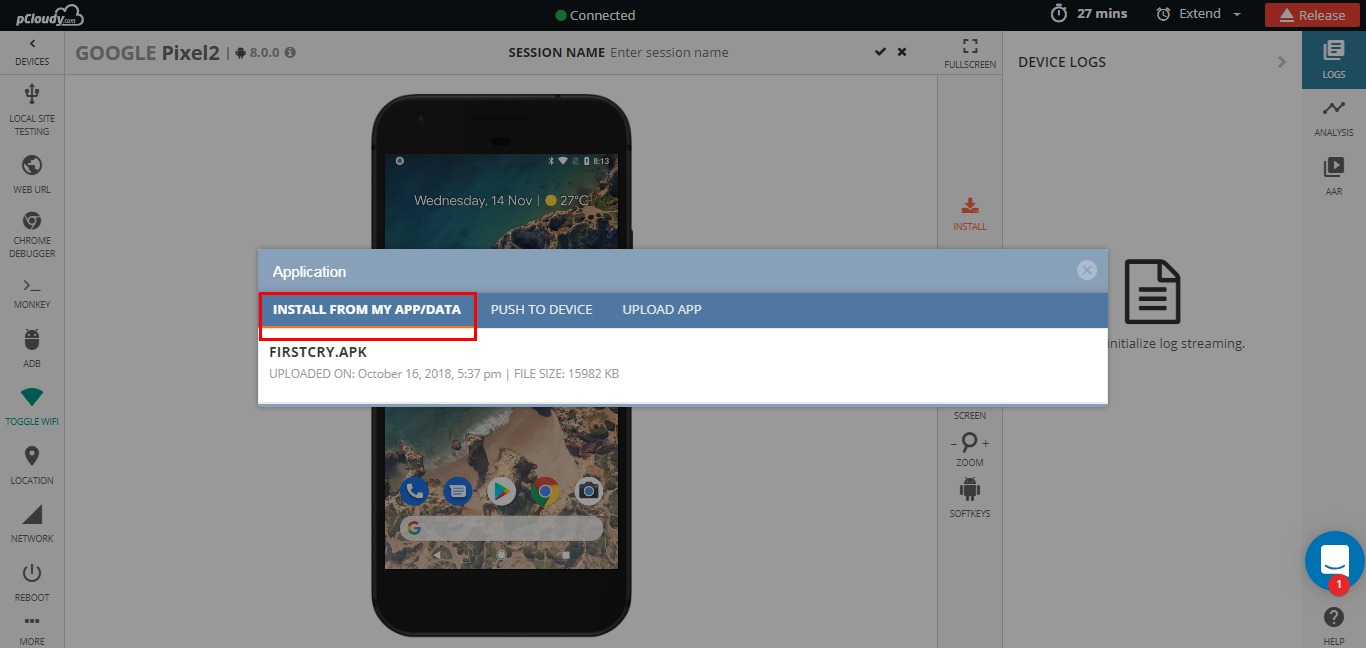


Install APK on  Device


Once the application is installed you can test the application on REAL Remote Device the way you test the application with the phone in hand. You can use the mouse to give touch gestures to the device. You can click the button, drag the screen or double tap the image.

While doing functional testing on the remote device, you can also monitor the device logs next to the device. Please start the logs from the right page and start monitoring the logs next to the device.
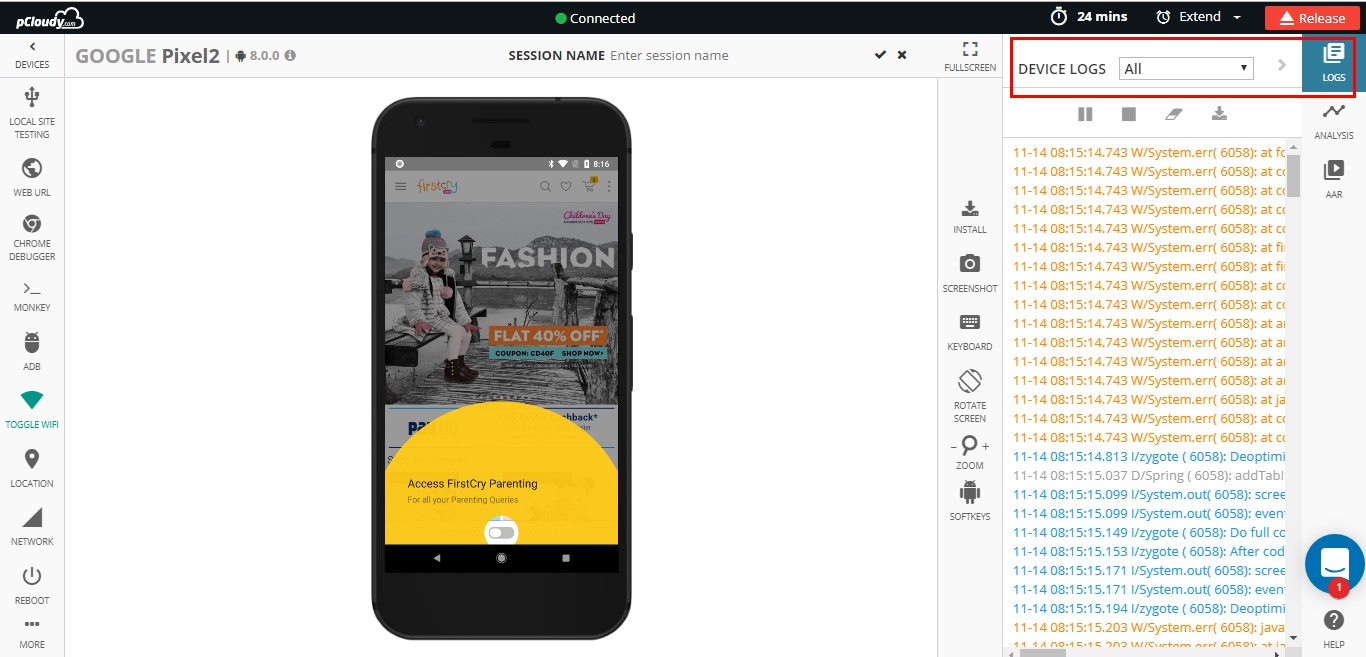
Device Logs


All Mobile App Testing tools at one place: One of the biggest advantages of pCloudy platform is it provides performance statistics like Memory Usage, CPU Usage, Battery usage, Data usage & frame rendering count of the application under test without any extra efforts by the test engineer.

To view this vital statistic on pCloudy platform, please select Performance tab -> Choose an APP -> Select the application under test.
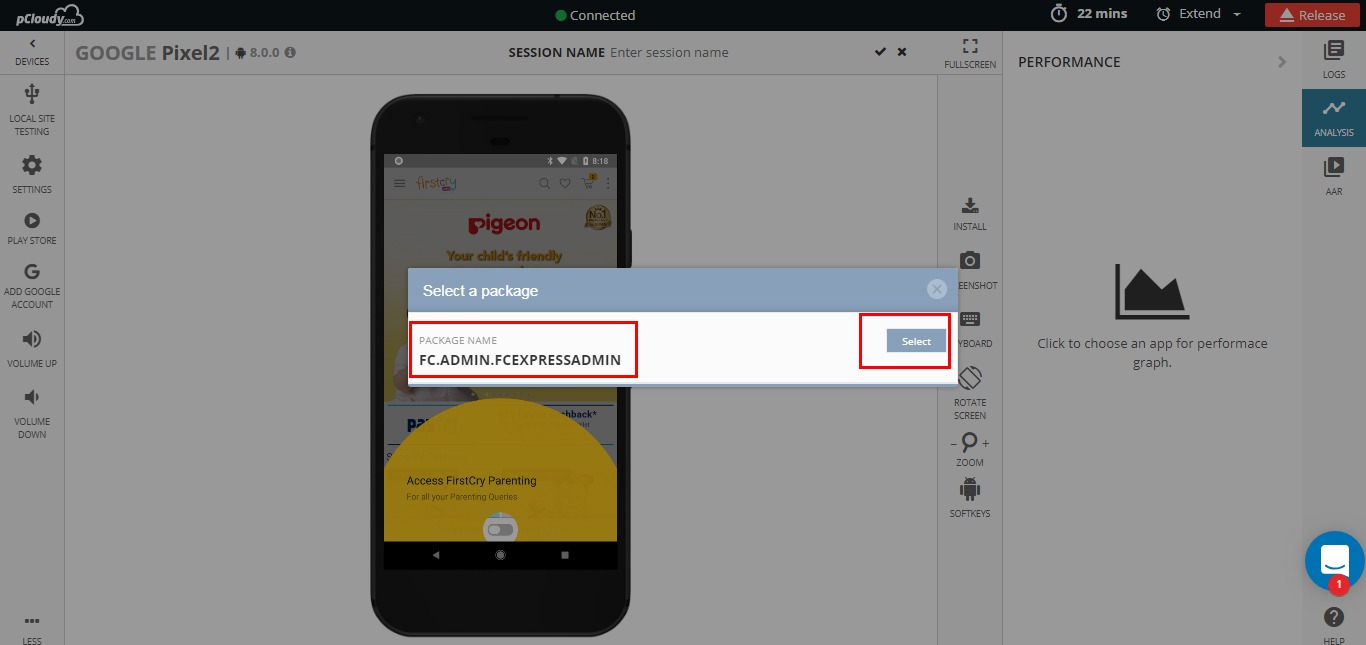
Select an app


Start navigating through the application to complete the function test flow.

On the right pane, you will start seeing the important vitals of the performance.
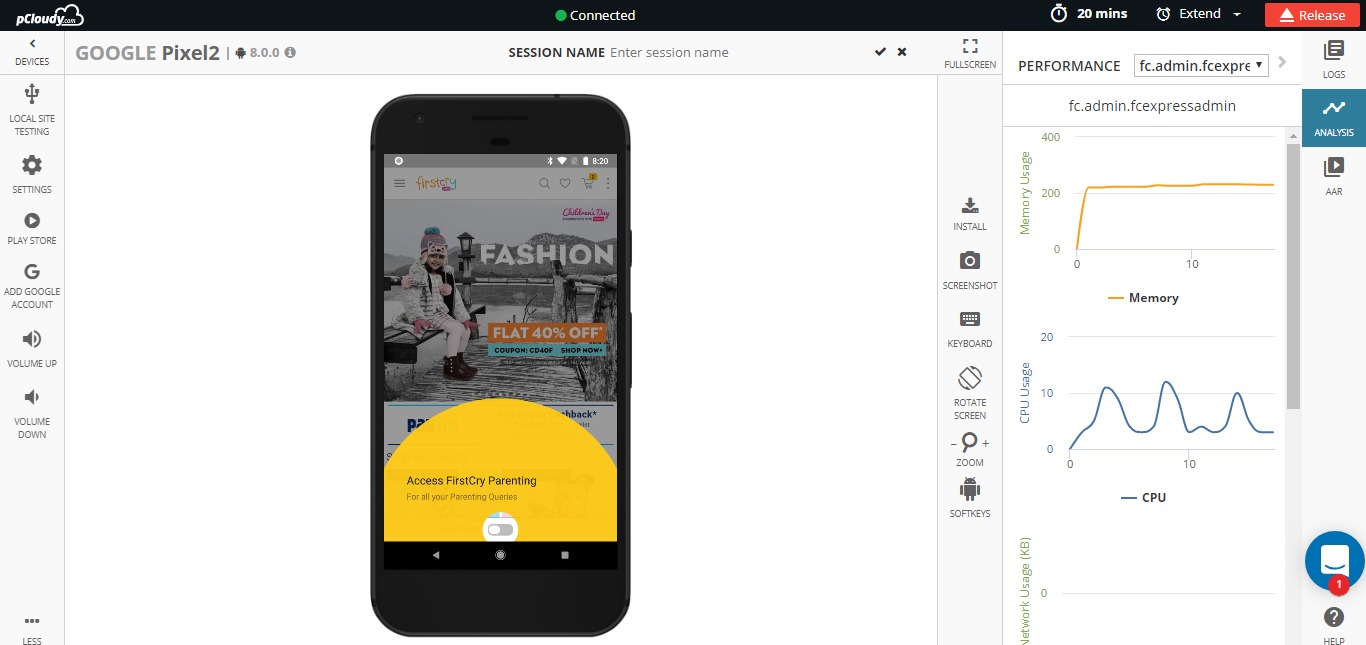
Performance Metrics


On the left pane, you can expand the device settings. All the important frequently used applications are made available to use on the device.
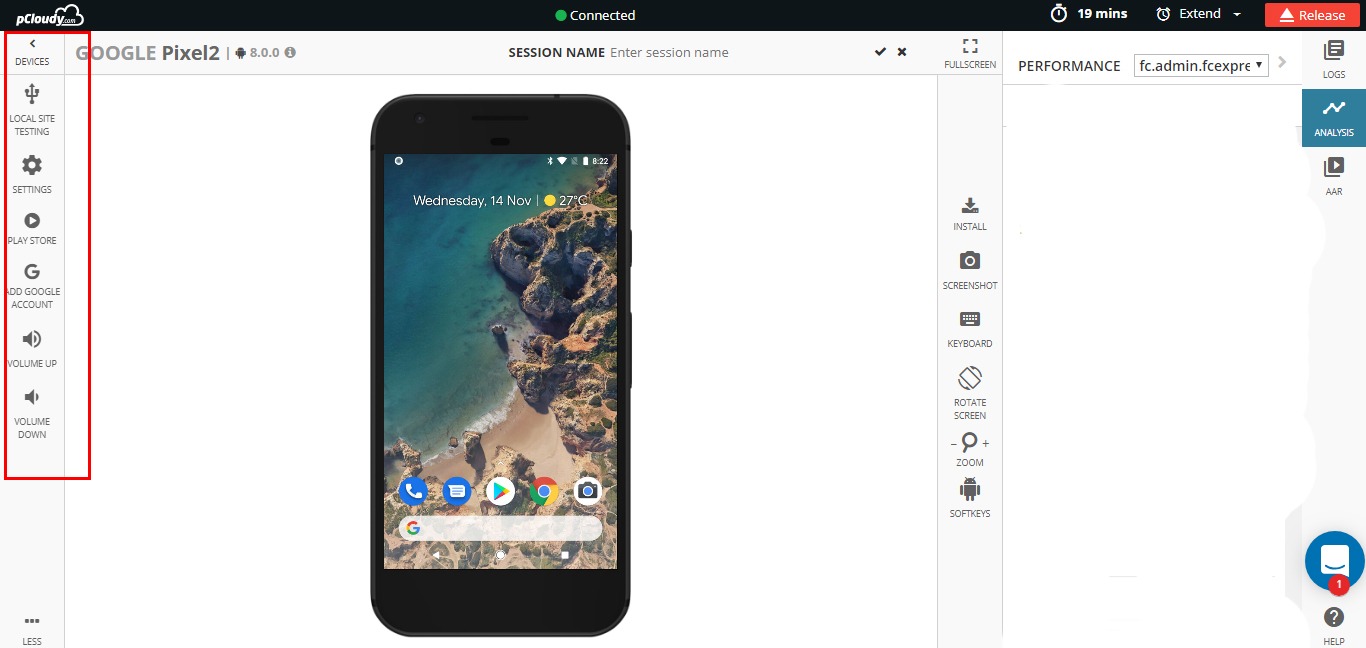
Device Settings


You can perform below actions on the remote device:

  • Reboot the device remotely
  • Toggle the Wi-Fi connection
  • Adjust the volume of the device
  • Manage the Apps
  • Open Developers options
  • Open Play store
  • Open Device settings
  • Use Set Phone Location

If your application under test is a location aware app and if it reads the geo-location from the device to provide the necessary results, “Set Phone Location” feature can be used to inject any location on the earth to the device and the device will be teleported to the selected location.

Once you select the “Set Phone Location”, the platform shows the google maps and you can select the location of your choice on this map. The same location is injected to the device.

Other key features during manual tests
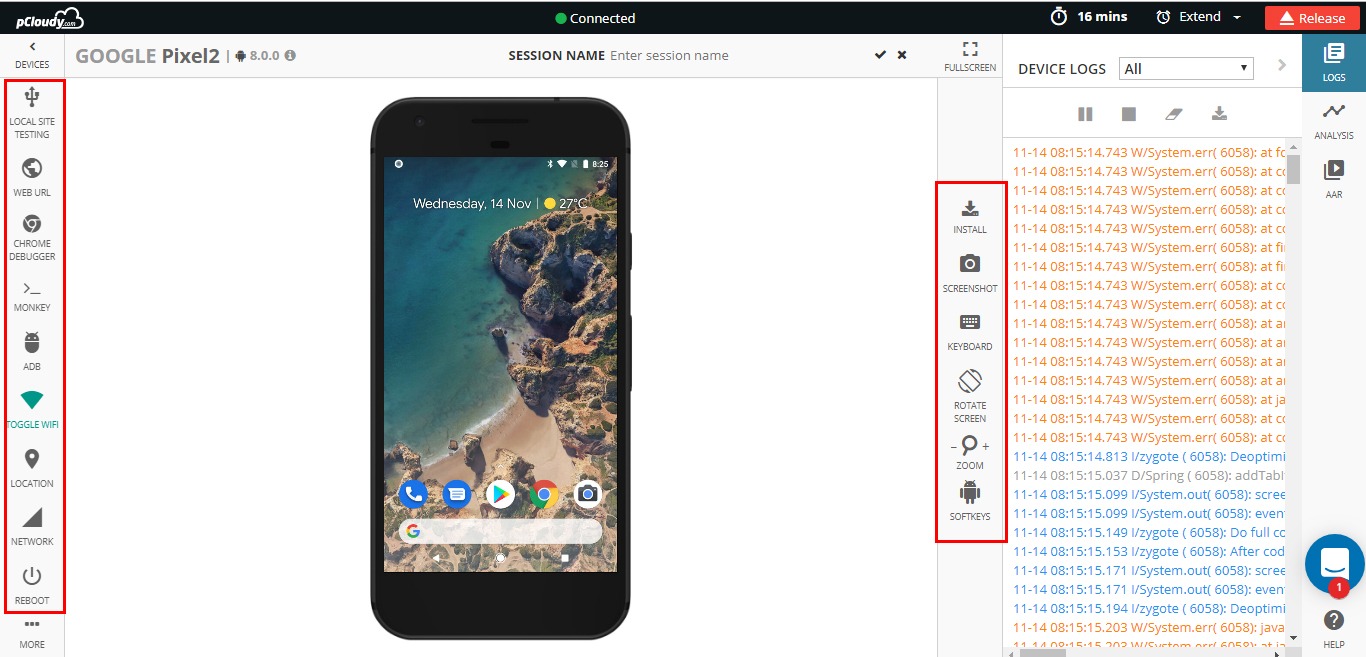
Key Features

  • You can capture high-resolution screen shots with the skin of the device
  • Change the orientation of the device to Landscape and portrait
  • Open the browser from the list of preinstalled browsers
  • Use the extended keyboard if you want to enter some text on the device. However, for Android ver 5.0 and above you can directly enter the text from your system keyboard.
  • Check the stack trace (crash logs) if the application is crashed
  • You can navigate the application with the buttons
  • Zoom in/out the device shown on the screen
  • Reset the zoom level to bring the device to default size
  • Extend the session if the device is available
  • Wake up the device from sleep mode or push the device to sleep mode
  • Release the device back to the cloud

Reporting
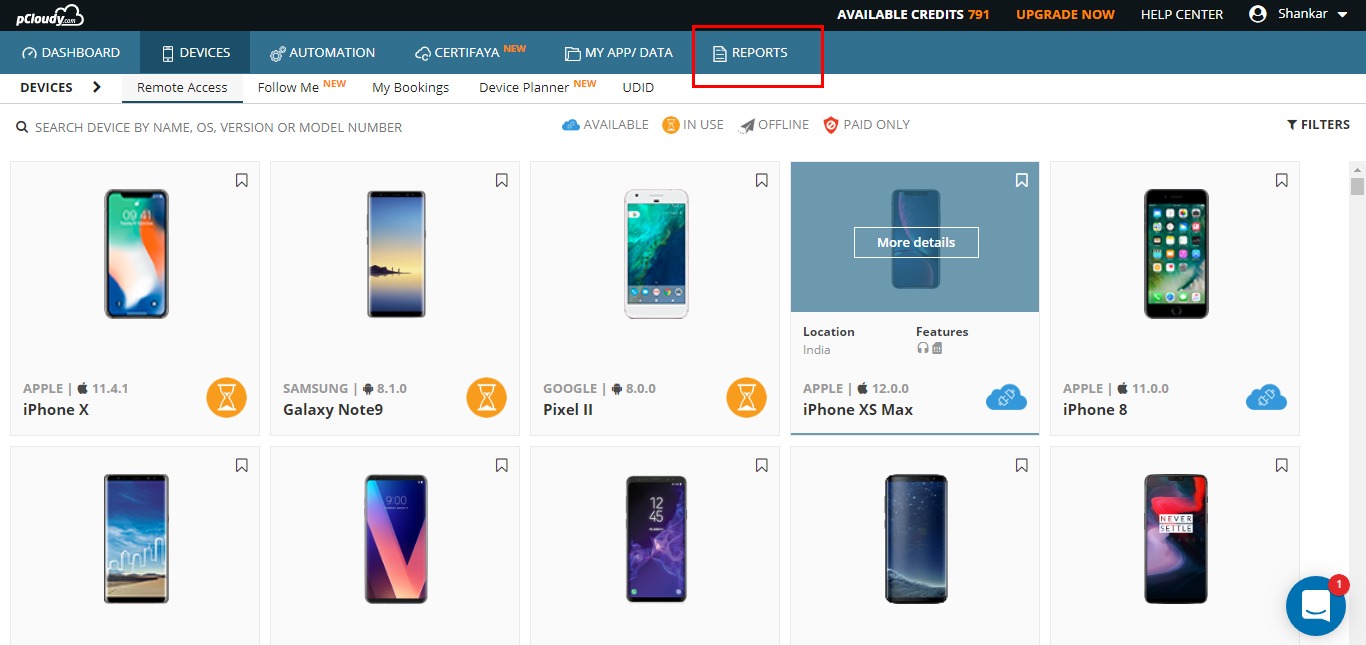
Report


Under reports folder, you can see the entire device session data for all the devices you used. You can find Videos & Logs (by default platform generates), screen shots and performance data if selected by the user.
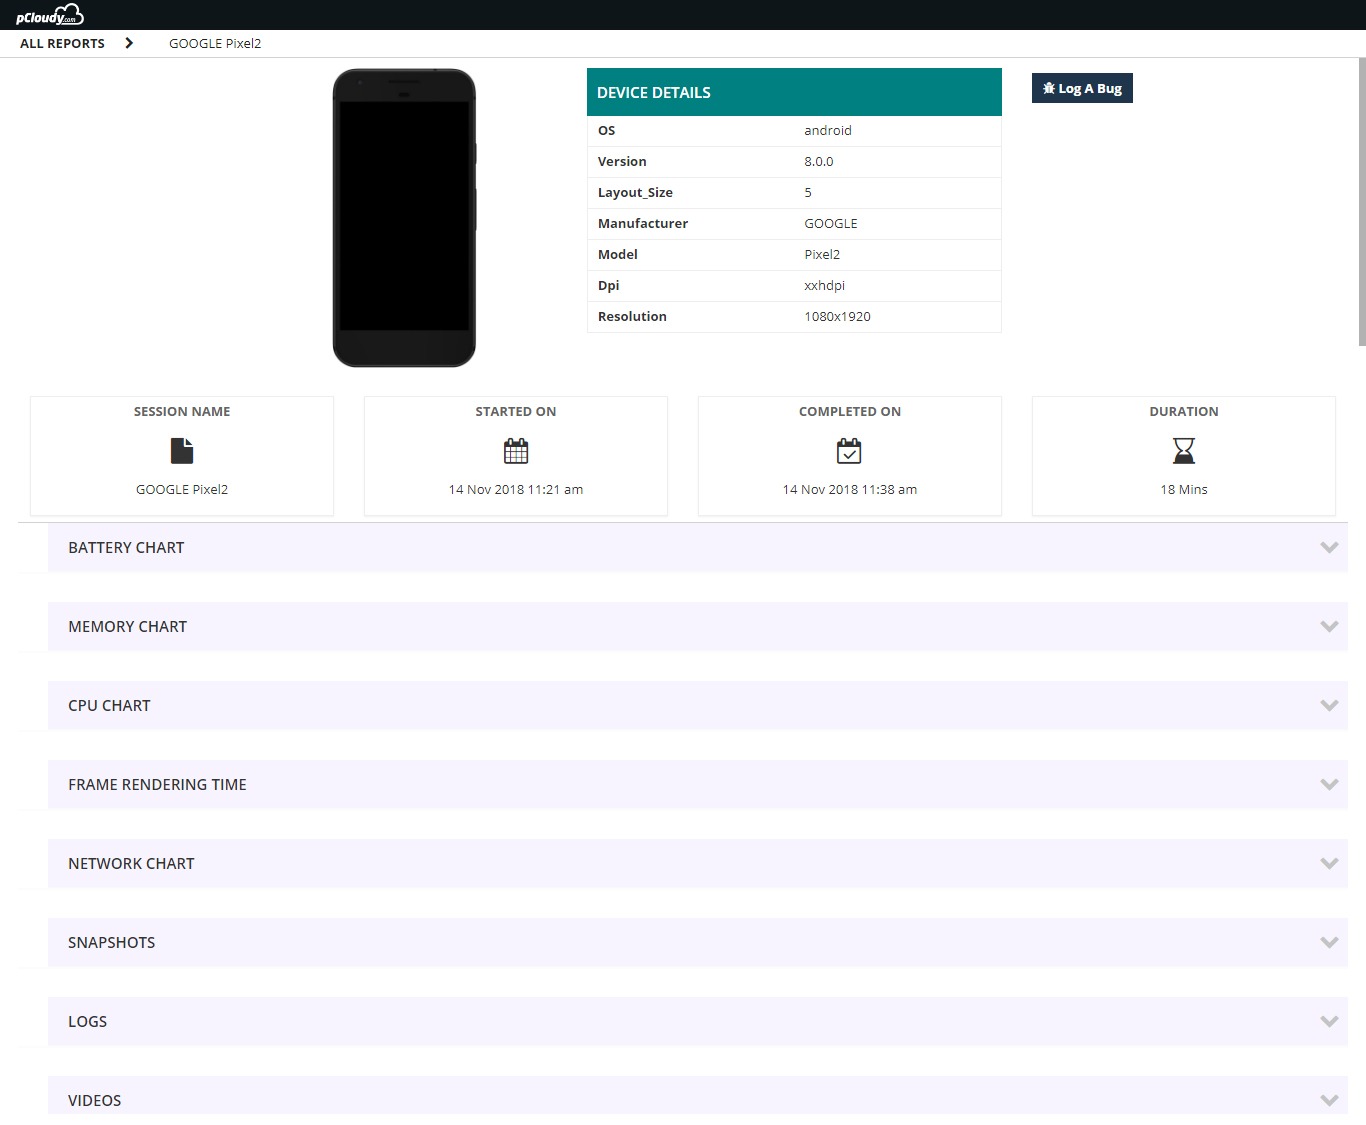


All Reports


Running test automation remotely

pCloudy platform supports test automation on multiple devices in parallel. Below test frameworks are supported for Android platform.
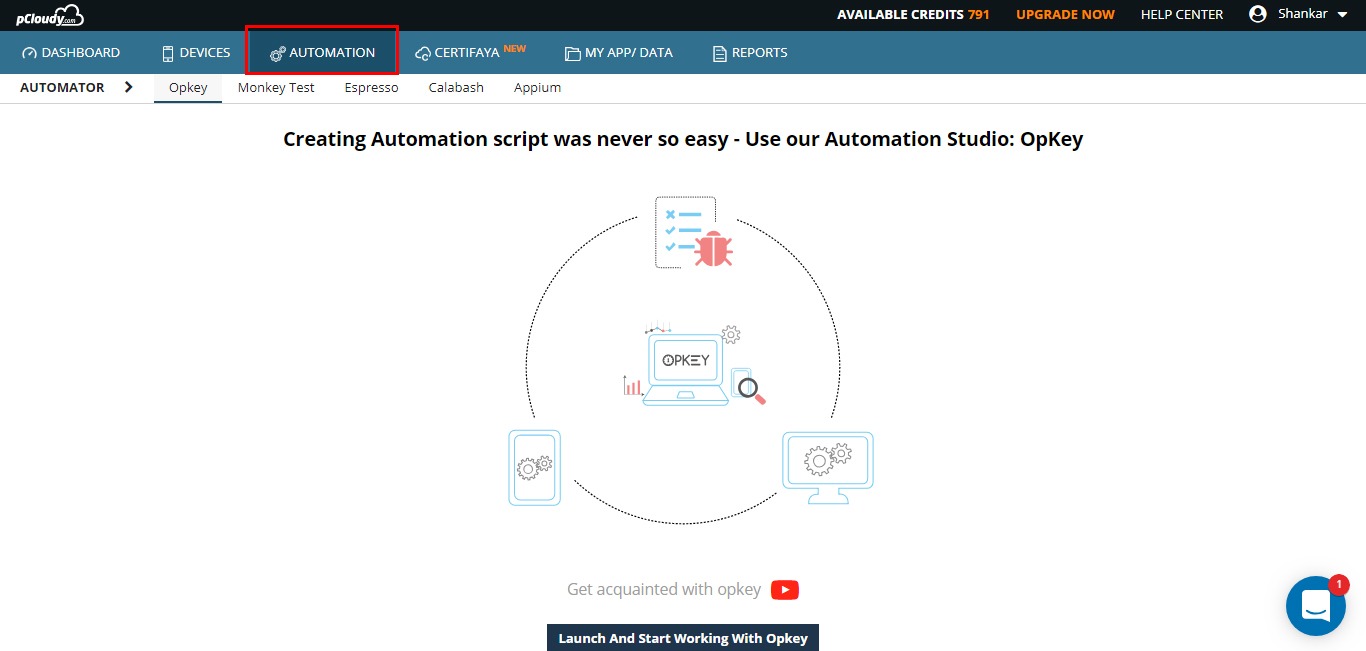
Automation Testing

You just need to select the Test platform, Choose the application under test, Test Suite, time to run on single device and test cycle name.

The biggest advantage of this platform is it generates performance vitals for your test automation scripts without you adding any hooks in your scripts. Otherwise, you will be using multiple mobile App testing tools to achieve the same result.


Once the above data is provided, user can select the devices on which the test automation to be run. Once the devices are selected, the user can schedule the test cycle.
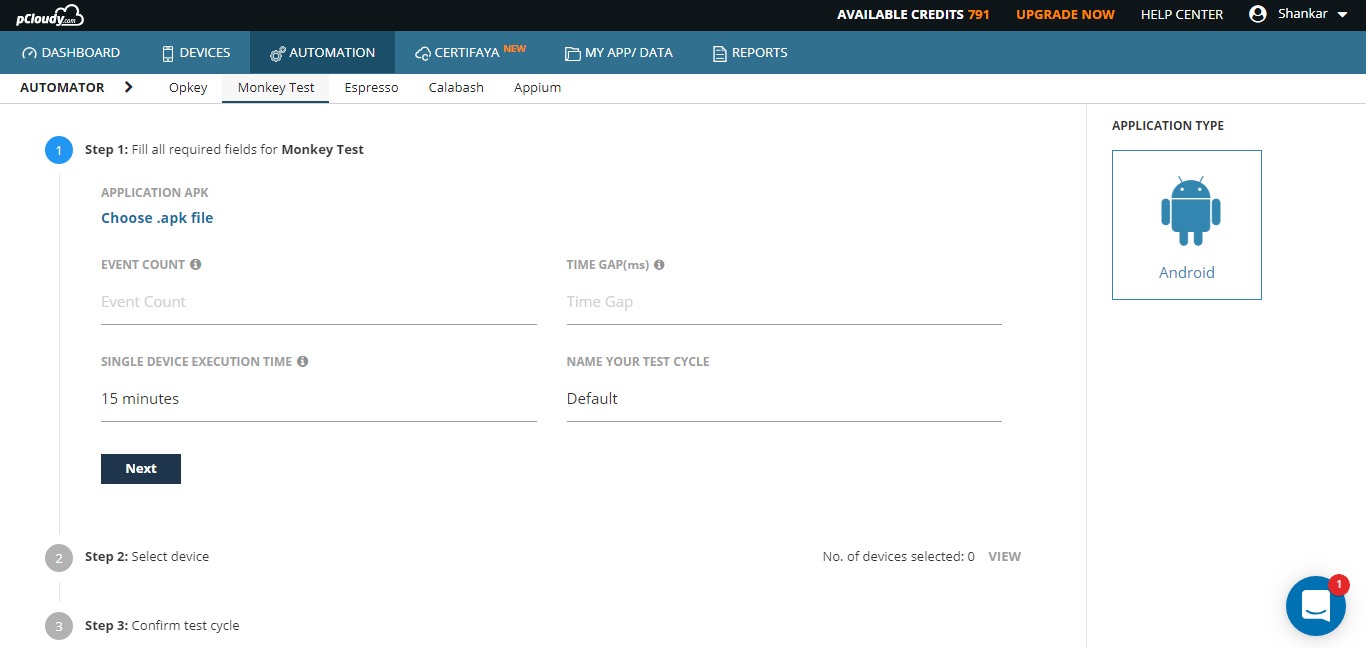
Device for automation testing


The platform will book the devices on your behalf and will start the test automation as soon as the devices are available. Once the execution is over, the user will be notified with an email and user can see the test reports.

APPIUM Test Automation

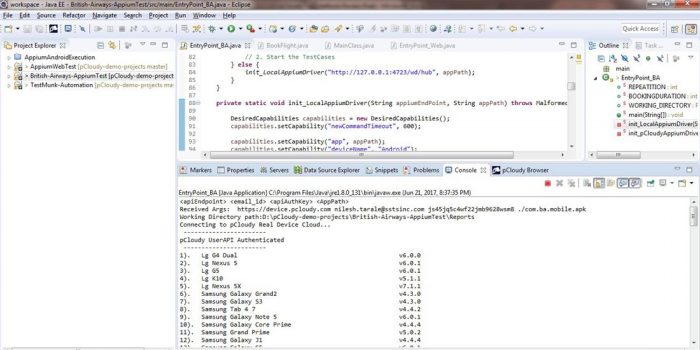
You can run the Appium test automation scripts directly from Eclipse or Android Studio. The platform provides the plugin for both the IDE’s. Simply copy a small piece of code to your driver code and run the project, select the devices on which this tests to be run.

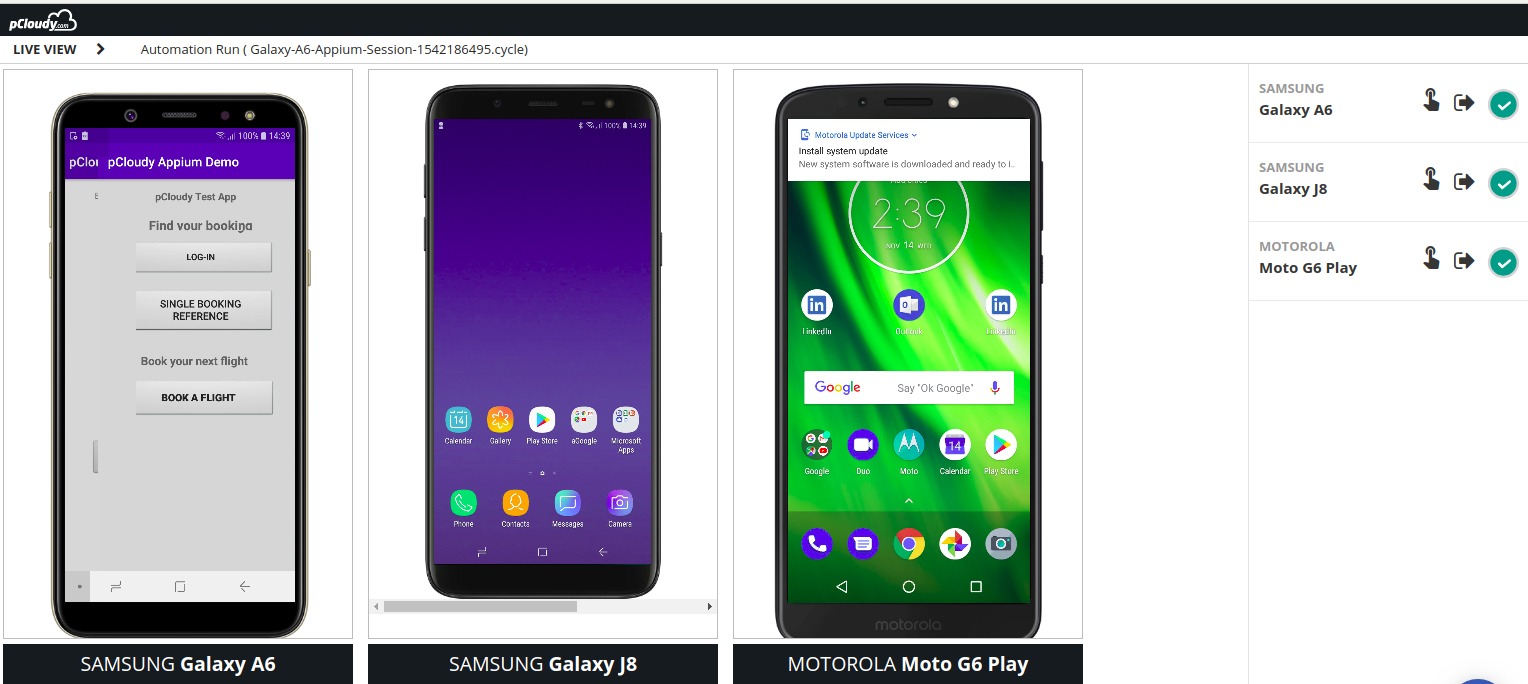
The “LIVE VIEW” feature will allow you to monitor the test automation runs through video streaming on the platform.
appium test automation

LIVE VIEW

Live view for automation
Live view – To see the automation happening on devices
Live View on devices


Automation Test Reports

All the test automation reports will be available under Reports folder.
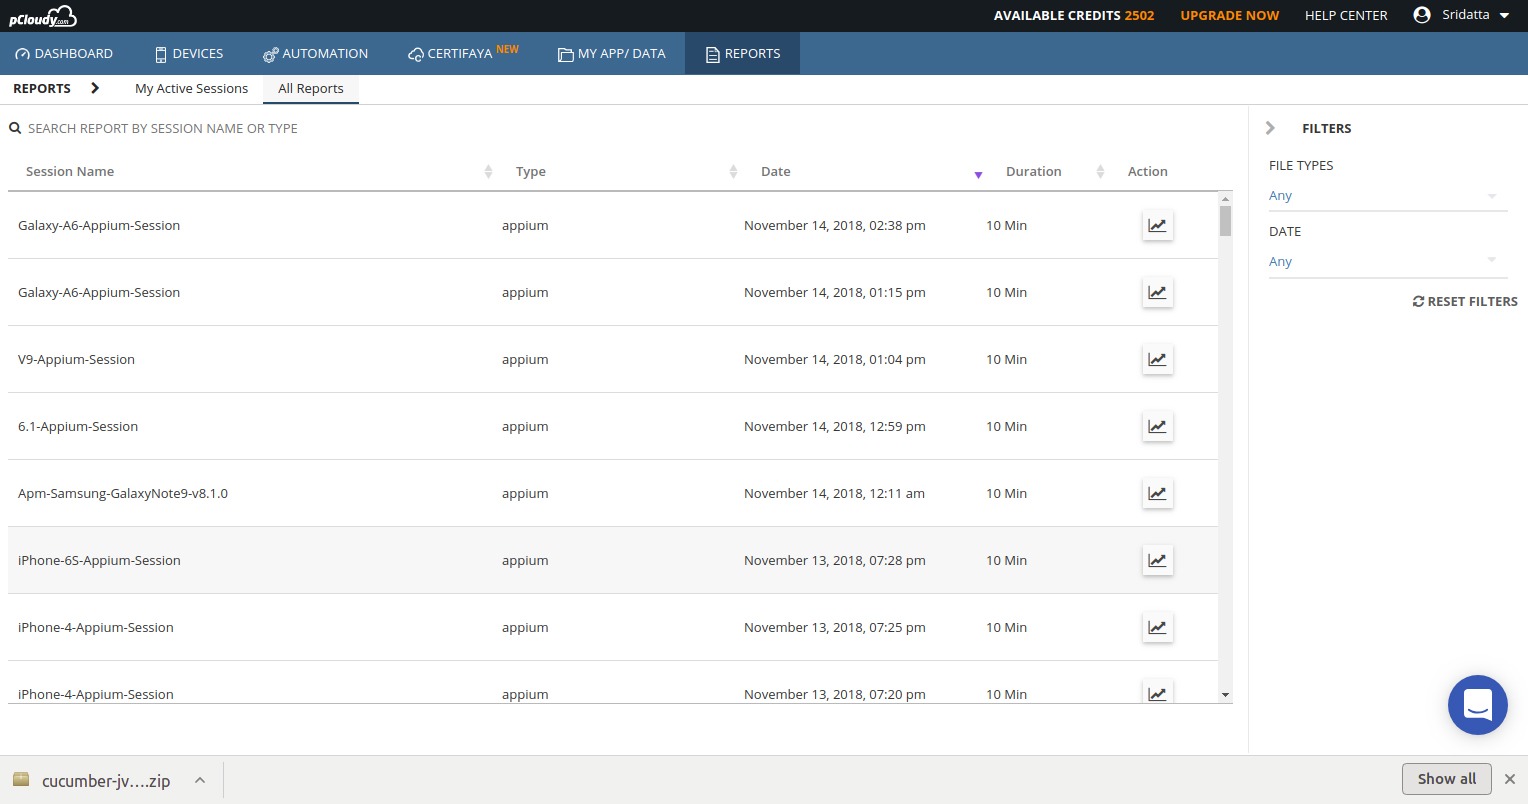
Automation test reports


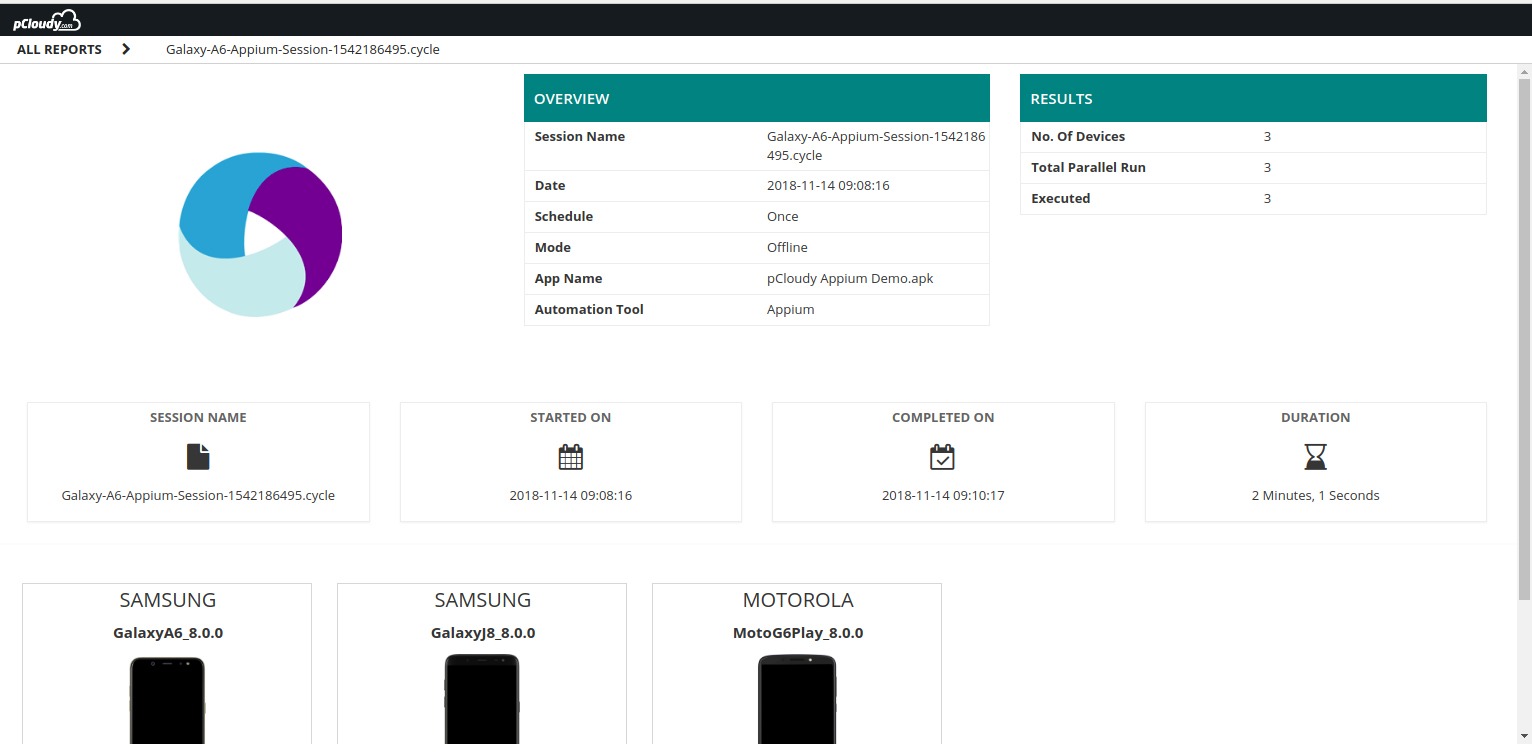
The reports will open in another tab with video, logs and performance data.
Appium Reports


To view the performance data for each device, please click on the device icon for each device.
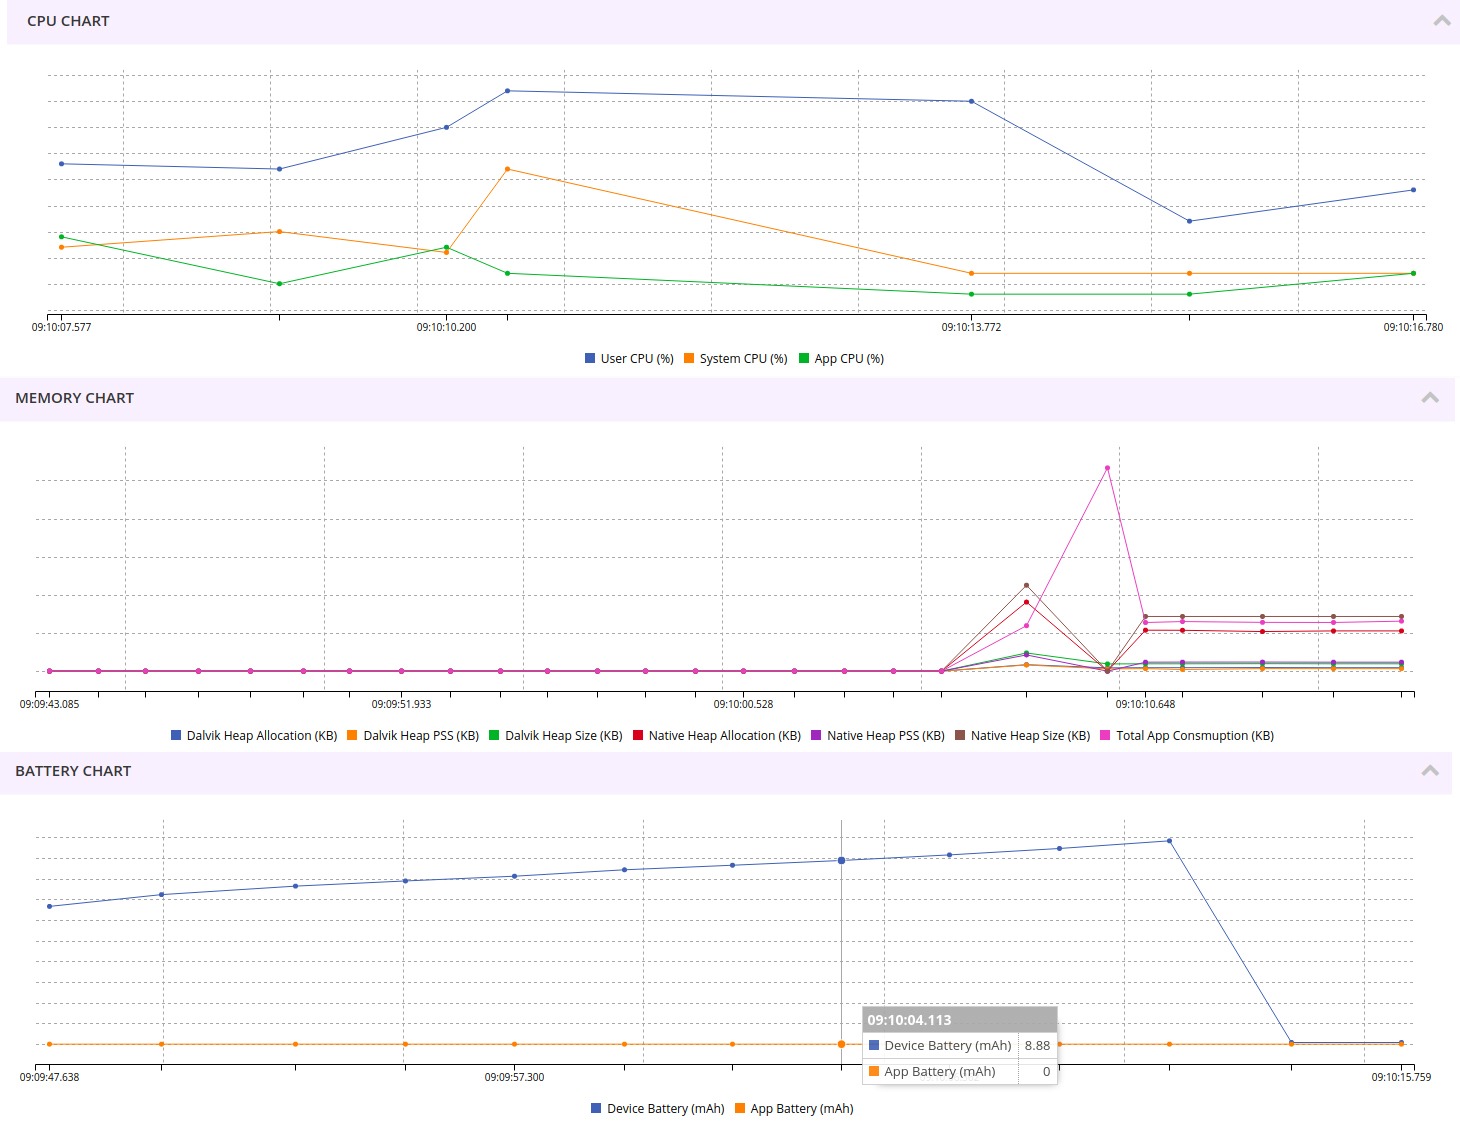
Performance Analytics


Opkey Integration

pCloudy has seamless integration with OpKey, which is a zero code multi-channel automation tool. A unique combination of Mobile App Testing Tools for manual and Automation testing.

OpKey allows single click recording and generation of automated scripts for Mobile Apps.
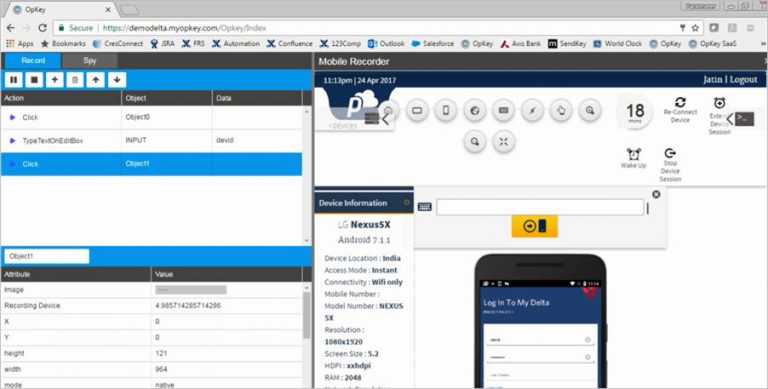
OpKey Integration

You can run the automated scripts on multiple devices on pCloudy directly from OpKey interface.
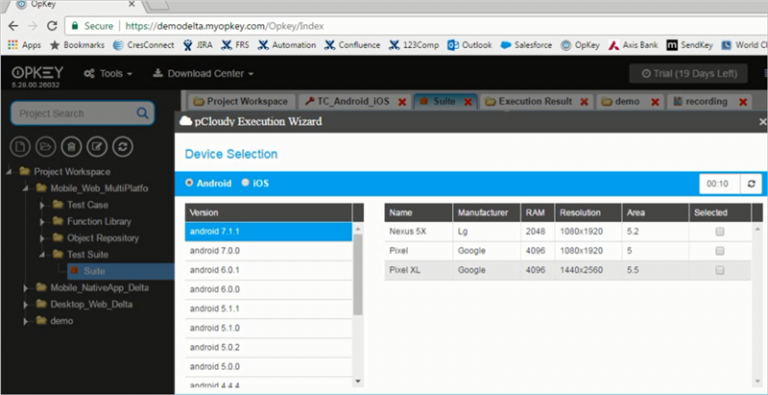
run the automated scripts

Advance Features:

pCloudy also provides many advanced Mobile App Testing tools like Network Virtualization Tests, Device Tunnel (access of devices from Developer IDE and Jenkins Integrations).

Conclusion

The quality of App is extremely important for its success in the market. Right devices and right mobile App testing tools are critical ask from every Mobile Dev and Test team. pCloudy with its comprehensive set of devices and tools could be a perfect companion to every Developer and Tester.

Anshuman Chatterjee | Posted on | 2 min Read

Uncover Memory Leaks by Mobile Apps


Mobile apps can often crash for many reasons. Nothing is as excruciating as memory leaks. It starts with your app crashing often, or becoming slow or maybe making your entire phone slow down, taking longer time to load activities. Memory leaks are notoriously hard to detect, and thus can easily surprise you. Have we ever thought why most of the users uninstall the application after some use?

Which is why it is critical for Developers to understand the memory consumption by any mobile application. How do you detect memory leaks during Mobile Application Testing? And if so, how can you prevent them from hogging mobile resource consumption?

A little knack for Mobile Application Testing always comes handy.


mobile application testing
Figure 1: Image Credit- GadgetHacks


Want to test your Mobile App?

Join pCloudy Platform!

Memory is critical to device


Memory is one of the key resources of the mobile device.And memory leaks in Android is an important thing to be kept in mind. Java is a garbage collecting language, which removes the need for developers to dig deep to manage allocated memory. This reduces the chances of any segmentation fault crashing an app or any unfreed memory allocation from eating up space of the heap area, thus creating a safer code.


However, a garbage collector is never an insurance against memory leaks. There are other ways by which memory can be leaked within Java. This means that your android mobile application is still pretty prone to wasting unnecessary memory allocation and crashing with out-of-memory (OOM) errors.


Toptal
Figure 1: Image Credit- Toptal


Why are Memory Leaks Bad?


Cause: Memory leaks occur when some variable of the application still has references to some objects that are unnecessary, no longer in use or used to be with the app anymore, is bloating the allocated memory heap and the Garbage Collector is not being able to release that memory.

Effect: Android devices mostly run on phones with limited memory, so as a result of too many leaks, the app runs out of available memory. This triggers more frequent Garbage Collector events which paralyze the device (Stop-the-world GC events) by almost stopping the rendering of UI and processing of events. This leads to an Out of Memory Exception and translates to the user as the app being unresponsive.


Android App Testing


Testing for Memory Leaks


Memory Leaks are caused by the failure to not be able to de-allocate memory that is no longer in use, which is why they cannot be identified during black box testing. The best phase to find the memory leaks is when developers are developing the application, at a code level.

It’s best to check for memory leaks during unit testing. However, testers can follow these tips:


Release Unused Memory: Memory leaks can be present because of the bad design of the application and thus might consume lot of memory when the application is in use


Test on Multiple devices:The memory consumption by the application should be monitored while doing the system & functional testing. One shouldn’t rely on a single device testing as there are plethora of devices in the market.


Detecting Memory Leaks

There are quite a few techniques and tools devised by developers to pin point memory leaks. Android’s very own Android Studio has a powerful tool to monitor not only memory usage but also for network, GPU and CPU usage as well, called the Android Monitor.

Memory Monitor in this helps track memory usage, find de-allocated objects, identify memory leaks and helps get an overall sense of how your app allocates and frees memory. It’s done in three steps:

1. During and use and debugging of app, track the memory monitor. If the memory usage graph rises for your app and doesn’t fall even if put in background, it’s a memory leak.

2. Using the Allocation tracker, you can check the percentage of memory allocated to different types of variables in your app. This gives you a sense of how much memory is consumed by which object.

3. Create a Java Heap Option to create a heap dump that keeps a snapshot of the memory at any given point of time, thus providing the data consumption data.

Despite Android’s monitor to detect memory leaks, there are a few platforms from developers that help extract memory consumption data without so many steps for faster testing cycles.

pCloudy’s very own platform for example, generates the statistics for Memory consumption while doing the normal functional Mobile Application Testing on real mobile devices.It also generates other vital data such as CPU consumption, battery consumption & data consumption for testers and developers who reiterate several test cycles across multiple physical devices.


mobile application testing
Figure 1: Image Credit- Android Developers Studio

Want to test your Mobile App?

Join pCloudy Platform!

Introduction to iOS TestFlight

TestFlight is an online service used to distribute and test beta iOS applications. Developers can use Test Flight to evade the Apple’s bitter binding procedure for testing new versions of their apps. It provides over-the-air installation, testing, tracking and managing of Beta apps. In simple words, TestFlight acts as a link between the developer, the tester, and the Apple Developer Center.

How is it useful?

  • Distribution of the app over-the- air to Testers
  • Tracking and managing testing using TestFlight’s dashboard
  • Receiving feedback from testers to improve the app
  • To obtain reports about the device models, OS version used while testing the App
  • Automatically records any crashes the testers encounter and sends it to the Developer

This tutorial will walk you through integrating TestFlight into your own apps.

What do you need to start?

You have to have your certificates, app ID, and provisioning profiles in place before distributing your apps using Test Flight. Here’s the list of items you need:

  • A Developer ID to login to your developer account.
  • A Certificate for Distribution to export builds and distribute apps
  • An App ID
  • A Device UDID
  • Ad Hoc Provisioning Profile to distribute your app on testers devices
  • Sign your app with a valid ad hoc provisioning profile

These items will help you obtain an .ipa file that can be distributed for testing in iOS devices with UDIDs mentioned in the provisioning profile of the app.

Uploading your app for Beta Testing

Open up your project in Xcode, make sure you have a correct Bundle Identifier and that you’ve chosen the correct Distribution Certificate:

Choose Product\Archive from the top toolbar:

Once Xcode finishes archiving your project, click the shiny blue Submit to App Store… button:

Choose your development team

Hit Submit

Wait for your build to upload. Once done you will receive a “Submission Successful message”

Inviting Testers

Choose the Right Testing Platform

 
As a mobile app maker, how sure are you about the success of your app? A small failure to recognize bugs can cost you thousands of dollars! A small mistake can turn you into a big failure among the users. Now, the question is, how to choose the best platform for testing.

Every mobile application is created differently from the other and the right platform to test can be the most important reason for your app’s success.

Right Testing Platform for Your App


Choosing the right platform among the various competing ones require a set of clear evaluation.

  • The nature of the targeted audience for your app. This will define the device matrix you should be targeting for your App Testing. Does that platform provide right device matrix for your testing needs?
  • Cloud based vs in-house setup – Does you testing process allow Apps to be allowed on outside cloud? Does your App have functionalities which work with in a secured network?
  • Type of Testing required for your App – Whether your current testing is manual or automated? Does your App require non-functional Testing?
  • Reliability and Scalability of the platform- Can it scale with your needs? Can the platform integrate with your existing tools and frameworks?
  • Return on Investment


Criterion

Description

Device Fragmentation

Can the platform handle you need of devices?

Availability

How critical for you instant availability of devices. Is you testing planned?

Automation

How much of testing is done using Automated scripts? Does the platform support the Automation tool that you are using or planning to use.

Type of Testing

What all functional features that you need to test? Does your App require non-functional Testing?

Extensibility ( integration with in-house frameworks)

Can the platform integrate with your in-house frameworks ( Automation, Test Management , Bug Management etc..)

DevOps

Can the platform support DevOps? Can it integrate with your build systems/dev IDEs or continuous integration systems.

Security

Can you upload your app on an external cloud? Does you App require interaction with your internal server?
Usage level and Cost

What is the usage pattern of your test and developing team and what is your budget?


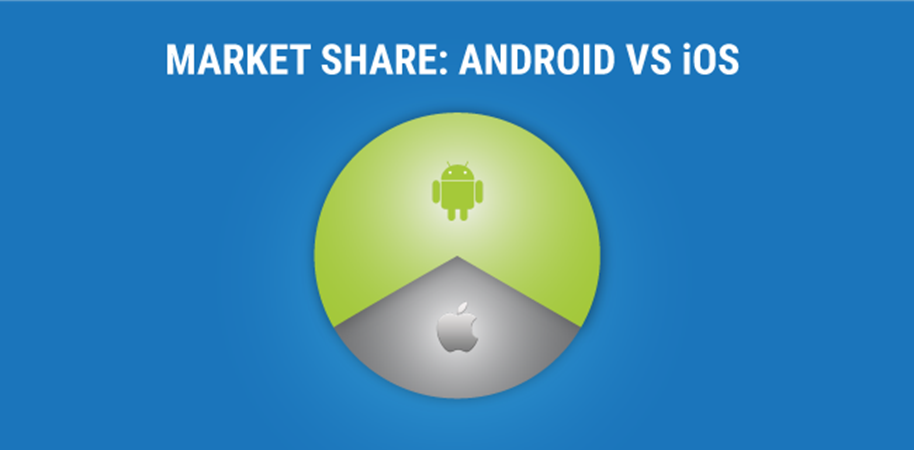
Market Share: Andriod VS iOS


pCloudy provides the necessary tools for convenient, effective and immediate mobile app testing. Our device is based on cloud and it enables continuous development and testing on real devices. Our unique debugging feature recognizes potential errors that will significantly reduce costs and time. Our platform provides single-click access to end numbers of real Android and Ios devices.

To experience the best with your app, we have developed three different types of cloud environments for you.

Public Cloud

With pCloudy’s publicly accessed cloud, you can perform tests directly from your browser. You won’t get confused to choose between manual or automated because both are available in our public cloud environment. We allow our users to test on a comprehensive list of real IOS and Android devices. You can also test your app over various network conditions like 2G, 3G, 4G or Wi-Fi. You can either configure your own browser or choose from our wide range of pre-installed browsers.

Private Cloud

This option is similar to our public cloud environment, except it comes with additional benefits of personalized security and dedicated access. Here, we would provide you a host of devices in our enterprise grade data center and you can choose your own device. If you have a geographically distributed team, then they will have secured devices over a browser. We make sure that your data is safe on our platform, as we allow only authorized team members to access.

On-premise cloud

In this option, we provide you with the necessary hardware and give you the freedom to set up your own secure device lab. You will have complete control of your own on-premise lab.

In addition to have exactly the same features of our public cloud, on-premise model contains supplementary benefits. On-premise cloud gives you the freedom of plug-in with your existing set of devices and provides you access to a geographically distributed team. Manual and automated- both the testing techniques can be used and with a simple plug-in, you can access it from any rack. Also, there is no limit for the number of devices which can be linked!

At the end of the day, the developer has to choose the best platform for his app. But choosing the right one saves so much of hassles.