Avinash Tiwari is a thought leader, a recognized keynote speaker, and the co-founder of pCloudy.com. He has 15+ experience in Product development and Testing. He brings with him a passion for emerging technology and quick adoption, both of which have solidified his reputation as a leader in the mobile app testing field.
We are committed to keep you ahead of others: pCloudy is one of the fastest to release support of iOS 11 beta devices on cloud, as always
Apple has just released the iOS 11 public beta for their upcoming iOS 11 release expected soon. With the iOS 11 beta version released in the market, lots of enthusiastic Apple users are already moving to iOS 11.
Have you started thinking: is your IOS App compatible with this latest release?
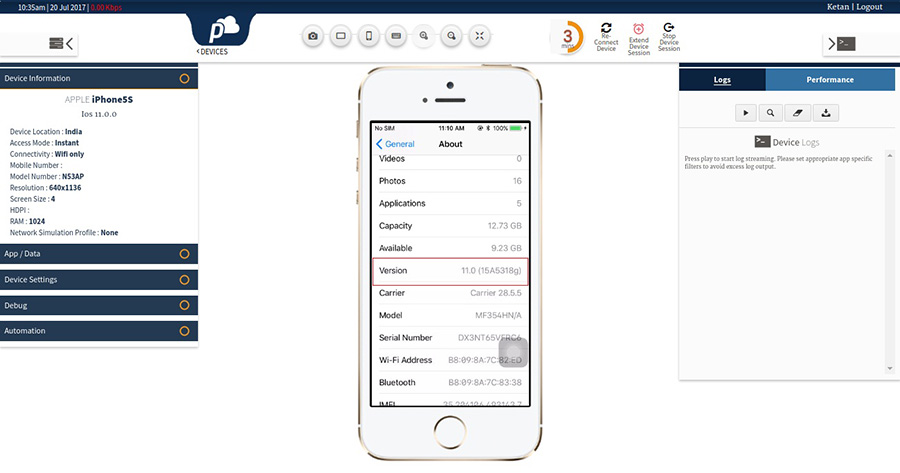
pCloudy is happy to announce that we have released our support for iOS 11 on our cloud.pCloudy customers can use the iOS devices with iOS 11 for testing their applications either manual or automated way.
Manual Testing
You can access the IOS 11 device like any other IOS device and check the compatibility of your App
Automated Testing
If you are using Appium, we are happy to announce support of Appium 1.6 to take care the execution of Appium scripts on IOS 11.
pCloudy recommends all the customers to start testing their iOS apps on iOS11 to identify glitches.
TestNG is a testing framework inspired from JUnit and NUnit but introducing new functionalities that make it more powerful and easier to use.
It is an open source automated testing framework; where NG of TestNG means Next Generation. TestNG is similar to JUnit, especially when testing integrated classes.
TestNG eliminates most of the limitations of the older framework and gives the developer the ability to write more flexible and powerful tests with help of easy annotations, grouping, sequencing & parameterizing.
Benefits of TestNG
There are number of benefits but from Selenium perspective, major advantages of TestNG are:
It gives the ability to produce HTML Reports of execution
Annotations made testers life easy
Test cases can be Grouped & Prioritized more easily
Parallel testing is possible
Generates Logs
Data Parameterization is possible
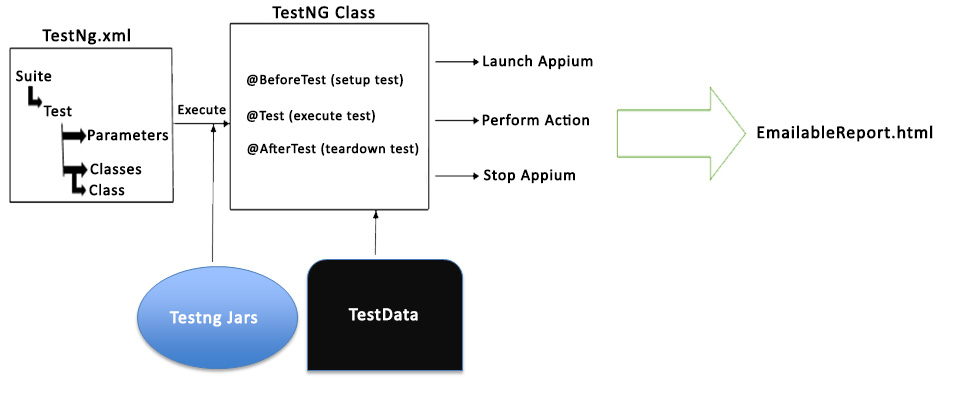
Architecture of the testNG framework
pCloudy
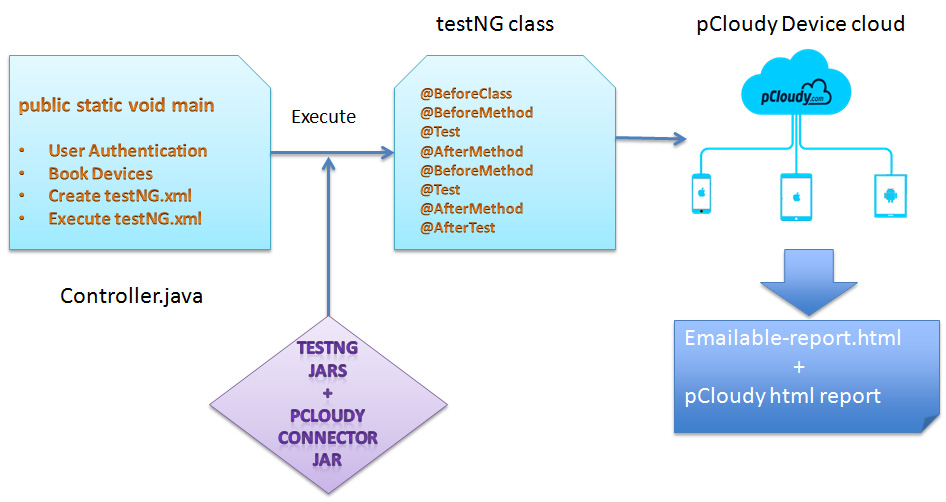
pCloudy platform provides single click access to real Android and IOS devices directly from your browser. Use these real Mobile Devices to click-and-perform Manual Testing and execution of Automation Testing for your App. Integrate our platform with CI for continuous Automation Testing and test your App on multiple real Mobile Devices with every change of your App.
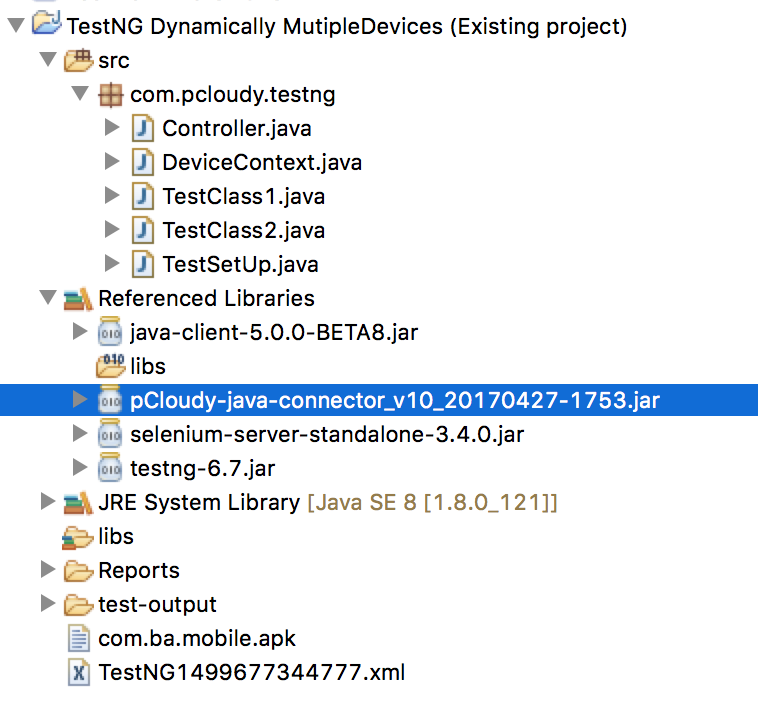
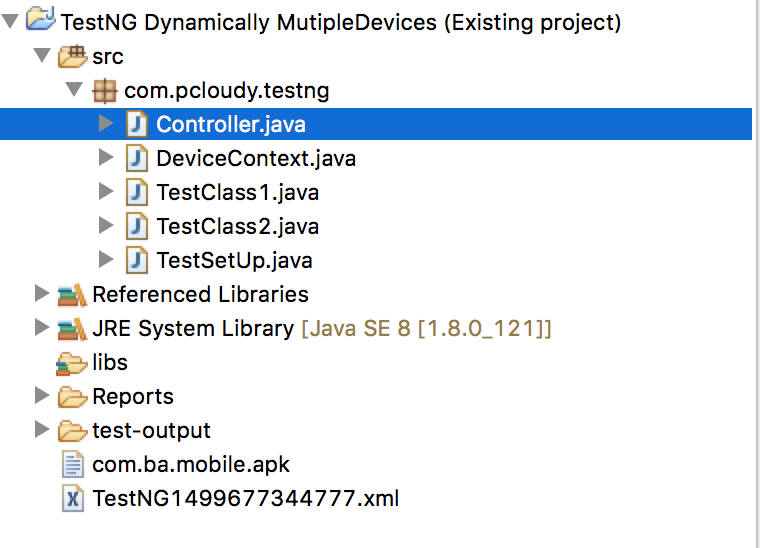
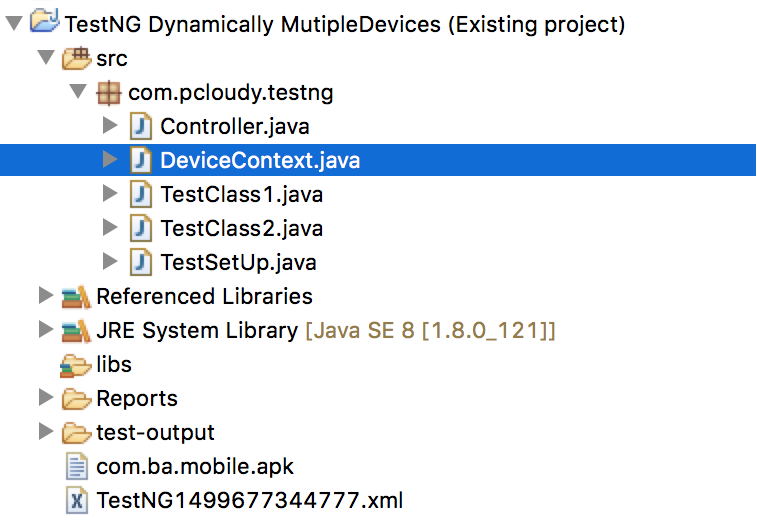
Now it’s very much simple to integrate your existing TestNG project with pCloudy.
The development world bumped into a new surprise by announcement of developer release of latest Android version: Android O. The makers have made everyone curious about its christening, wondering which sweet it has been named after (Oreo, rumour has it). On the developers front however, it seems to be a good time to assess this developer preview and its included features that might have implications on the apps on your phone and their quality, as well the future it holds for us.
So let us lay out the key details and focus on the challenges or opportunities that developers will run into due to the changes in the OS features and application development environment.
With major share of the market with Android M and L, i.e. 60 percent, fragmentation is still in growth within the Android landscape. During most Android OS changes, a few basic fixes make the app compatible with the newer version. However, its API changes and several features make changes to the appearance and functioning of the existing apps. It can result in unstable applications and confusion among the users. This means that there are not only more devices and OS combinations in the market to test against, but also that from both supported test cases and features, there should be different branches that combine the test suites with a device/OS combination and a supported capability.
Sneak Peek into the New Features of latest android version – Android O and the Challenges to Testing:
The first release of Android O is just for devs to get a sneak peek into their bag of tricks behind the show and the help needed for that transition. E.g. adding extra layers of security options to prevent malware entry into your phone. Of course there will be more UX and UI based improvements in the beta releases. Let’s take a brief look at their features and the challenges they present to Testing.
Revamped Settings and Changes in UI: This feature is one of the most outward change in the preview. That means new icon, condensed and summarized organization, which makes the navigating app superior and pleasant. There are several other similar organizational and in a many places functional changes in UI including lock-screen shortcuts, icon badges, picture in picture feature etc.
However, this immediately opens a range of visual test automation scenarios that will need insights into different resolutions and themes to assure the new animated look, movement or adaptation as required.
More Control over Notification Channels: Changes again in the Notification shade for UI improvement, with more icons in the status bar, a cooler shade and a bit more subtle yet stronger control over its notification channels by Notification Grouping. I.e. option to choose for notification from people in your contacts and more manageable system and processes alerts.
This means, more testing to be added to support the granular notifications, the configuration traits of the device and network environment related testing.
Enhanced Auto-fill: So far, other than Chrome, no other system has made the process so seamless, making jumps between password managers or switching to special keyboards. Android O’s brand new auto-fill API lets you support specific needs like password management, without having to launch the app in parallel, making the process a lot damn faster.
This also means that each app will have external requirements like password management and testers would need to understand which apps can serve as auto-fill for their app under test, and then test against them.
Better Control over Battery Power and App Background Resources: Android O is changing the way how the OS functions in the background by enforcing more limits on app resource usage in order to save battery and how frequently background apps can retrieve your current location, and implicit broadcasts.
That means, more new tests and branches of these tests need to be added in order to assure correctly that the limitations apply based on the location constraints set by the developers and other limits that are supported.
We just touched on a few immediate implications of the new latest Android version – Android O release for developer and testers, who need to be ready to usher in a not just a new set of challenges and branches of testing, but also prepare themselves for early versions that are to be launched soon. To know more on the specifics of migration to Android O, you can go to the official Android Documentation at their website.
UI testing for iOS app is a way to validate & interact with the real UI of the app. This testing process will check if UI elements are designed and implemented the way it should be by interacting the UI elements by tapping, swiping, scrolling and verifying the behavior. For iOS version 9.3.5 and above, Apple has introduced XCUITest by deprecating instruments with UI Automator making it mandatory to use XCUITest for iOS automation.
Xcode has XCUITest framework integrated allows to easily develop UI tests for user’s interaction with the application. Implementation of UI tests for iOS apps with XCUITest is same as unit tests in XCTest.
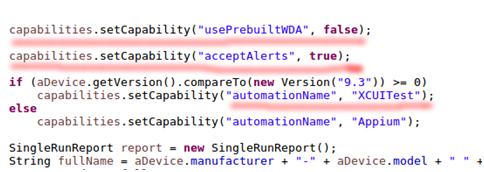
pCloudy supports both XCUITest for iOS version 9.3.5 & above and instruments for lower version. DesiredCapabilities like automationName, usePrebuiltWDA, acceptAlerts are required to run the automation scripts in pCloudy platform.
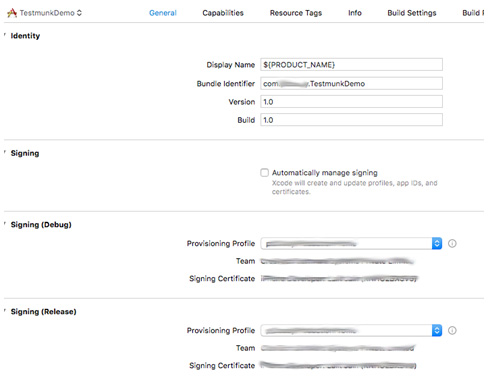
1) Creating IPA file using xcode for testing
a. In General tab, Select Provisioning profile in Signing(Debug) and Signing(Release)
b. Select Provisioning Profile
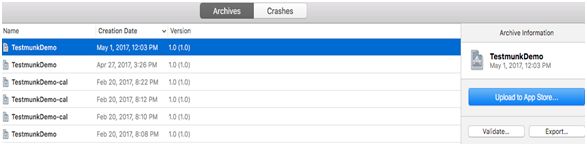
c. Archive the build
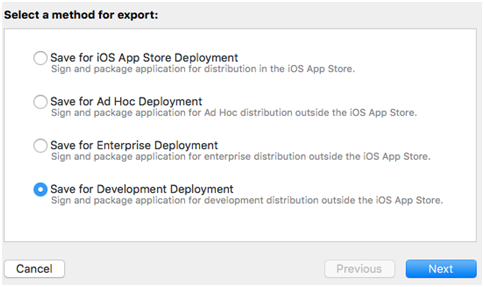
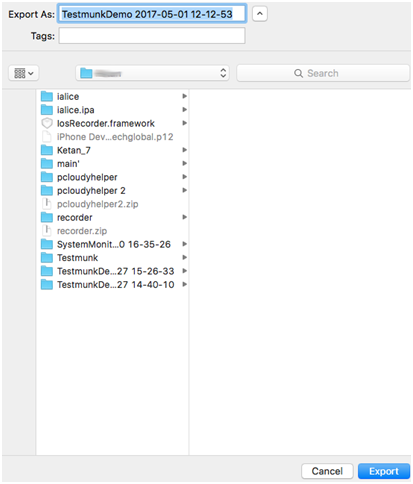
d. Export the build
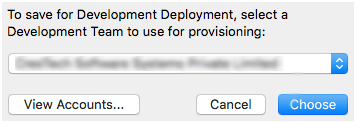
e. Choose Development Team ID
f. Choose to export for all compatible devices
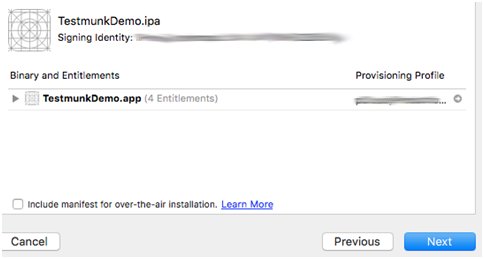
g. Select the appropriate location to save
Now you have properly signed to run automation in pCloudy platform.
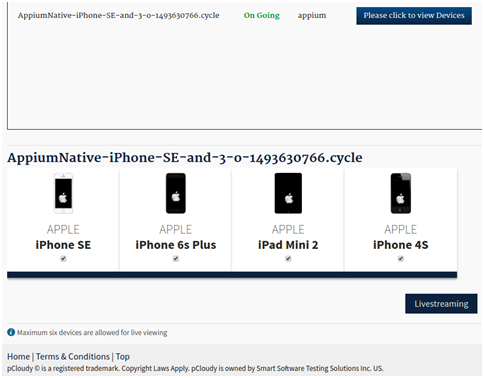
2) Running Automation Script @ pCloudy
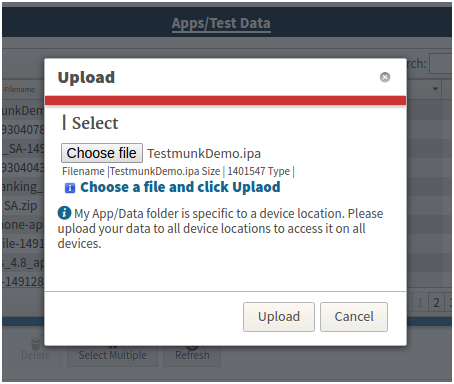
a. Login and upload ipa file
b. Upload the App to cloud drive post login
c. Create XCUITest project in Eclipse or Android Studio.
The following capabilities need to be set after creating AppiumDriver object to run XCUITest above v9.3
The pCloudy Mobile App Hackathon is a programming-focused Coding contest designed to inspire a creative and dynamic generation of tech professionals to put their skills to the test. For three weeks, top developers will compete for the chance to win prizes and job interview opportunities in a skill-based challenge. Think you got what it takes?
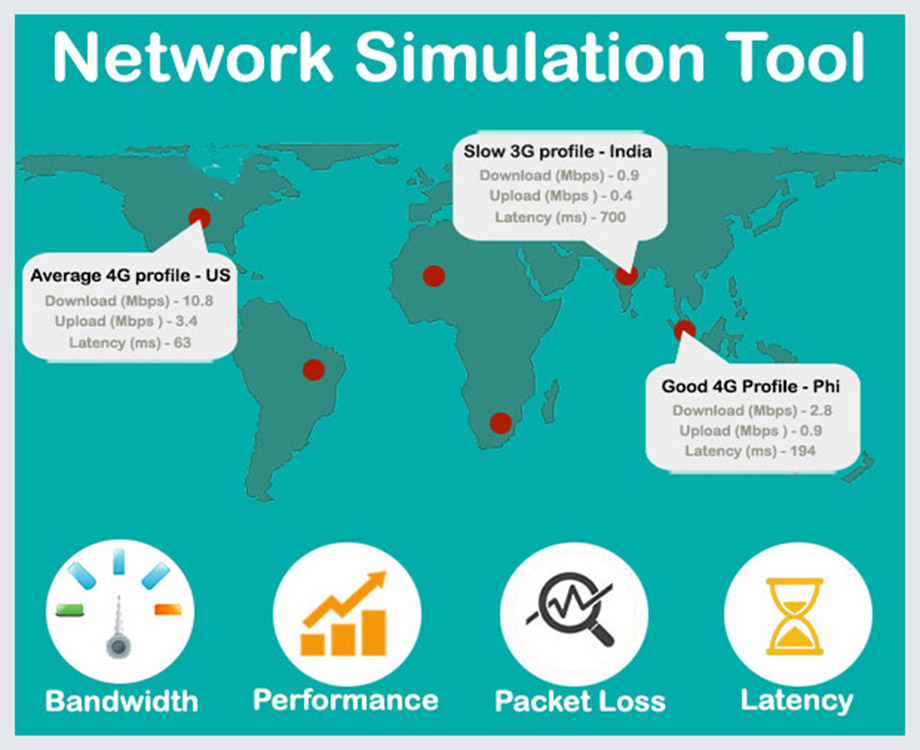
Test Your Apps function differently in different Network Environments
There might be a whole set of bugs you probably are marking as “Cannot Reproduce” simply because you are thinking “Hmmm… Funny, it seems to works here”.
The App you tested in your lab environment will not work the same way when you use it in an elevator, or in a basement, or while you are travelling on a highway. These are probably a whole set of testing scenarios you probably haven’t thought of.
You Can do now
Mimic different real network environments that impact app functionality and performance
Create different Network Profiles and test you apps on multiple Network Environments
Identify and rectify functional and performance issues
Modify various parameters like bandwidth, packet loss and latency during testing