In the last blog in this series, we learned how to set up Appium for test automation on a Windows machine. Now we will handle the application by writing the Java code. We will require the following software:
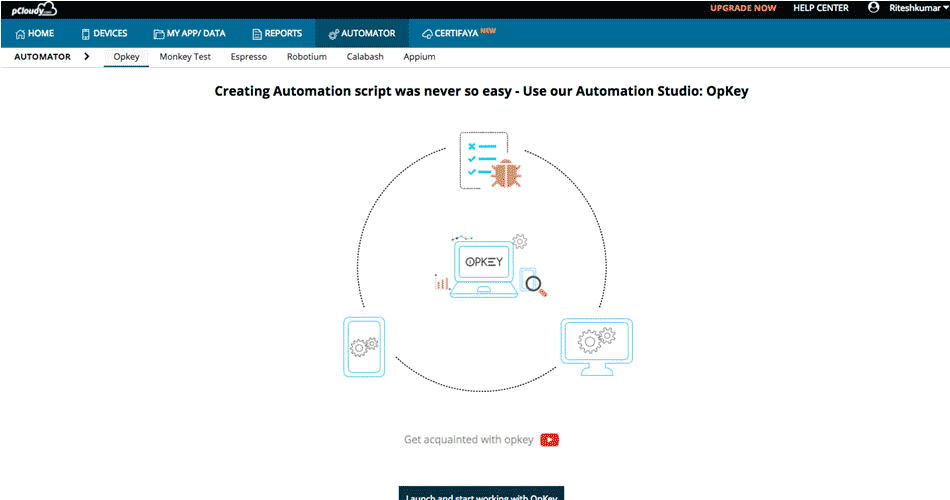
This process consists of five steps as depicted in the picture below.

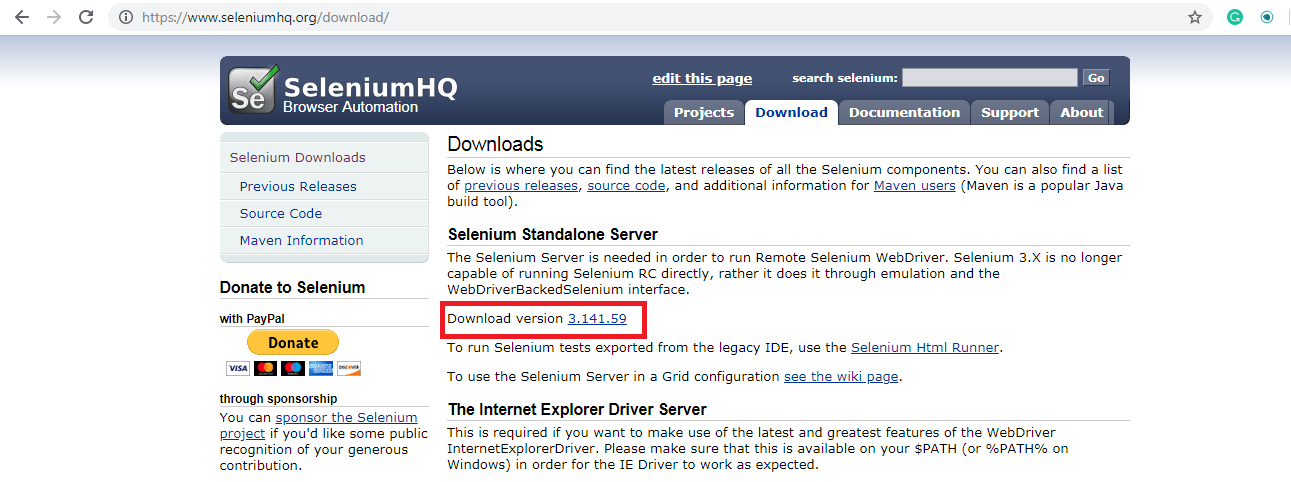
First, we need to collect the Selenium Standalone JAR and Appium Java Client Libraries. To download the Selenium standalone JAR file, go to seleniumhq.org/download then click on the Download version.
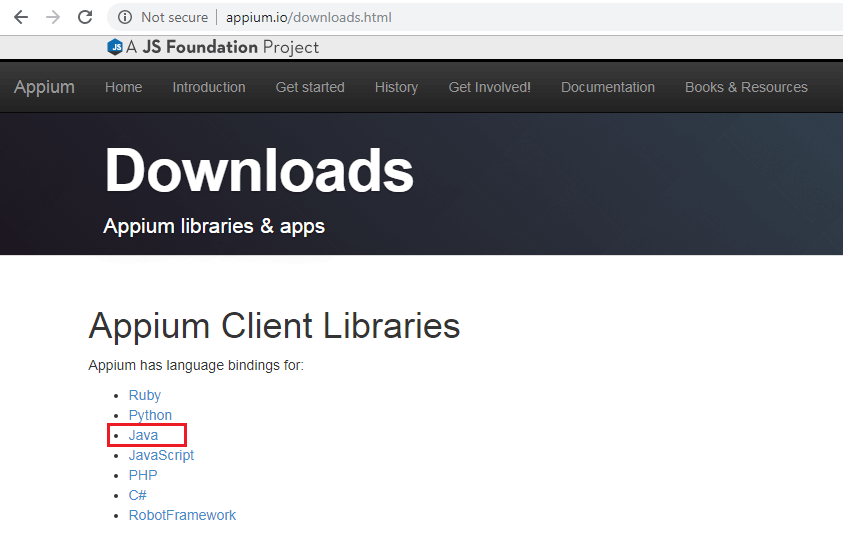
For Appium Java client you need to go to appium.io/downloads and download the libraries for the selected language.
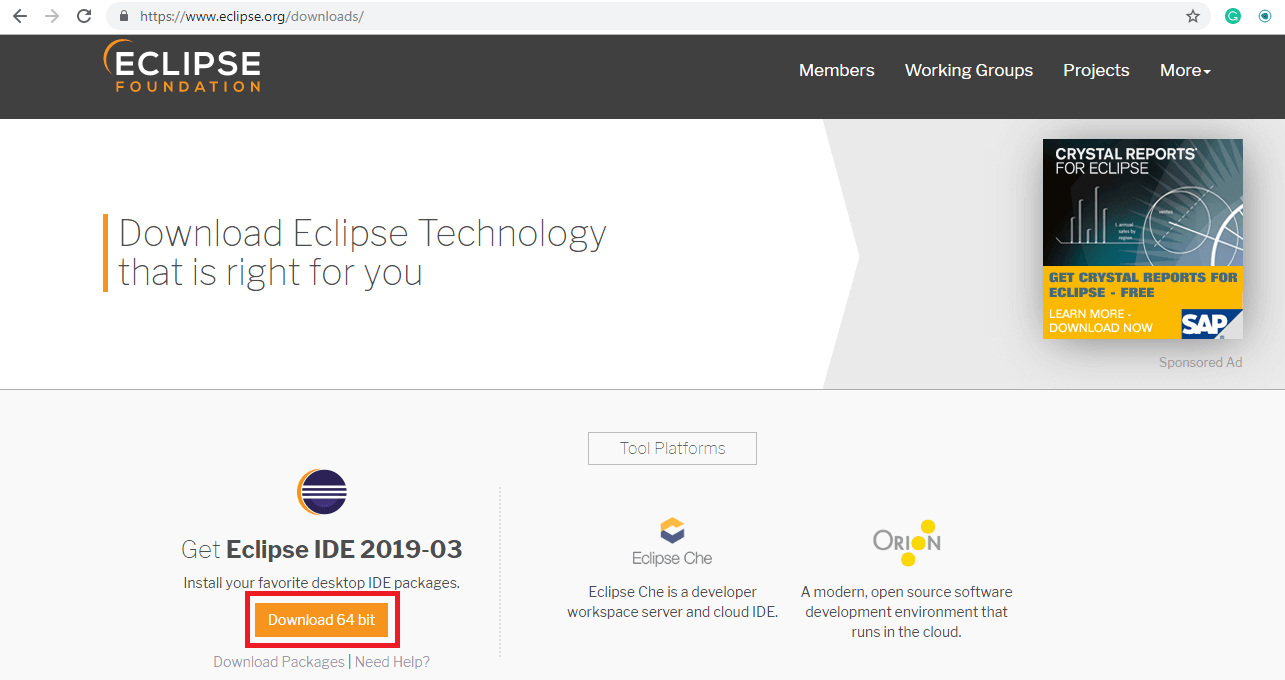
Now to create a java project download Eclipse from eclipse.org/downloads. Launch Eclipse and select the workspace location.
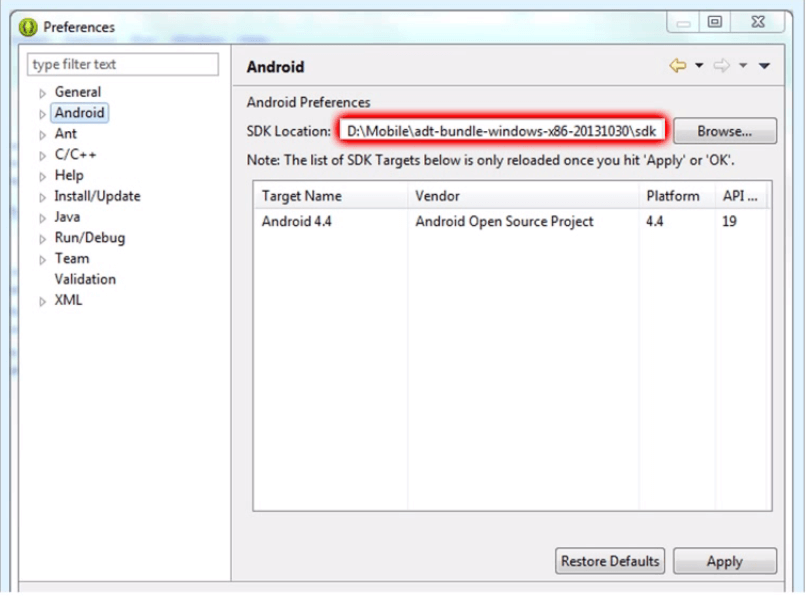
To set the Android SDK path into Eclipse, click on the Windows tab in the menu bar and select Preferences in the drop-down list.
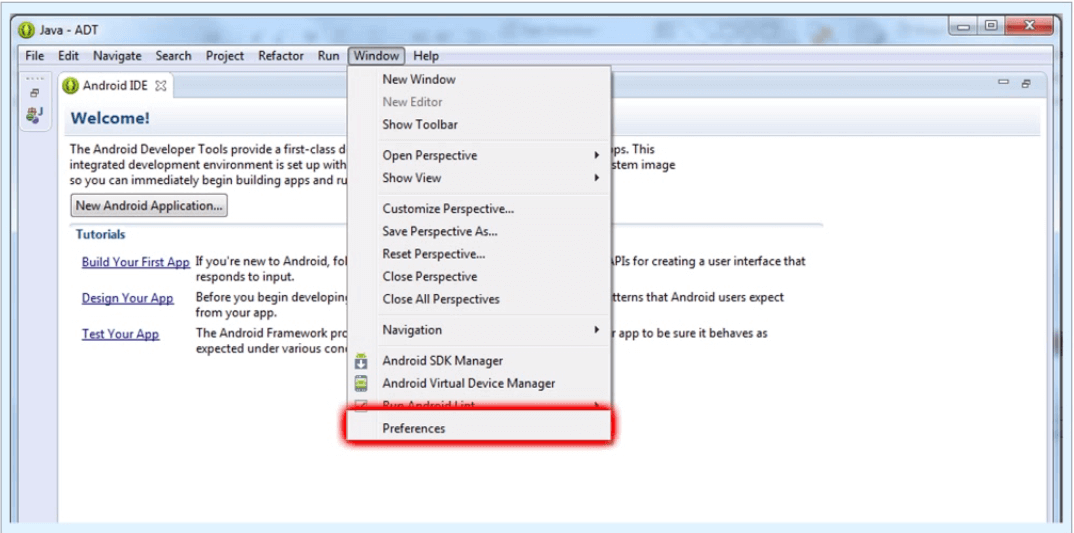
Then select the Android option and browse your Android SDK location and click on Apply.
Launch Eclipse and right-click on Package Explorer. Then select a new Java Project.
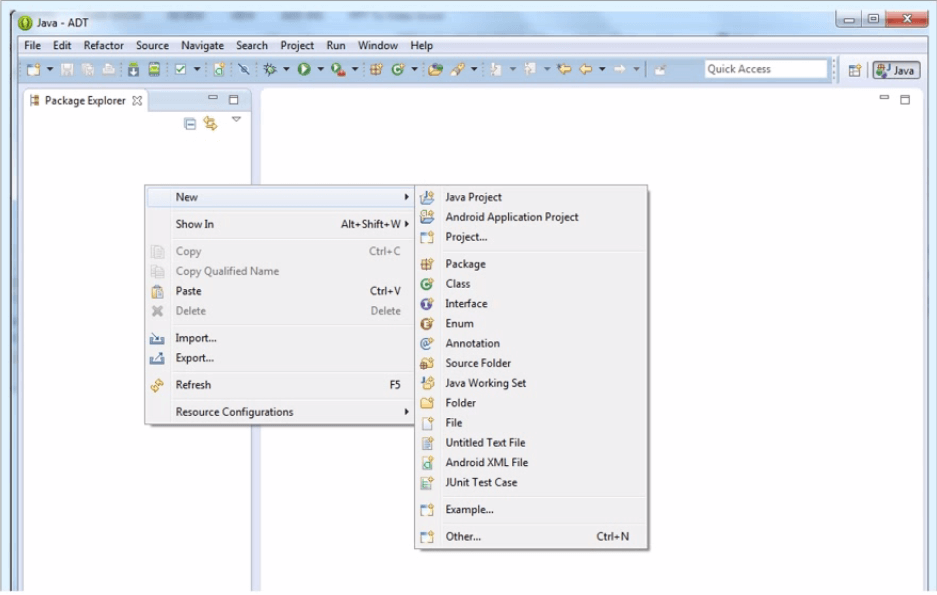
Enter a project name and click finish.
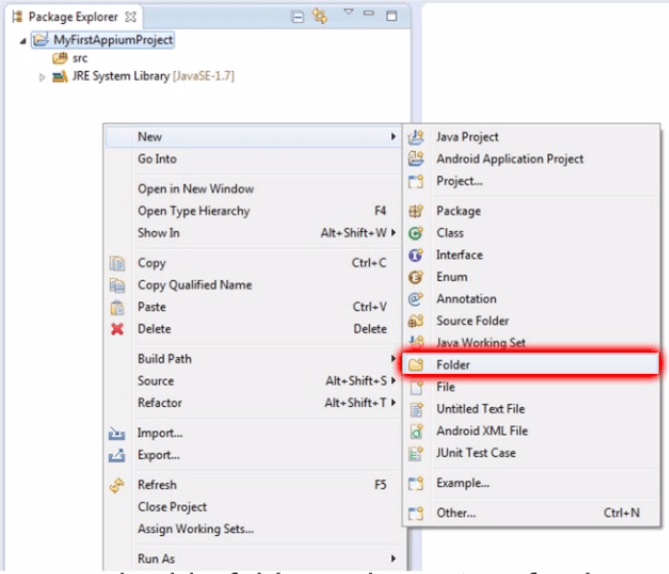
Once the project is created, add a folder to the project, for the project dependency files [Selenium Standalone] and [Appium Client Library] which you have downloaded.
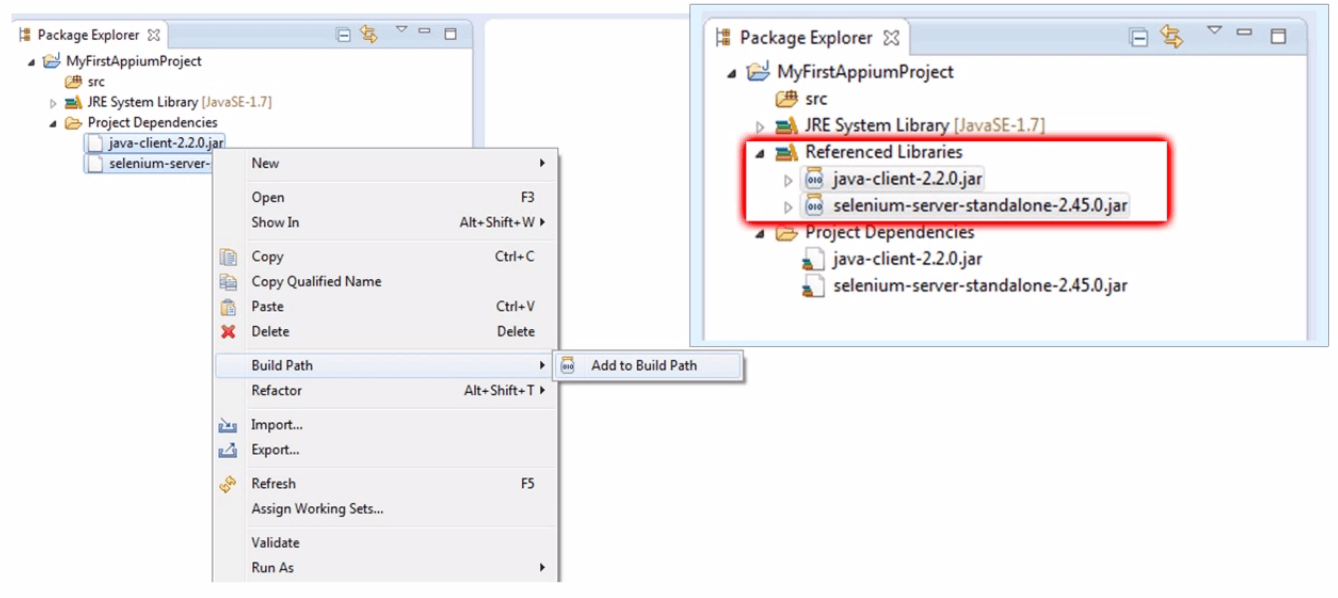
Copy the downloaded file into the newly created project dependencies folder. Select both files and right-click. Then select the add to Build path option and then Add to Build Path. Thus both classes have been added to your project reference libraries.
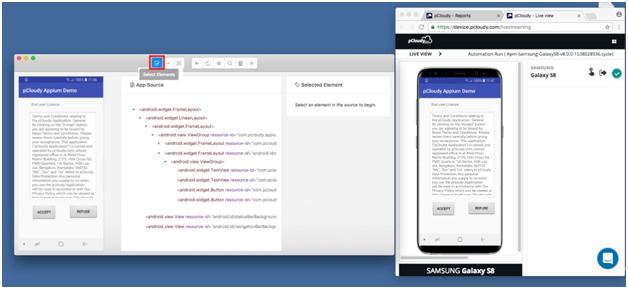
Create a class and import the required packages. Now right click on the src folder, hover the mouse over the new option and select the Class option.
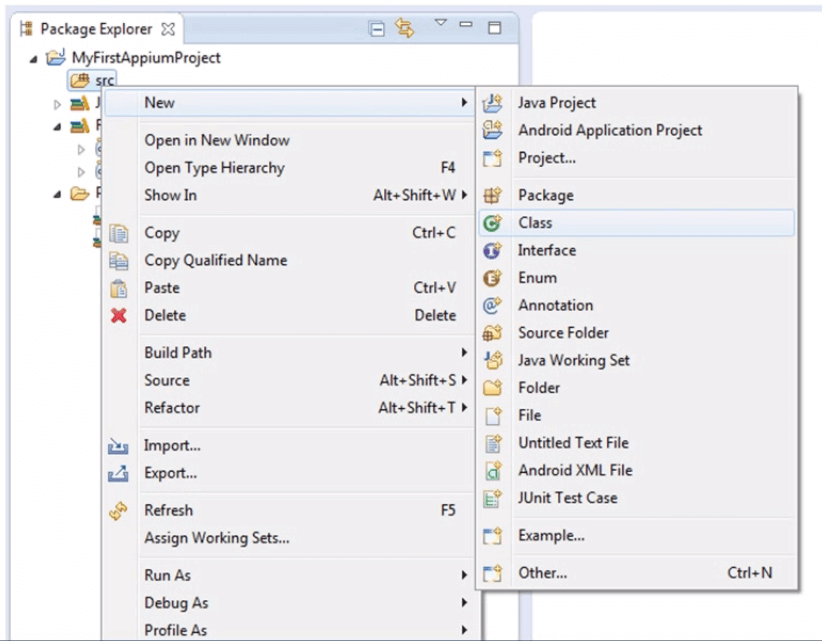
Provide a package name, the name of class then select the main method checkbox.
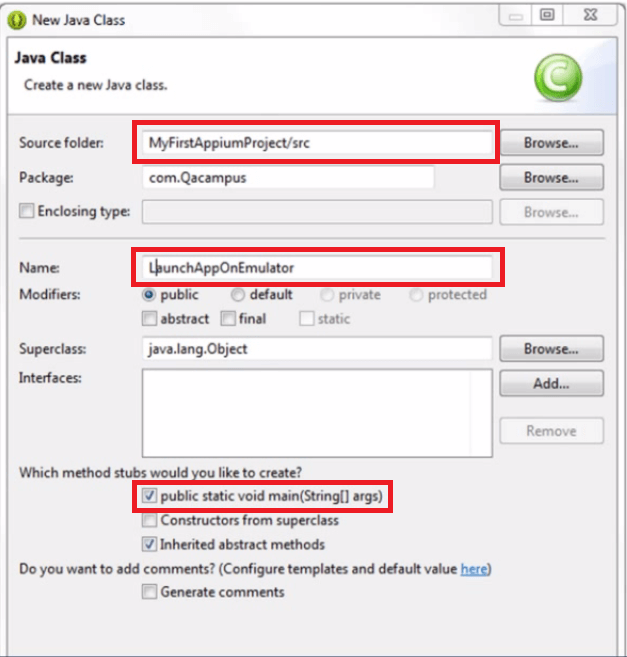
A .java file within the package is created in Package Explorer panel. An auto-generated the main method is generated on the right panel.

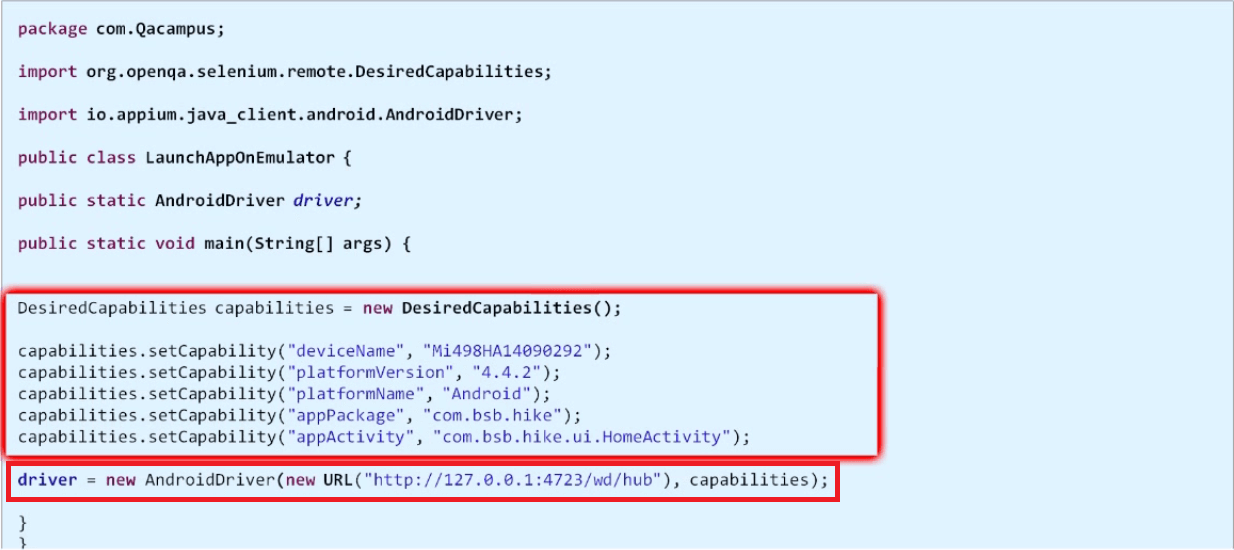
You need to define a public class variable of AndroidDriver as your first line of code. You will now see an error for an android driver. Now hover your mouse over the error, you will get a list of quick fixes. Select Import ‘AndroidDriver’. Once you select the import package option, the android driver package will be imported and the error will be removed.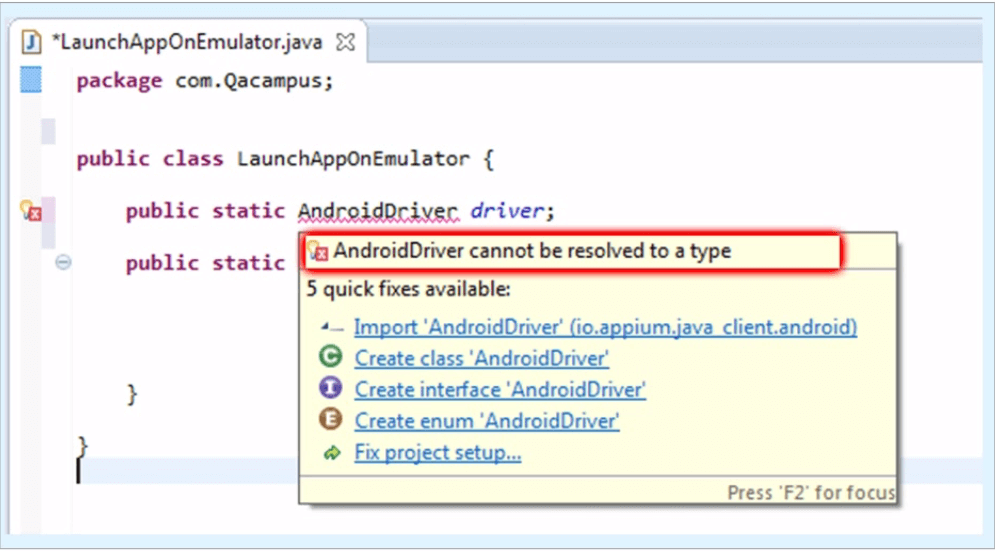
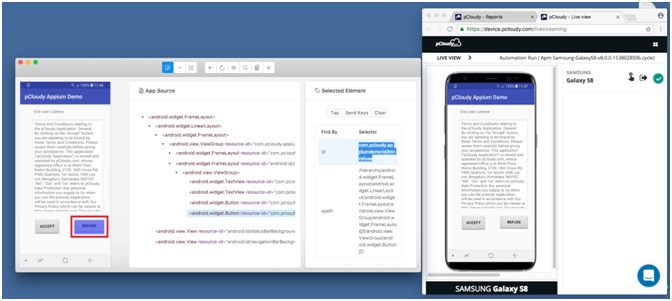
Create an object of DesiredCapabilities. Again you will get an error for DesiredCapabilities. Hover the mouse over DesiredCapabilities and then select Import ‘DesiredCapabilities’ from the quick fix list.
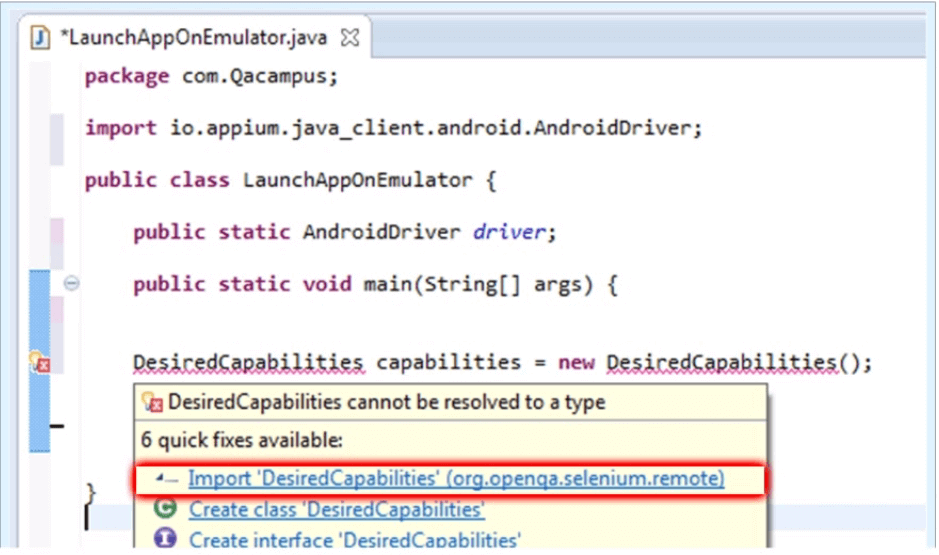
Once you select the import package option, the DesiredCapabilities package will be imported and the error will be removed.
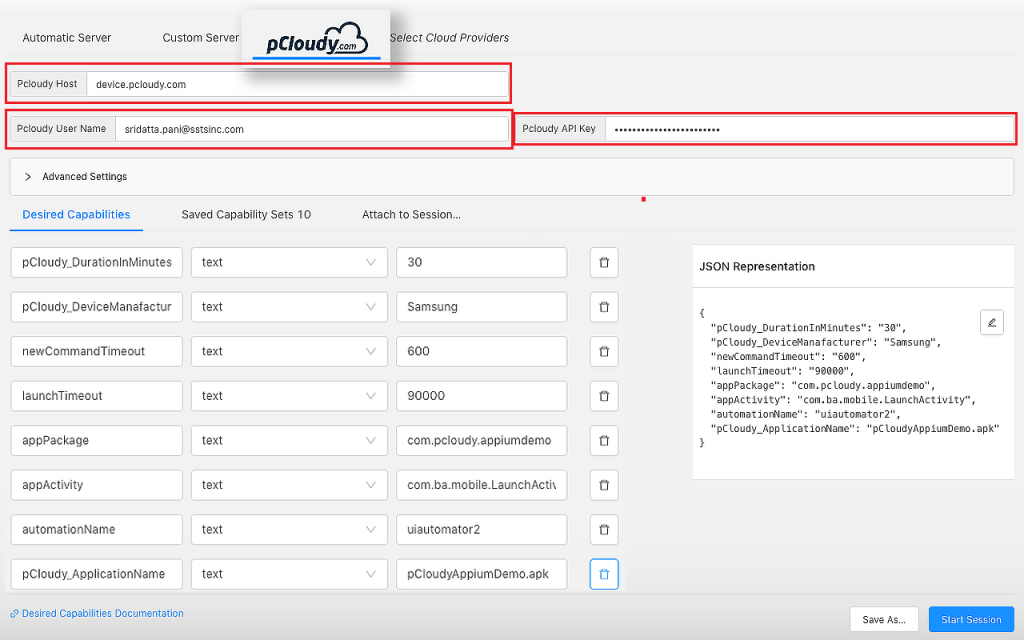
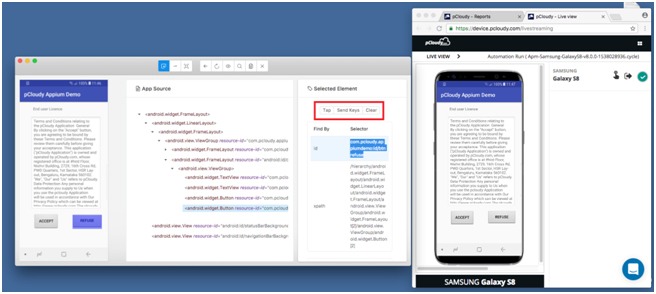
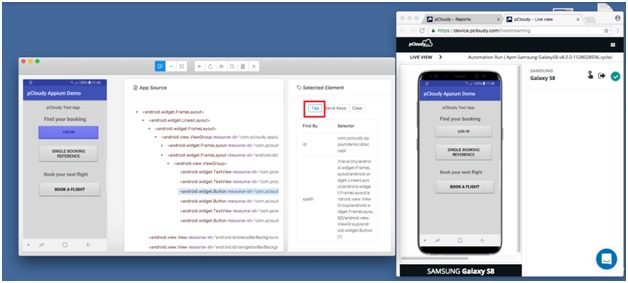
Now set the DesiredCapabilities and also provide the package of an application and the name of application launcher activity.
Now you need to instantiate the Android driver.
To do this we need to have two parameters, the first is the Appium server address with the port number which it is running and the Capabilities.
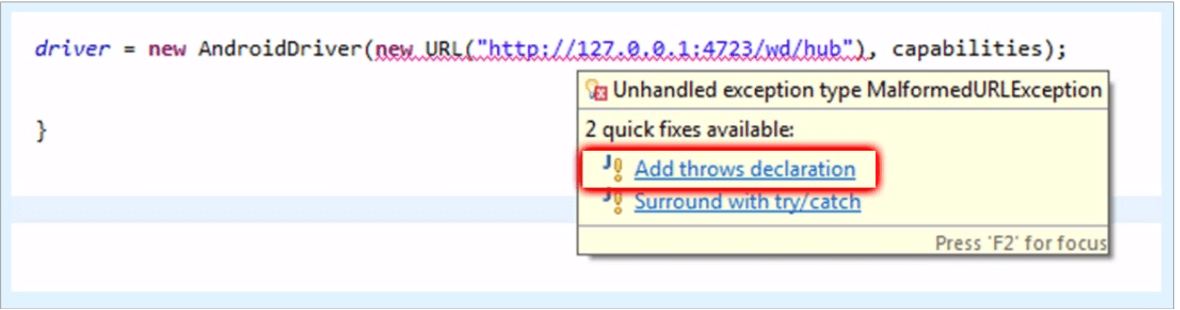
Hover mouse on URL and import URL from Java.net. You will get an error for complete new URL section, hover mouse on the error and select Add throws declaration. By doing so exception has been added into your main method.
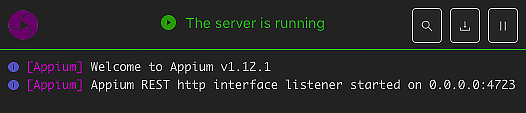
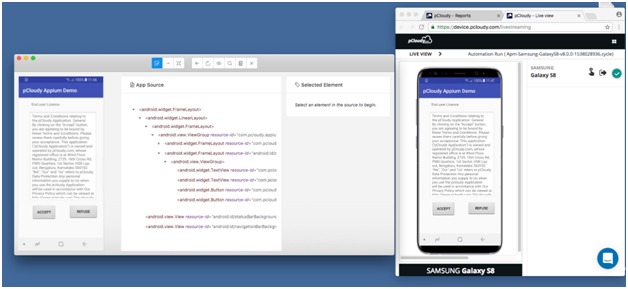
Now start the Appium server and connect a device to the system. Now return to Eclipse and execute the code. This will launch the app in the device.
In the code, we have declared the class as public so that we can access it anywhere inside out test.
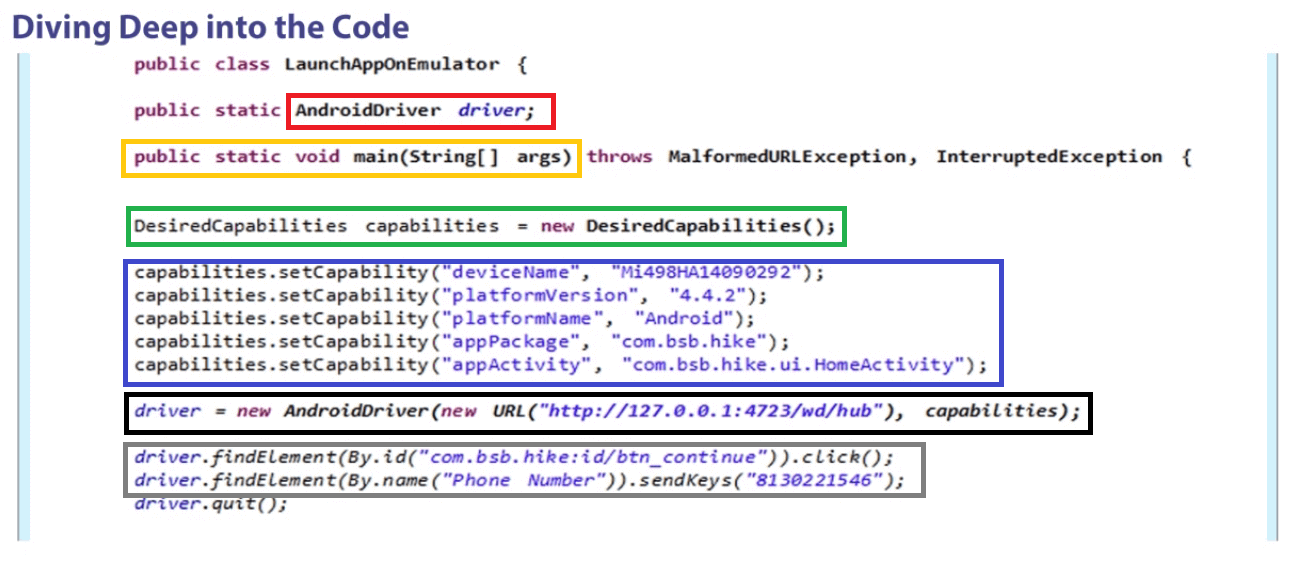
The java main method is highlighted in yellow. We created an object of desired capabilities class which you can see in the green box. In method setCapability, there are two parameters. First is the capability name and second is the capability value as highlighted in blue. Then we created an object of AndroidDriver class highlighted in the black box. The code highlighted in gray is the findElement(By) method which can locate an element on the screen.
Now that you have learned how to write a mobile test automation script using Appium test automation framework, we can move on to the next blog where we will learn how to start the Appium server and launch the app from code.
Related Articles: